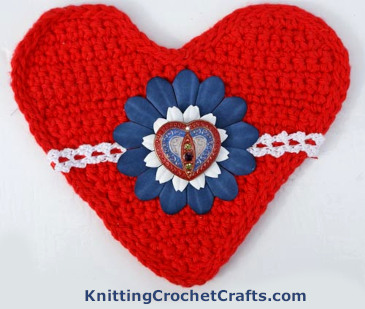
Decorate a Heart in Red, White and Blue: This Version Features a Czech Glass Button as the Focal Point

Decorate a Heart in Red, White and Blue: This version of the heart incorporates crocheted lace trim with ribbon; faux flowers; and a sparkly dragonfly-shaped gem
There are zillions of different things you can do with crocheted heart shapes. A lot of times, people think of these as being Valentine’s Day craft projects; but the truth is, you can find suitable ways to use them for many other holidays — and for everyday, too.
Lets try decorating a crocheted heart shape with red, white and blue accents for Fourth of July.
Choose a Heart Shape to Crochet
Your first step is to choose a heart shape and crochet it in the yarn, thread or other material of your choice.
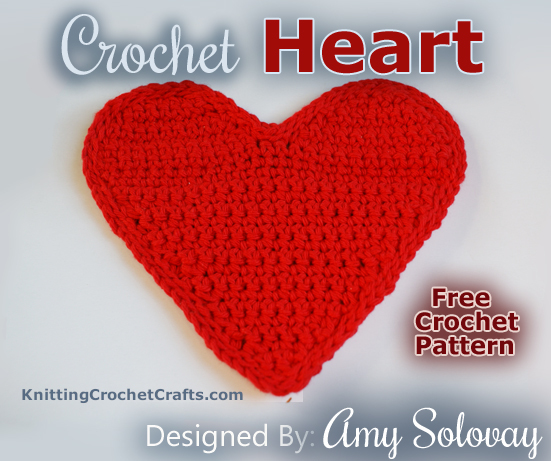
You can crochet a heart shape using this free crochet pattern; then decorate it in red, white and blue for Fourth of July (or in any colors, for any occasion).
I’m starting with this heart shape crocheted in red yarn; but there’s nothing particularly special about this design. If you want more options, there are many different heart designs you could crochet.
Choose Your Decorations
After you’ve made your heart shape, it’s time to grab some things to use for decorating it. How you decorate your heart depends, to some degree, on what you want to do with it. You could turn it into a wall hanging. Alternately, you could crochet two hearts and put them together to make a pouch. One of my readers crocheted two hearts and a strap, and she used those to make a purse. Those are just a few ideas.
I’ll probably use these hearts as wall hangings, so I still have some work to do to figure out how I want to hang them.
I like to use lace, trims and edgings on my hearts; so when I am decorating hearts, I usually start off by stitching a bit of lace or trim to the heart and then building up layers of decorations from there. One of my favorite trims for this purpose is this easy scalloped trim with ribbon. If that one isn’t what you want to use, you can check out this page of (mostly free) patterns for edgings, borders and trims to find bunches more suitable options — or take a look at our recommendations on the best crochet edging pattern books for even more ideas.
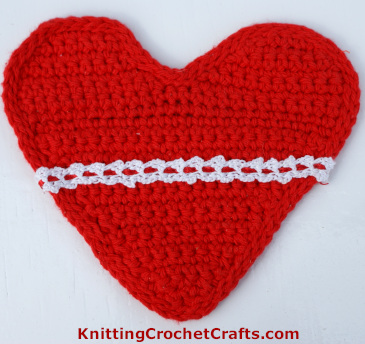
Decorate a Crocheted Heart Shape: Start by Embellishing With Lacy Trim
Next, you want to grab whatever other pretty baubles you have hanging around that could be used for heart decorations: crocheted flowers, silk flowers, buttons, beads and ribbons are all fair game. If you want to use crocheted flowers, check out these crochet flower patterns for some options for flowers you can make. If you want to use faux flowers, I recommend scrapbook.com as being a great source for pretty ones. Czech glass buttons are particularly pretty for this sort of project; Etsy is one of the best sources I know of for Czech glass buttons.
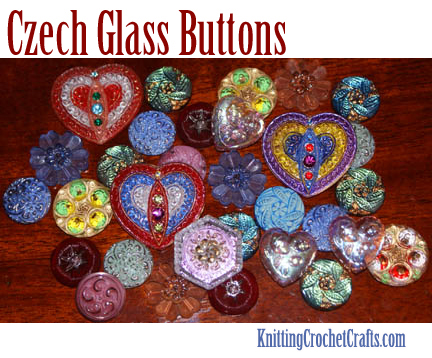
Choose some Czech glass buttons for decorating your heart shapes.
The last step is to do your finishing. How you approach that will depend on what your plans are for the project; but, in general, you’ll need to sew, glue or otherwise attach your embellishments to your heart. I like using a tapestry needle and thread to do this part, but you could also use a hot glue gun.
So there you have it: Those are some ideas for decorating a crocheted heart in red, white and blue for Fourth of July.
Happy Independence Day!