A Fun, Creative DIY Valentine’s Day Gift Idea

Hearts are popular design motifs with the “crafty” crowd. They are interesting shapes to make by hand. Not only that, they help us to express strong emotions like love and affection for others.
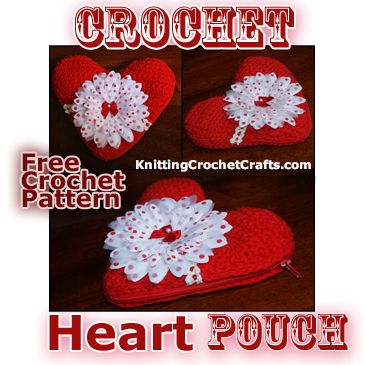
Want to share a sweet token of affection with a loved one this Valentine’s Day? There are many ways you could go about it. One possibility: Make him or her a heart-shaped pouch like this one, and fill it with things that would bring joy – perhaps wrapped candies for a friend, or quarters to use as parking meter / laundry money for a son or daughter who’s away at college.
Of course, you can find many uses for these little pouches if you want to make and keep some for yourself. I held onto one of mine, and am using it for storing love notes and other little tokens of affection that my husband has given me over the years.
Crochet Skill Level: Intermediate
Sewing Skill Level: Average / Intermediate
Supplies You’ll Need to Crochet a Valentine Heart Pouch Like the Sample Pictured:
- Yarn: There are many possible yarns you could use to crochet this Valentine heart pouch. To work my sample pouch, I chose a worsted weight kitchen cotton yarn in a red color that is unfortunately no longer available. However, this pattern is appropriate for use with many other different fibers. Feel free to use the worsted weight yarn of your choice.
- Crochet Thread and Ribbon for Trim (Optional): If you decide to crochet your own trim, as I did, you’ll need a small amount of size 10 crochet thread. I also used a small amount of narrow ribbon to make my trim. Alternately, you could use a store-bought trim or ribbon instead of hand-crocheted trim.
- Embellishments: You can embellish your heart using faux flowers, crocheted flowers, buttons, beads, appliques, or anything else your heart desires. If you want to make your pouch washable (mine isn’t!) be sure to choose washable embellishments. Aside from my scalloped trim, my embellishments are faux flowers by Petaloo and a bow with pearl accent by Offray.
- Sewing Thread: You’ll need some sort of thread for stitching your zipper to your pouch. I used size 10 crochet thread for this, although you’ll probably want to use actual sewing thread instead.
- Zipper: You’ll need a six inch zipper in a color that closely matches your chosen yarn.
- Crochet Hooks: If you’re crocheting your own the trim, you will need two different crochet hooks — one for crocheting the pouch, and one for crocheting the trim. For my trim, I used a small steel crochet hook; for the heart pieces, I used a size H / 5.0 mm aluminum crochet hook.
- Tapestry Needle: You’ll use this for or weaving in your loose ends when you’re finished crocheting your heart shapes. You can also use it for stitching your heart shapes to each other to make the pouch.
- Fabric for Lining (optional): My pouch is not lined, but you can add a lining if you want to. If you do, you’ll need some fabric for the lining. Note that my instructions below omit any lining; my crochet work is tight enough that my pouch could even serve as a change purse and I wouldn’t be worried about losing any coins.
Finished Size:
At it’s widest point, my finished pouch measures approximately 7.5 inches; it measures about 6.5 inches high.
Charts for Crocheting the Heart Shape
Additional Pages to View:
- You’ll need to make 2 heart shapes using this Crochet Heart Shape Pattern.
- You’ll also need to crochet a strip of this Scalloped Trim With Ribbon.
Heart Pouch Instructions:
Crochet two identical heart shapes using the free heart pattern and charts linked above.
Crochet the Scalloped Trim (Optional): Measure your heart shape in the spot where you want to attach your trim; then crochet a piece of scalloped trim measuring about an inch longer than that measurement. Mine’s about six inches, but yours might need to be a different length.
Stitch the trim onto the heart, folding the extra width so that it wraps around to the back of the heart. Stitch the ends in place to secure them.
Stitch (or attach) the other embellishments onto the front of the heart.
Pin the zipper to the side of one of the heart pieces, then stitch it in place. Open the zipper. Pin the other side of the zipper to the corresponding spot on the other heart piece; open the zipper if necessary, and stitch it in place. Zip the zipper. Sew around the outside of the heart to create the pouch. I used whip stitch to do this, but if you have a preferred stitch for this sort of thing, feel free to use it.
I recommend adding a bit of extra stitching / reinforcement at each end of the zipper, where the pouch may encounter extra stress when in use.
The pouch is now ready for use; you can put goodies in it if desired. I hope you, or the recipient, will enjoy it!
Related Resources:
More Crochet:
- How to Crochet
- Find the Best Yarn for Crochet and Knitting
- Learn Different Crochet Stitches
- Discover Interesting Crochet Techniques.
Try Other Crafts: Knitting, Embroidery Sewing, Quilting, Card Making, Paper Crafts and More
- Knitting
- Jewelry Making
- Beadwork
- Quilting
- Sewing
- Check out our main directory of craft techniques and ideas
- Click here to get updated on the latest craft supplies.
Posted By: Amy Solovay
Page last updated on 8-11-2021. Thanks for visiting!