Learn the Easiest Ways to Mend Kids’ Clothes
It’s Easy to Fix Torn Seams, Rips, Worn Elbows, Holes in Knees, Pants That Are Too Long, Skirts That Are Too Long, and More. And, You Don’t Need a Sewing Machine to Do It!
Have you noticed how expensive kids’ clothes are getting? The prices on them are climbing steadily.
If you have kids, it’s ideal to learn how to mend kids’ clothes.
There are going to be times when your kiddos tear their clothing, and it’s preferable to mend the tears rather than having to buy a replacement garment that will soon be outgrown — both from an environmental standpoint and a financial one.
In fact, you might already be buying your kids’ clothing secondhand, or accepting hand-me-downs from friends and family members, to either be more sustainable or more frugal, or both. Clothes that have been passed down from one kid to the next are especially likely to be in need of mending at some point; with time and wear, they tend to lose buttons and accumulate rips and stains.
The Easiest Way to Mend Kids’ Clothes Without Sewing: Use an Iron-On Patch
If you’re looking for an easy fix, and you’re hoping to NOT have to get out a sewing machine (or buy a sewing machine), or even learn to hand stitch, iron-on patches might be exactly what you need. (If you end up needing to hand sew, we got your back; in that case, check out our guide to hand sewing stitches to learn what you need to know.)
To make use of iron-on patches, all you need is a suitable patch, a garment that needs mending, and a hot iron with a place to plug it in and use it. It’s ideal if you have an ironing board to use, but the ironing board is optional as long as you have a clean, flat surface that can withstand the heat of your iron. I occasionally iron things on a bed if the ironing board isn’t handy.
Iron-on patches give you an easy way to cover up permanent stains on clothing. They’re also a quick fix for rips, tears, holes and distressed places in clothing.
Follow the manufacturer’s instructions that are specific to the iron-on patch you’ll be using. Most of the time, it’s simple to do this:
- Check the garment label to determine the hottest acceptable steam iron setting you can use on the fabric of the child’s garment that you want to mend.
- Plug in your iron, turn it on and wait for it to heat up.
- Position the patch on the garment in the spot you want it to be.
- Iron the patch, and apply some firm pressure as well as heat to press it onto the garment.
- Turn off and unplug your iron (although this seems obvious, I forget to do it sometimes, so I figure it doesn’t hurt to include this all-important step in the step-by-step list of instructions.)
It’s also possible to use sewing appliques for patching holes or covering stains on kids’ clothes.
Cover Up Stains Without Sewing: Use Tie Dye Techniques
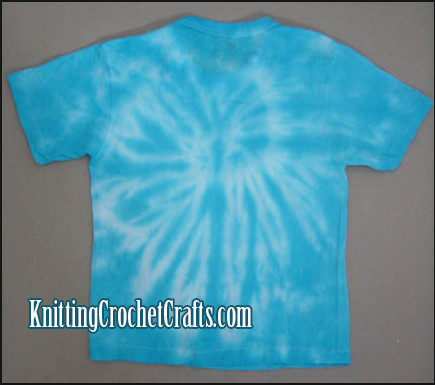
It is sometimes, but not always, possible to cover up stains on t-shirts or other cotton garments using fiber reactive dyes and tie dye techniques. You can learn more about that by visiting our pages on the topic of dyeing clothes.
How to Hem Kids’ Pants or Skirts:
(That Is to Say, How to Make Pants Shorter or Make Skirts Shorter)
If you need to hem your kids’ pants or skirts, you’ll need a seam ripper, safety pins, straight pins, an iron, thread and a hand sewing needle. A pencil or disappearing fabric marker may also be useful.
The steps are as follows:
- Use the seam ripper to rip out the stitches on the existing hem, if there is one.
- Use the iron to press the hem around the garment flat and straight.
- Ask the intended wearer to put the garment on, and safety pin the hem in place where you want it — or, alternately, you can use a pencil or fabric marker to mark where you want it (but do this in such a way that it will not be visible on the outside of the garment; you want to only mark the inside.)
- When you’re marking, keep in mind that there will need to be TWO folds on each pants leg, or two folds at the edge of the skirt. There will need to be a fold line below the actual hemline.
- After the intended wearer removes the garment, take it to your ironing board (or ironing surface) and use the iron to press the hem in place. You will first press the line BELOW the spot where you want the actual hemline to fall.
- Then fold the fabric again to create the actual hemline, and press it in place using the iron.
- You might also wish to pin the hem in place to make it easier to do your stitching. I recommend doing this in cases where you’re hemming jeans or similarly durable pants; you might want to skip the pinning if you are hemming a delicate garment, like a silk skirt.
- If possible, use a thread color that is almost an exact match for the color of the garment and is made of the same fiber as the garment. It is not advisable to use polyester thread to mend a cotton garment, because polyester tends to be stronger than cotton, and the two might not wear well together in the long term. (On the other hand, your kiddo might outgrow the clothes before that becomes an issue, so it could be counterproductive to worry too much about that unless you want a few more kids to be able to wear the garment in the future. If you’re really hoping to maximize the lifespan of the garment, see this page on sewing thread for more considerations to keep in mind when you choose your thread.
- I recommend sewing by hand and using the catch stitch to sew the hem, because that’s the best stitch to use for hemming, in my opinion. However, it’s also possible to machine stitch the hem if you have access to a sewing machine.
Mending Knits vs Wovens
One important thing you need to think about if you plan to mend kids’ clothes using sewing techniques: You need to understand whether the piece you want to mend is knitted or woven. This is because knitted and woven fabrics are structured differently, and they perform differently from each other. So you’ll get the best results from mending if you understand the inherent properties of each, and then choose a stitch that’s compatible with those properties.
In case you don’t remember how to tell a knit from a woven, let’s do a quick refresher on that.
- Knits are created by interlocking rows of loops together.
- Wovens are created by intertwining threads over, under, over, under, over, under each other.
- Most weft-knitted fabrics are inherently stretchy, even if made from a material like cotton that isn’t typically resilient.
- It’s typical for wovens to not be so stretchy unless they are made from fibers that include a stretchy component, like spandex blends.
- If you have a pair of jeans to mend, they’re most likely woven.
- If you have a stretchy t-shirt to mend, it’s most likely knitted.
- If you have a t-shirt that isn’t stretchy, and it closes with a button or some other similar closure, it’s probably woven.
If you don’t already know whether the garment you’re dealing with is knitted or woven, take a careful look at it under a magnifier.
When you sew a knitted garment, it’s ideal to use a serger. But if you don’t have a serger, don’t let that stop you; in that case, use a zigzag stitch. If you’re mending a torn seam on a knitted garment, you can look at what’s left of the existing stitch and match it as closely as possible.
If you’re mending a woven garment, you can use straight stitches; no need to use a zigzag stitch.
One more important thing: If you’re patching a knitted garment, it’s ideal to use a knitted patch rather than a woven one. Likewise, it’s preferable to use a woven patch if you’re patching a woven garment.
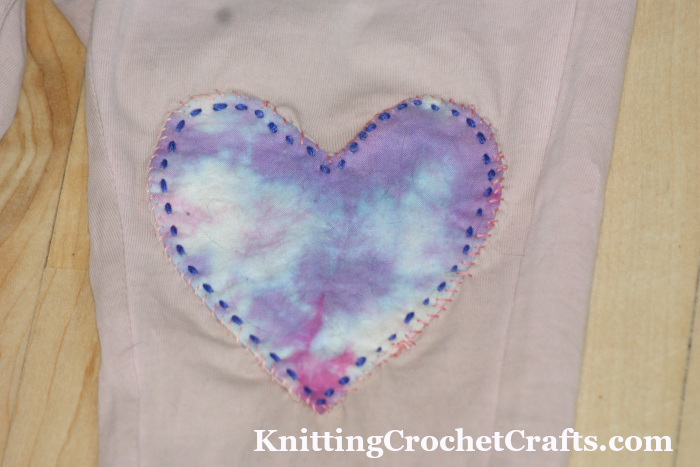
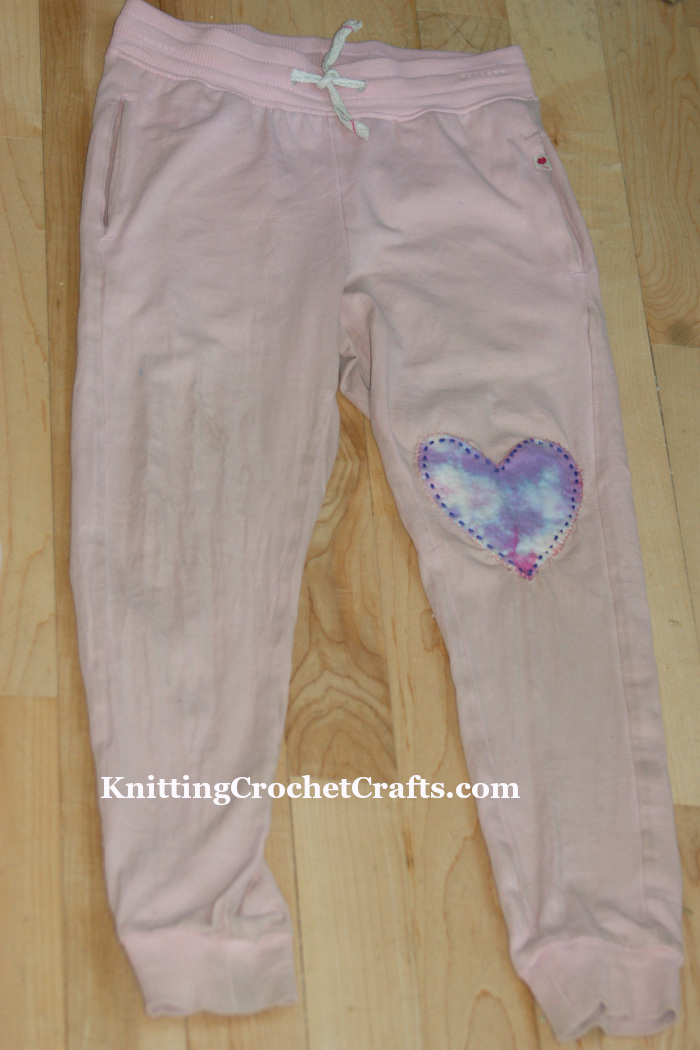
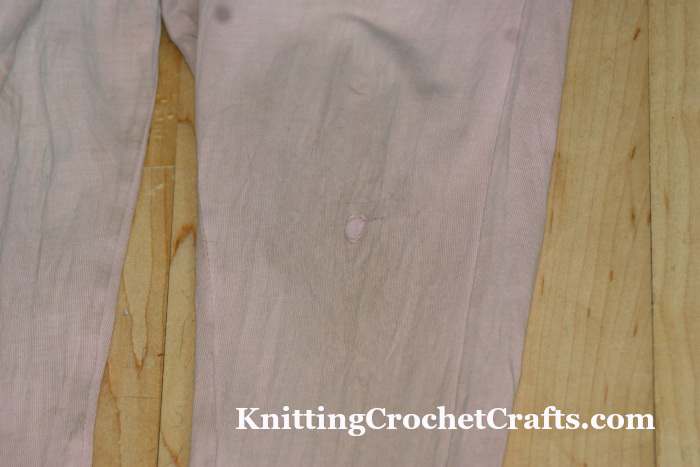
The pictures I posted along with this article actually show you an example of what NOT to do; I used a handmade woven patch and stitched it over a hole in the knee of a knitted pair of kids’ pants. The result looks cute, and it held up for awhile, but the mend didn’t wear well with time. Luckily, it held together until the kiddo outgrew the pants, but this mending job could have been improved on substantially. We live, and we learn!
Here’s the “Before” Photo:
Here’s an “After” Photo That Gives You a Close-Up Look at the Patch I Used for Mending the Worn Pants:
I made the heart-shaped patch using scraps of tie-dyed fabric that were left over from another project. I also used quilt batting, and I stitched the tie-dyed fabric to the batting to keep them together. I hand sewed the entire piece to the pants covering the hole.
When you mend pants like this, you have to stick your hands down inside the pants legs. You have to make sure NOT to stitch through all layers of the pants, because you don’t want to sew the pants closed. So, pay careful attention to what you’re doing as you sew.
I hope this information will be helpful to you for maximizing the useful lifespan you get from your kids’ clothes. I wish you much success with your mending!
I invite you to return to this blog often for more craft tutorials, project ideas and inspiration! You can make sure you keep this site on your radar by signing up for my newsletter and community at Substack. .
Basic subscriptions are free; I send out regular newsletters to let my subscribers know about new craft articles and tutorials as they are posted. I also share details about the craft projects I’m working on, and invite my readers to share their projects, too. So there is no need to feel like it’s just you, crafting all alone at home. I’d love to have you join us! You’re invited!!
By Amy Solovay
Please Visit My Ko-Fi Shop HERE to Find My Sample Sale, Destash Sale and Digital PDF Pattern Downloads for Sale.

About the Author: Amy Solovay learned to sew as a child in 4-H group. As a 4-H club member, she sewed a reversible wrap skirt and entered it in the Maryland State Fair. The skirt won a prize; seeing her skirt displayed at the fair with its ribbon award was one of Amy’s proudest childhood accomplishments. Ever since then, she has been using her sewing skills to mend clothing for all the people in her inner circle.
Amy holds a degree in textile design from FIDM LA. She writes about sewing for this website and others. You can find more of her writing at Amysolovay.com.
This page was last updated on 1-18-2025.