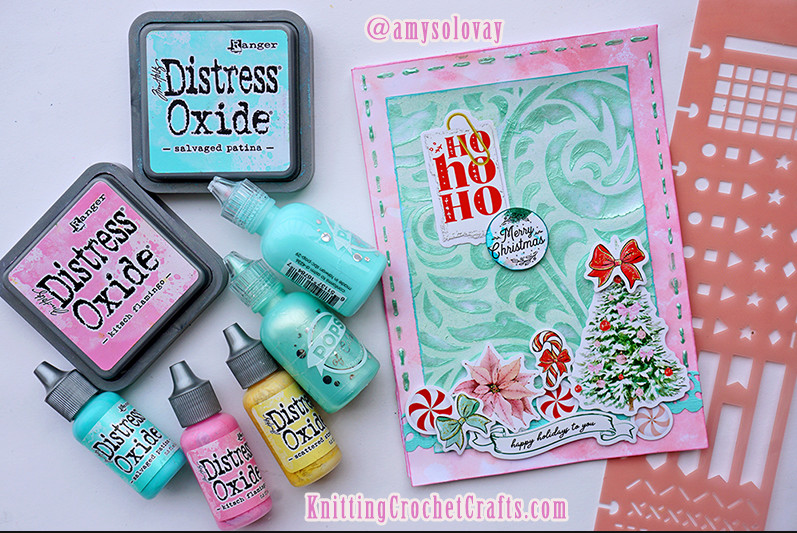
Candy Cane Lane Christmas Card Featuring Supplies by Prima, Altenew and Ranger Industries
Craft Supplies You’ll Need for Creating a Similar Christmas Card:
- Prima Candy Cane Lane Stickers: Prima and Scrapbook.com collaborated on an exclusive Candy Cane Lane sticker sheet that is now discontinued, and that’s what I used to make this Christmas card. However, the stickers from the main Candy Cane Lane collection are really similar to these stickers, and I think you could use those to make a card that looks a lot like this one if you are inclined to do so.
- Elegant Swirls Stencil by Altenew
- Kitch Flamingo, Scattered Straw and Salvaged Patina Distress Oxide Ink — I like using the reinkers to do ink blended backgrounds like the one you see here, but you could alternatively use the ink pad if you don’t have the reinkers. The Kitch Flamingo and Salvaged Patina colors are just a little bit brighter and cleaner than the colors in the “Candy Cane Lane” color palette; I muted the Kitch Flamingo and Salvaged Patina ever so slightly with Scattered Straw ink to get the right shades.
- You can’t really see it, because I layered so many stickers on top of it, but I used a die by Pinkfresh Studio from the Lacey Edgers set to make a border that stretches across the lower edge of the card.
- Scrapbook.com’s Pops of Color in the Seafoam Pearl Color
- Nuvo Media Spatulas or similar tools for spreading your Pops of Color through your spatula
- I used a Happy Planner Stencil to make the stitched effect around the outer edge of the card. I think if I had it to do over again, I’d skip using the stencil and just freehand the stitches, though. I use Pops of Color in stencils frequently, and it typically works pretty well, but putting the Pops of Color through this particular stencil made a mess. Another option would be to stamp faux stitches using this Bobunny Stamp Set and then go over the stamped stitches with the Pops of Color to make them stand out and shine.
- Adhesive Foam Strips
- Plain white, smooth cardstock
- A scoring tool for paper
To create the bottom layer of this card, I ink blended using the Kitch Flamingo and the Scattered Straw reinkers on white cardstock. I also inked around the outer edges of this paper using Kitch Flamingo ink.
For the next layer, I ink blended on white cardstock using Distressed Patina and Scattered Straw Distress Oxide ink colors. Then after it was dry, I used the Seafoam Pearl Pops of Color to stencil overtop of the ink blended background using the Altenew Elegant Swirls stencil.
I layered the two pieces of cardstock to my card base; Then I attached the die cut lace border and all the stickers to the card front.
I added the faux stitching around the outer edge of the card as a finishing touch.
Thanks so much for your interest in my project! I am glad you dropped by today.