Jewelry making is an artistic and satisfying pursuit that many crafters enjoy. Some crafters make jewelry as a fun means of personal expression, while others do it to make gifts for their friends and family members. Others pursue jewelry making as a means of earning income.
Jewelry making is a vast and varied category of craft, and there are many worthwhile jewelry making techniques you could explore. Some of your options include bead stringing, bead weaving, knotting, bead crochet, bead knitting, macramé, braiding and wire wrapping. These are not your only options, but these are some of the most popular techniques that beginning jewelry makers gravitate towards. There are also more complex jewelry making techniques you could try including soldering and enameling.
If you’re interested in learning how to make jewelry, you may need to use tools to do it. There are some simple jewelry making projects that can be completed without investing in tools – but jewelry tools definitely make the jewelry maker’s job easier.
There are numerous jewelry tools available. Which tools you need depends greatly on which types of jewelry you want to make, what materials you plan to work with and what type of jewelry making technique you want to use. For example, you’d need different tools and supplies for making a beaded hemp bracelet than you would need for making fine silver post earrings.
Some of the Basic Tools and Supplies That Beginners Will Find Useful for Jewelry Making
If you’re new to jewelry making, one of the most important decisions ahead of you is how much of a commitment you want to make to the craft. There are so many jewelry tools and supplies available that it would be impossible to buy all of them – so it’s helpful to give some thought to what kind of jewelry you want to make, and then invest specifically in the right kinds of tools you need for making that kind of jewelry.
My advice to a beginning jewelry maker would be to decide on a jewelry making technique you want to try first – and then at first to prioritize getting only the absolutely essential tools for that technique. After you’ve tried making a few projects, you can evaluate what else you might need, and pick up a new tool here or there as needed.
There are some types of jewelry pieces you can create without making a huge investment in jeweler’s tools. If you aren’t absolutely committed to becoming a metalsmith and spending your time on activities like soldering, you’ll probably want to hold off on buying things like torches and bead kilns. Save those purchases for after you’re absolutely certain you’re committed to this art form.
Some of the easiest and safest jewelry making techniques that can be done at home include bead stringing, wire wrapping, bead crochet, bead weaving, bead knitting, beaded macramé, knotting, or braiding / kumihimo. You can do any of these techniques without needing to furnish a complete jeweler’s bench or create a dedicated jeweler’s work space. Definitely don’t overwhelm yourself by trying to learn all of these techniques; I suggest choosing one of them to try at first. You can then see how you like that one technique before proceeding further.
The following are some of the most important general-purpose jewelry making tools you might want to consider buying:
Tool Kits: If you’re hoping for an easy way to acquire multiple tools or supplies needed for jewelry making, you could consider picking up a tool kit or two. Often, you’ll find that it’s far less expensive to acquire your tools in kits than it is to buy them individually.
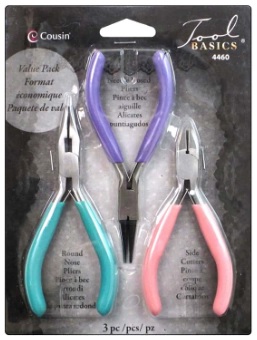
For example, Cousin DIY makes an affordable three-piece tool kit that comes with needle-nosed pliers, side cutters and round-nose pliers. These tools can help to get you started with simple jewelry-making techniques such as gauge wire wrapping and cutting. The needle nose pliers are what you’d want to use for wrapping wire into loops and curves; the side cutters can help you to make precision cuts in wire and similar soft materials; and the needle nose pliers are good for a variety of tasks ranging from crimping to bending to holding your materials.
Pliers: Jewelry crafters utilize different types of pliers to make their projects. A few of the most commonly used pliers include needle nose pliers, chain-nose pliers, snipe nose pliers, round nose pliers, round concave pliers, flat nose pliers and half round pliers.

Tweezers: Beads, wire and jewelry findings can be fiddly and challenging to hold onto. Tweezers are essential tools for handling the small components you need to work with when you’re crafting a new piece of jewelry.
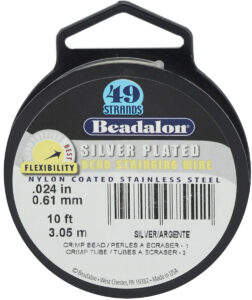
It can be challenging to find a good pair of starter tweezers, because a lot of the cheapest options are either extremely flimsy, or the tips don’t meet up well enough to give you a good grip on whatever bead or finding you’re trying to grab. If you’re looking for an affordable pair of beading tweezers that’s of sufficient quality to actually be useful to a beginner, try the Beadalon straight tweezers. I haven’t personally tried these, but my husband’s aunt, who was a jewelry maker, swore by her pair. She made significantly higher volumes of beaded jewelry than I do, and her jewelry was incredibly lovely.
Crimpers: Crimping is simply attaching multiple pieces of metal to each other by bending or deforming one or both so that they hold together. “Crimpers”, also known as crimping pliers, are simply tools that empower you to make such a crimp in your work. There are also “crimp tubes”,“crimp beads” and crimp covers, which are all valuable additions to a jewelry maker’s stash of supplies.
Magnifiers: Jewelry findings can be fiddly to work with. Magnifiers are essential time-savers, because they’ll help you to see the little details of what you’re working on. Jewelry making supplies are expensive, and mistakes you make can be very costly; a good magnifier can pay for itself quickly by saving you from making expensive mistakes that waste supplies and time.
Ideally, if you only get one magnifier, you want it to be one that can clamp to your work table and be used hands-free. That way you can look through the magnifierr while you are holding your jewelry project to work on it. But you might also find hand-held magnifiers to be useful at times, too.
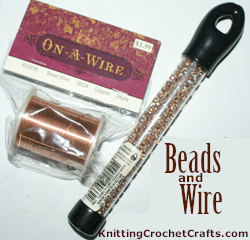
Wire: Wire is useful for multiple purposes in jewelry making. You can string beads onto it or use it for wire wrapping. You can also crochet using the wire itself to make wire crochet jewelry projects, or knit with it to make wire knitting projects. These techniques are especially lovely for making bangle bracelets, but there are many types of jewelry projects you can make using wire crochet and wire knitting.
Wire Cutters: You’ll need wire cutters for cutting your wire or similar pieces of thin metal. You’ll reach for this tool every time you’re hoping to achieve a smooth, clean cut in the precise spot where you need it.
Mandrels: A mandrel is a cylindrical rod you can use for shaping any round metal jewelry pieces you want to create – for example, you can use mandrels for forging or shaping bracelets or rings. If you’re planning to make glass beads with a torch, you can also use mandrels for that. A mandrel is extremely useful to have on hand for wire-wrapped jewelry techniques.
You need the right size mandrel for the jewelry making project at hand; smaller ring-sized mandrels are available to use for shaping rings, and larger ones are what you’d need if you want to work on shaping metal bangle bracelets.
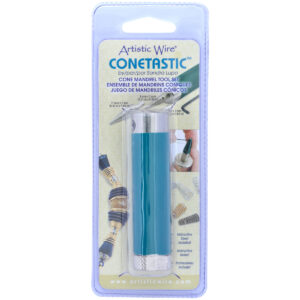
Pictured at Right: The Artistic Wire Conetastic Cone Mandrel Set is an affordable mandrel that beginning jewelry makers might be interested in considering. The set includes a handle, mandrels and an allen wrench you can use for changing your mandrels. This is a set that would be of interest to you if you want to get started with making wire-wrapped jewelry pieces.
Thread Burner – This is a tool that many experienced beadworkers recommend to beginners working in a variety of techniques including bead weaving and bead stringing. This tool is helpful for removing excess thread that you can’t easily trim with scissors. The thread burner empowers you to get in close to your beadwork and get rid of those pesky little ends you don’t want. (You don’t need this tool for bead crochet, as you typically weave the thread ends into your work).
Files: It’s useful to have a variety of files on hand for smoothing out burrs and rough edges that can be present on metals other surfaces.
When you choose a file, check to see the number that has been assigned to each file you’re considering. Higher numbers = a greater number of teeth per inch, which results in a relatively finer cut. Lower numbers = a lesser number of teeth per inch, which results in a relatively coarser cut. However, these numbers will vary between file manufacturers; you can’t expect a #3 file from one manufacturer to be precisely equivalent to a #3 file from another manufacturer.
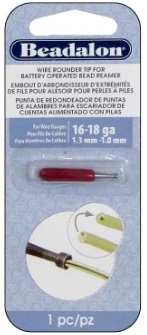
Bead Reamer: A bead reamer is basically a specially-configured file that is useful for multiple purposes in jewelry making. A bead reamer is typically a small cylinder shaped tool that fits through the drill-holes in beads. You can use a bead reamer for subtly enlarging the drill-hole on some kinds of beads, or smoothing rough spots in the bead’s drill hole. If the drill hole is crooked, you might be able to straighten it out with a bead reamer. This tool can save you money and wasted beads, as it is possible to use the bead reamer for salvaging beads that would otherwise be unusable.
If you’re planning to use a bead reamer with small, fiddly beads that are hard to hold onto, it’s ideal to also have a good pair of tweezers on hand for helping you to hold the beads as you work on them with the bead reamer.
Which Jewelry Tools to Buy for Specific Jewelry Making Techniques
Jewelry Tools for Wire Wrapping
For making wire-wrapped jewelry, the absolute necessities are wire and flush cutters, but it’s helpful to have other tools and supplies available beyond these. You’ll also ideally want to acquire semi-flush cutters, pliers, mandrels, files, and jigs to expand your options and make it easier to create appealing wire-wrapped jewelry pieces. The best pliers for wire wrapping are round nose pliers, flat nose pliers, and chain nose or bent chain nose pliers. Other beneficial supplies include findings and, ideally, some beads, cabochons or other pretty baubles to wrap. For wire, you could choose colored copper wire, ordinary copper wire, brass wire, sterling silver wire or many other types of wire.
Jewelry Tools for Beading
There are many different ways to approach beading. Skip down to the sections below if you’re interested in bead weaving or bead crochet as your primary approach to beading. Those techniques require a different supply list than simple bead stringing does. Otherwise, consider getting yourself a basic tool collection that could possibly include beading needles, embroidery scissors, wire cutters, Flush cutters, Chain-nose pliers, Round-nose pliers, round concave pliers, crimpers, and a good pair of ordinary scissors. A thread burner is also helpful but is not essential.
Jewelry Tools for Bead Crochet
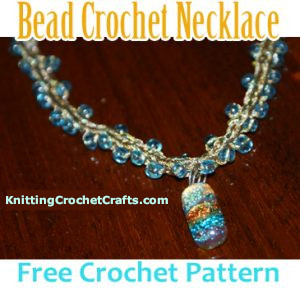
Bead crochet is my favorite jewelry making technique; it doesn’t require many tools or supplies, and you can use it for making just about any type of jewelry you can imagine including necklaces, chokers, pendants, bracelets, rings, earrings and rings.
If you want to try bead crochet, I recommend getting cheap, sturdy metal crochet hooks like Boye or Susan Bates, size 3 or size 10 crochet thread or ___-gauge wire, and a good pair of wire cutters to cut the wire with if you’re going to use wire. A couple of crimper tools in different sizes are also useful, especially if you plan to crochet with wire; if you don’t use crimp beads or crimp tubes on these pieces, you’ll have ends of wire poking you in the wrists or neck every time you wear your wire crochet bracelets, necklaces or earrings. You also need beads and needles; once you’re sure that bead crochet is really your thing, and you’re serious about it, it’s ideal to have a variety of beading needles and tapestry needles on hand for this purpose. But if you’ve never tried bead crochet before, I recommend picking a project you like to start out with and just getting the supplies recommended for that one project. I have posted a bunch of free bead crochet patterns tutorials you can use – so you can try one of those if you like, and see how it goes, before you make a greater investment in beads, cords, wires, tools, etc.
In general, beads for bead crochet can be tiny, but they shouldn’t be too big. Very large beads aren’t easy to incorporate into a bead crochet project, and they can get too heavy. It might also drive you bonkers to work with very small beads. It can be done, but I don’t recommend it to beginners because it can get really fiddly and frustrating to work with the extremely fine crochet threads that pair best with tiny beads. Other than taking care to avoid beads at either size extreme, you can use your choice of beads for bead crochet. I’ve successfully used chip beads, round beads, seed beads, freshwater pearls and bunches of other types of beads in my bead crochet projects.
See Also: Bead Crochet | Jewelry Making | Wire for Crafts
Jewelry Tools for Bead Weaving
Bead weaving is another jewelry making technique you might want to consider starting out with; to be successful with bead weaving, you have to decide on an approach you want to take and then get the supplies you need for that particular method of bead weaving. You can do bead weaving on a loom, but a loom isn’t strictly essential for bead weaving; there’s a technique known as “off-loom” bead weaving that you can do.
For off-loom bead weaving, you need beading needles, beading thread, a bead mat and a good pair of scissors. It’s also helpful to have a good craft light, as it can be hard to see the little beads and bits you’re working with when you do off-loom bead weaving. It’s worthwhile to get either flat nose or chain nose pliers (or both) for tasks like opening jump rings, closing them again and getting a grip on your beading needle to pull it through at times when it is jammed in the work. You might also find it helpful to own a bead reamer, although this is not necessarily an essential tool for casual bead weavers.
If you want to do bead weaving on a loom, you’ll find a broad variety of looms available to choose from. You can typically find small, inexpensive bead looms to get started with. The bead looms I’m familiar with are low-tech; they aren’t computerized and don’t require electricity.
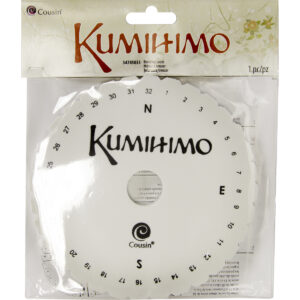
Jewelry Tools for Kumihimo Braiding
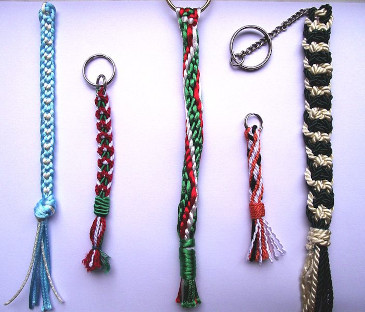
Kumihimo wasn’t originally used for jewelry making; it is a traditional braiding and cording technique that originated in Japan. Silk kumihimo braids were originally worn by Japanese people as obi belts for their kimonos. These were known as obijime in Japanese. Intricate yet robust silk kumihimo braids were also incorporated into Samurai warriors’ armor, helmets, sword handles and horses’ armor; the kumihimo technique is capable of producing surprisingly strong, protective finished pieces.
Nowadays, this art form tends to be prized more for its beauty than its protective properties. Women have adapted kumihimo braiding techniques to make bracelets, necklaces, keychains and similar pieces. It is also possible to place beads on your cord or thread before you do the braiding, which results in gorgeous beaded kumihimo projects.
There are also kumihimo kits and finding kits available that can help you to easily get started with making braided or beaded kumihimo bracelets, if this is a technique that is of interest to you.
Watch Repair Tools
If you’re hoping to repair broken or stopped watches, watch batteries are useful items to keep on hand. You can frequently start a stopped watch simply by giving it a new battery. Watch battery kits and battery testers are also useful for this purpose. Other commonly utilized watch repair tools are screwdrivers, pliers, vices, and link pin removers. You might also occasionally need a watch gasket when repairing an old watch.
Other Jewelry Making Supplies You Might Find Useful
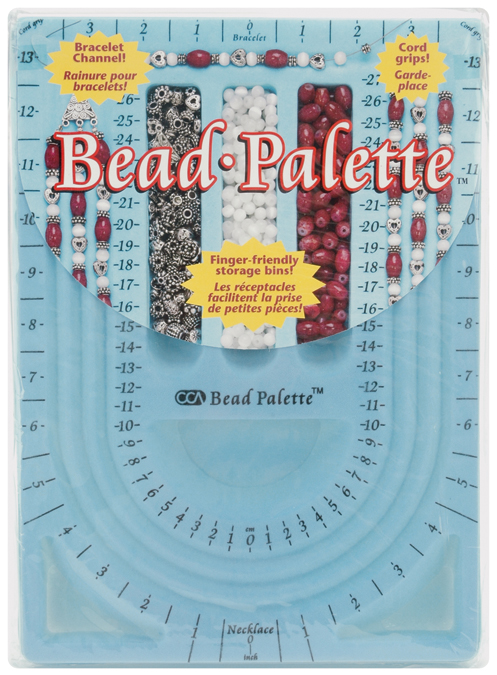
A Beading Board: A beading board gives you a convenient place to lay out your beads in the correct order for stringing. Before you commit to stringing the beads, you can move them around and play with the design until you get it just the way you want it. You can do all this without a beading board, but the bead board will help to keep you from losing beads as they roll away and get lost. It can pay for itself pretty quickly, especially if you’re using expensive beads made from 14 karat gold, sterling silver, precious stones or lampworked glass. I did a lot of bead stringing before inheriting my husband’s aunt’s beading board – but now that I have it, I really wouldn’t want to be without it.
Beads and Baubles: It’s ideal to have an assortment of beads, cabochons, briolettes, charms and pendants on hand that you can use for enhancing your jewelry projects.
Beading Cord: Cord is useful to have on hand if you plan on making any jewelry that requires weaving, knotting, braiding or beading. You can use it for making necklace cords, anklets, hair bows, Chinese knotting projects, or kumihimo projects, among other things.
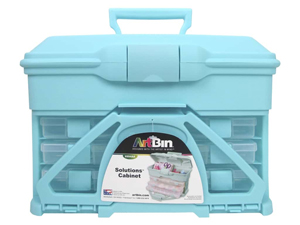
Bead Organizers: It’s useful to have at least one bead organizer on hand for keeping your beads sorted and safely stored. In some cases, you might be able to just use the containers your beads come in; however, in many cases, you’ll find that this is not at all practical. I’ve purchased many beads that were packaged in plastic baggies, which are not ideal bead storage organizers. All it takes is one accident that results in a torn baggie, and you will spend hours upon hours picking beads up off the floor (or worse, losing them all to your vaccuum cleaner or having them all get stepped on or broken underfoot). If you spend any time at all making beaded jewelry, it won’t take you long to understand that good bead organizers can pay for themselves pretty quickly by saving you money on lost, broken beads.
My favorite bead organizer is the Artbin Solutions Cabinet. It has a top compartment that opens; in this section, you can store small jewelry tools like mandrels and pliers and other supplies like packages of wire, beading cord, instruction leaflets, etc. The Solutions Cabinet also includes three bead storage trays.
If you want more info about this jewelry maker’s organizer, I refer you to my Product Review of the Artbin Solutions Cabinet Organizer. The short version of my review: I highly recommend it!
An Introduction to Jeweler’s Tools for Beginners
If you’re serious about working with precious metals, gemstones and precious stones, you’ll need to create a workspace that incorporates a jeweler’s bench and includes specialized jeweler’s tools. The following are a few of the tools and supplies you might want to prioritize acquiring for your jeweler’s bench:
Jewelry Hammers and Mallets
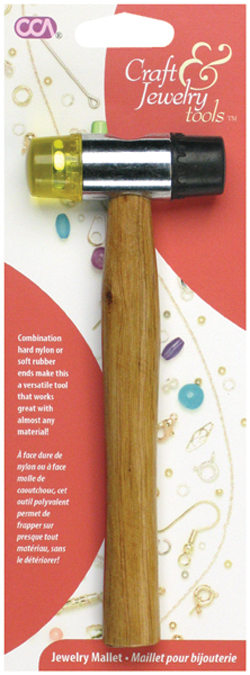
Some jewelers use hammers or mallets for making fine jewelry projects. It’s unwise to use an ordinary hammer for hammering metals, because the hammer is likely to mar the surface of the metal, possibly making recognizable round indentations. For jewelry making, it’s ideal to use a specially manufactured, non-marring hammer.
Cousin makes an affordable double-sided jewelry mallet available. This mallet has hard nylon on one end and soft rubber on the other end; both of these surfaces work well for hammering various metals you would be likely to use when making jewelry.
Ring Clamps: A ring clamp is a useful tool intended to help you steady the piece of jewelry you’re working on and keep your hands safe as you work on it. Perhaps you’re applying heat to your piece or filing it, both of which are activities that could endanger your hands. The ring clamp provides a bit of extra protection, which makes it easier and safer to hold the piece as you work.
Jeweler’s Saw: You can use a jeweler’s saw plus a saw frame or clamp, saw blades and wax or Cut Lube to make your own one-of-a-kind jewelry designs out of sheet metal. One possible way to approach this is to draw a pattern on paper, adhere it to your sheet metal with rubber cement, and then use the jeweler’s saw to cut out your design.
Torch and Fire Extinguisher: There are various metalsmithing, lampworking and other jewelry making / bead making techniques that are best accomplished with a torch. If you’re planning to use a torch, don’t forget the fire extinguisher and safety goggles; you’ll also need a fuel source such as brazing fuel (MAPP gas) or propane.
So those are the basics you need to know about jewelry tools for beginners. There are many, many more tools and supplies beyond these that you might find useful — but these are the basics that you’ll want to prioritize learning about as you get started with jewelry making. We hope this information is helpful to you if you’re wondering which are the best supplies for beginning jewelry crafters to work with.
References:
Related Resources
- Jewelry Making
- Beadwork
- Best Beadwork Books
- Best Bead Organizer for Jewelry Makers
- How to Make a Necklace Longer
Posted By: Amy Solovay
This page was last updated on 6-25-2023.