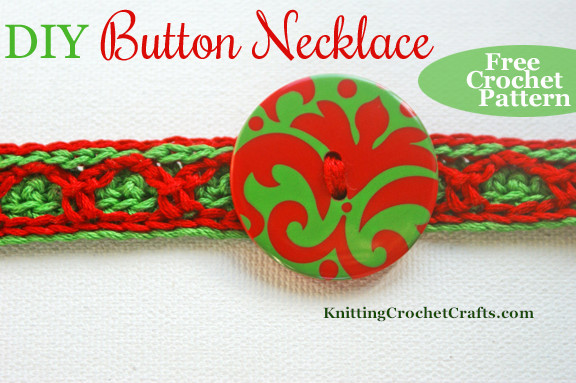
Get a Free Crochet Pattern for Making a Necklace Band You Can Embellish With a Spectacular Button
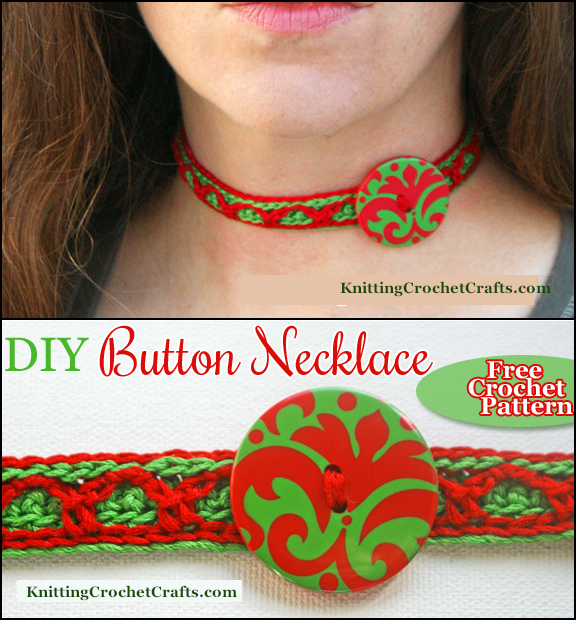
A great, big patterned button is the center of attention in this pretty necklace. To make the necklace, you simply stitch the button to a textured crochet band, which you can make using the free crochet pattern below:
Materials Needed for Making a DIY Button Necklace:
You’ll need the following materials to create a necklace like the one pictured above:
- 1-2 skeins of red embroidery floss – DMC 321 is the color I used to make the sample necklace pictured above.
- 2 skeins of green embroidery floss – I used DMC 702 as the green color in the sample necklace.
- A button measuring about 1 1/4″ – the button shown is by La Mode.
- A pair of snaps or a pretty button to form the closure
- Crochet Hooks: Sizes D and E, or size needed to obtain gauge.
Color Variations for the DIY Button Necklace Pattern
You Can Recolor This Necklace in Many Different Ways. Here Are Some Suggestions:
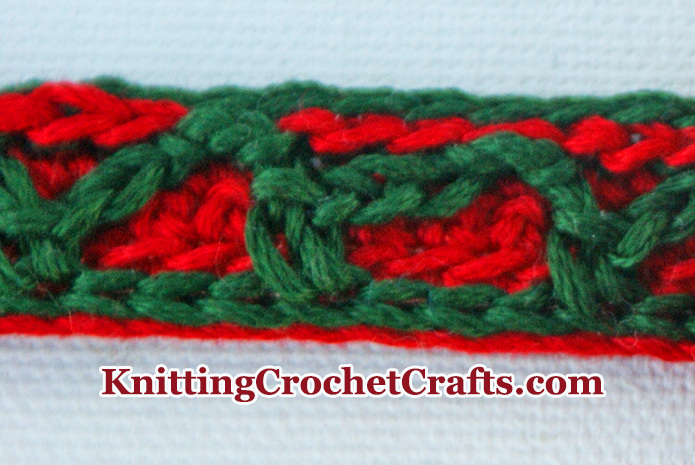
Red and Forest Green — Here’s the recipe for achieving this colorway:
Main Color / Color A: Red – I used DMC Embroidery floss in color #321 to make the sample necklace band.
Accent Color / Color B: Green – I used DMC Color #890.
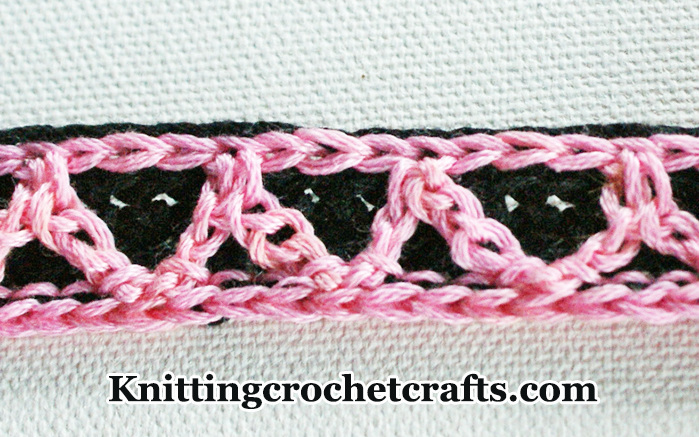
Pink and Black — This pink and black color variation isn’t specific to any holiday or special occasion; it’s more of an everyday look. I used vintage embroidery floss to crochet this sample, so I don’t have exact color numbers to share — but you won’t have any trouble finding suitable colors to make this version of the necklace band:
Main Color / Color A: Black.
Accent Color / Color B: Pink.
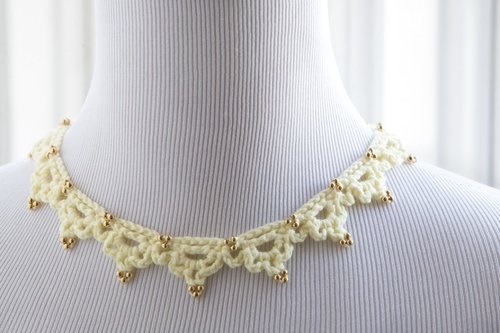
Pink and Yellow — This pink and yellow color variation is another one that’s suitable for everyday wear. I used vintage embroidery floss to crochet this sample:
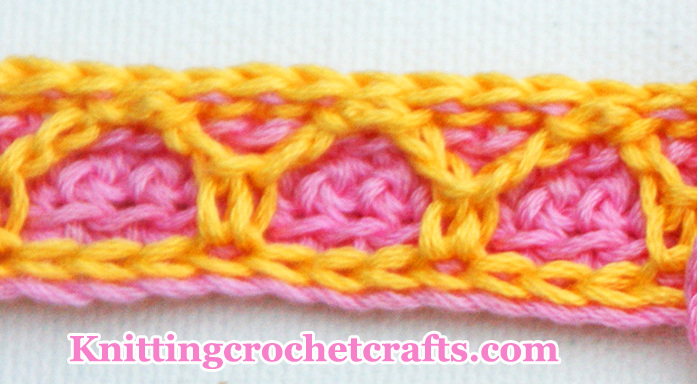
Main Color / Color A: Pink.
Accent Color / Color B: Golden Yellow.
Finished Necklace Size
Necklace Band: Finished size is 12.67″ long by 5/8″ high. This length is typically suitable for a pre-teen or young teenage girl; it may also fit a small woman.
Since neck sizes vary, be sure to check the intended wearer’s measurement before you begin crocheting. Keep in mind that the necklace should fit snugly, but not too snugly.
Neckband Size Adjustments
The starting chain is a multiple of 4 + 1.
If you’d like to make this necklace to fit a smaller child or an adult woman, it is easy to adjust the size by decreasing or increasing the length of the starting chain.
Gauge
When working the layered stitch, 3 stitch repeats = 2″.
Crochet Abbreviations List for This Pattern
- BLO = back loop only (click here for an explanation of “back loop only” if you aren’t familiar with this particular set of instructions).
- ch = chain
- rep = repeat
- sc = single crochet
- sl st = slip stitch
- st = stitch
Crochet Skill Level — Advanced.
How to Crochet the Necklace:
Ch 77 using color A and a size E crochet hook. Switch to a size D hook before crocheting the rest of the project.
Row 1: Sc in second ch from hook, and in every ch across the row.
Row 2: Ch 1, turn. Work entire row in sc.
Row 3: Rep row 2. At the end of the row, place a stitch holder or a safety pin in the stitch to hold it.
Begin the layered stitch. Work into the starting chain. If you’re right-handed, turn the work upside down and start at the right hand side, working from right to left. If you’re left-handed, reverse this, starting at the left hand side and working from left to right.
Row 4: Using color B, draw up a loop in the first ch st in the starting ch. Working in the starting ch, make 76 evenly spaced sl sts across the work.
Row 5: Continue using Color B. In this row, you are going to turn the work so that it is right side up again. Then work back across the row from right to left if you’re right-handed, and from left to right if you’re left-handed. (Ch 5, skip 3 sl sts, sc in BLO of 4th sl st.) Rep sequence inside parentheses 18 more times for a total of 19 arches made of chains and sc sts. End off.
Row 6: Next, you’re going to pick up at the top where you placed the stitch holder or safety pin. Remove the holder. Gently tug at the thread and undo the last step of the last sc. Then insert your hook into the 2 loops that remain. Change to color B by drawing up a loop to finish the last sc stitch in row 3. Ch 1, turn.
Work 2 sl sts into first 2 sc. The next stitch will also be a sl st, but instead of only working the st into the sc, you are also going to anchor the arch of ch sts you created in row 5.
To do this, (insert your hook into the next sc as usual, then slip the sts from row 5 onto your hook, then grab your thread with your hook and pull it through to complete the ch st. Work 3 more ordinary sl sts.) Rep sequence inside parentheses all the way across the row.
At the end of the row, all the arches in row 5 should be anchored by sts worked in this row.
Row 7: Ch 1, turn. Working in front loops of sl sts, complete entire row in sl st.
If you are going to create a button closure, do not end off yet.
How to Finish the Button Necklace:
Button Loop: Ch 4, sl st to anchor the chain to the first foundation chain at the base of the necklace. End off.
Closure: Attach your button or snaps to the necklace band.
If you want to block your necklace band, this is the time to do it.
The next step: Sew your button to the necklace band you just crocheted.
At this point, the necklace is ready to either wear or gift, whichever you prefer.
Happy holidays!
Find More Crochet Jewelry Patterns and Jewelry Making Ideas
I’ve made bunches of free crochet jewelry patterns and other patterns available. I hope you enjoyed this necklace pattern, and I invite you to use my other jewelry patterns, too!
By far, the loveliest crochet jewelry project I ever made is the “Elegant Trios” necklace I submitted for publication in Sharon Silverman’s book called Delicate Crochet. This special necklace pattern is one of the few crochet patterns that I offer for sale (instead of for free), but I hope you’ll agree that it’s worth paying for. It has been carefully tested, professionally tech edited, and it includes international symbol crochet charts.
My archive of free patterns is currently an “endangered species” because the bills to host this 800+ page site have exceeded the site’s earnings. If you’d like to ensure that my archive of free crochet patterns stays free and available online, I invite you to either purchase a pattern from me or make a donation at Ko-Fi to help support my work. Thank you so much for considering this request!
Amy Solovay’s Knitting, Crochet and Crafts Newsletter at Substack
If you enjoy crocheting jewelry or getting access to a variety of other free crochet and craft patterns, I invite you to return to this site often for more necklace patterns, project tutorials and inspiration! You can make sure you keep this site on your radar by signing up for my newsletter and community at Substack. .
Basic subscriptions are free; I send out regular newsletters to let my subscribers know about new craft articles and tutorials as they are posted. I also share details about the craft projects I’m working on, and invite my readers to share their projects, too. So there is no need to feel like it’s just you, crafting all alone at home. I’d love to have you join us! You’re invited!!
By Amy Solovay
About the Author:

Amy Solovay is a real, live, human content creator and educator who holds a Bachelor of Arts degree in mathematics from Sweet Briar College; she has also earned a separate Associate of Arts degree in textile design from FIDM LA (The Fashion Institute of Design and Merchandising, Los Angeles). She is NOT a robot and does not use artificial intelligence (AI) to write book reviews or articles for this website.
Amy learned to craft as a small child, and she still enjoys crafting techniques all these years later.

As an educator, Amy Solovay used to teach in-person college courses in trend forecasting, marketing and surface design at California Design College in Los Angeles. Nowadays she uses online platforms for sharing her knowledge about textiles, crafts, current color trends and current design trends.
More Craft Pages You Might Enjoy:
- Button Crafts
- Craft Supplies
- Knitting
- Knitting Supplies
- Yarn for Crochet and Knitting
- Quilting
- Jewelry Making
- Best Tools for Jewelry Making
- Beadwork
- Sewing
- Sewing Appliques
- Kitchen Crafts
Find More Craft Project Ideas HERE!
This page was last updated on 10-14-2025.