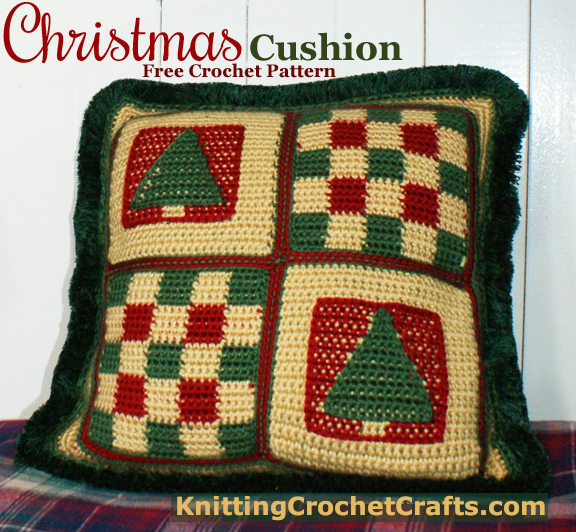
Featuring Christmas Tree Motifs and Checkerboard Squares
If you’ve already put up your Christmas tree and decked your halls with holly and ivy, maybe it’s time to decorate all your cozy chairs, window seats and beds with festive Christmas pillows. Need a good pattern for making such a design? This Christmas pillow pattern is a great choice, plus there are other Christmas designs you might also wish to look at. (Try this crochet puff stitch Christmas tree square too; it includes free instructions for finishing off as a pillow.)
- Find the matching Christmas blanket pattern
- Get the free charts for crocheting the Christmas tree square and the checkerboard square designs
This Christmas-friendly pillow could be used all winter long. The pine tree motifs are suggestive of winter, and would be perfect for decorating a home, mountain cabin or ski lodge.
Related Resources: Christmas Patterns | Crochet Pillow Patterns | Home Décor Patterns
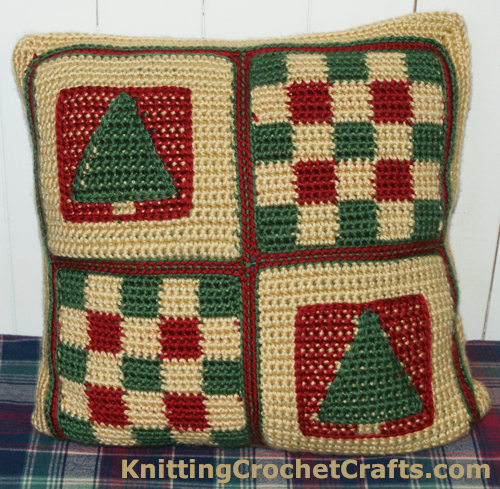
This crocheted pillow features Christmas colors – red, green and gold – plus holiday-inspired motifs. If you celebrate Christmas, the pillow would be a perfect addition to your family’s Christmas decorations, or it would also make a lovely gift.
The pillow’s main motifs are un-decorated evergreen trees; a quick re-coloring would transform them into regular pine trees, which is nice for those of you who do not want to make a seasonal or Christmas-themed project.
This pillow could be used in several different rooms in the home. In the living room or family room, it could grace a favorite easy chair, or live on the couch. In the bedroom, it would be nice on either the bed or on a nearby chair.
Skill Level: Intermediate
Materials:
Yarn: To crochet the sample pillow, I used Caron Simply Soft in Autumn Maize, Autumn Red, and Dark Sage. Feel free to substitute similar yarns or other colors if you like.
Pillow Form: I used a pillow form measuring approximately 15.5″ square.
Fabric and Thread: If your pillow form is plain white, I recommend covering it with a fabric that matches the colors you’re using for your pillow. That way, if there are some itty bitty holes in your crochet work, you won’t see bright white fabric peeking through.
I used an old pillowcase to make my sample pillow cover. I cut it down to make it the right size, then sewed the pillow form into it.
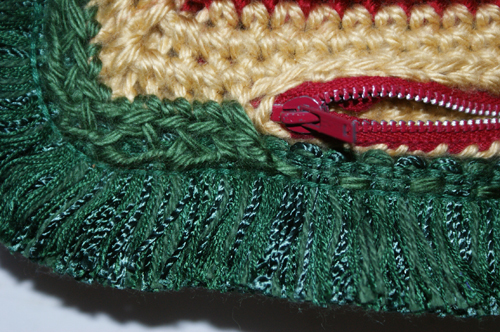
Zipper: My zipper measures about 12″ long. It was salvaged from a damaged skirt. I used a red zipper because I thought it would be easier for you to see it in the pictures, but I recommend using a zipper that’s a closer match for the background color of your pillow.
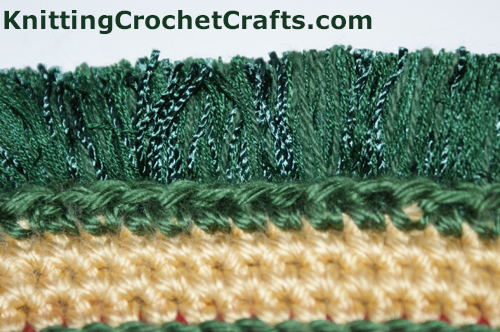
Fringe or Trim: I used brush fringe, although there are many other possibilities you could try – piping, cord, or even a crocheted edging or trim. The fringe and trim are optional; I’ve included instructions for both the version with fringe, and another version without fringe. Take your pick, or feel free to use your creativity to come up with a different way of finishing your pillow.
Crochet Hook: Size H / 8 – 5.0 mm
Other: Tapestry Needle
Gauge:
4 sts = 1 inch
Finished Size:
The pillow measures approximately 17.5 inches including the fringe.
List of Abbreviations:
- beg = beginning
- ch = chain
- sc = single crochet
- sl st = slip stitch
- st = stitch
Design Note: This pillow requires bunches of sewing and stitching. If you plan carefully, and leave long enough tails of yarn in appropriate places, you can combine the tasks of stitching your pieces together and weaving your ends in. I encourage you to do so as much as possible; it will make your project sturdier, and possibly even prettier too.
In places where you don’t need to use the tails for stitching, you might be able to crochet over top of them to save time.
Pillow Instructions:
Crochet four of these Christmas tree squares, and four of these checkerboard squares. Finish each square by crocheting a round of slip stitch in green, then another round of slip stitch in red.
Arrange these squares in groups of four, using the photo above as your reference for where to place each square. Join the squares together using whip stitch or the joining method of your choice. When you are finished with this, you’ll end up with two identical pieces, one for the pillow front and one for the back.
Pillow Border:
There are about a zillion different ways you could do your pillow border, edging and trim. I’ve shared two of them here, but feel free to use your creativity if you’d like to try something different.
Version 1: (Pictured Above.) This is the version with brush fringe around the outer edge of the pillow. If you’d rather not bother with fringe, skip to version 2 below. Version 2 is much faster, so if you are in a hurry to be finished this project, that’s the version I recommend.
Using red yarn, work a round of sc st all the way around each set of joined squares. When you get to a corner, ch 3, then continue working sc st all the way around. Sl st to join the end of the round to the beg. Change colors to autumn maize. Work 3 rounds of sc st around the outer edges, putting 3 ch sts in each corner and joining each round with a sl st at the end.
Using green yarn, work a round of surface crochet slip stitch in the spot where the red yarn touches the autumn maize yarn.
End off, leaving a super long tail of yarn which you can use for stitching. Weave in all your other loose ends.
When you have completed both the front and the back pieces of the pillow, whip stitch the sides and top together using autumn maize yarn. Important: Whip stitch through only one loop on each piece – the back loop on the pillow front and the front loop on the pillow back. You’ll need to be able to crochet into the unused loops in a later step.
On the bottom edge, stitch the zipper to the pillow. Again, stitch only through one loop on each side of the pillow; leave a loop free for crocheting into later.
Depending on your zipper, you may need to whip stitch a bit on either side of the zipper to fully close the lower edge.
Using green yarn, pull up a loop in the lower right hand corner on the front of the pillow. Working through front loops only, sc in each stitch around; work 3 sc sts in ea corner st.
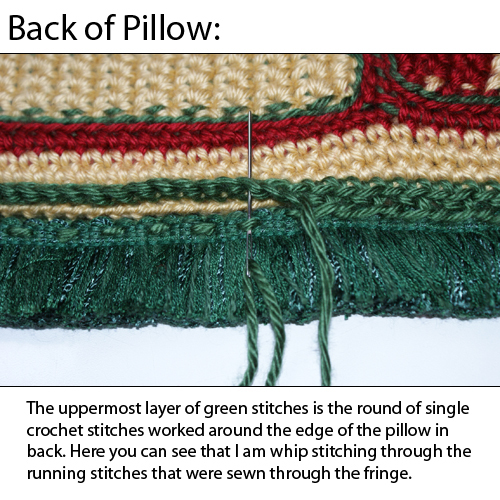
Stitch your fringe to the back of the round of sc sts. I used a sort of would-be running stitch to do this; there might be a better stitch to use for this task, and if you know of one feel free to use it.
When you are finished attaching your fringe, flip your pillow over to the other side and attach your green yarn in the lower right hand corner. You’re going to work sc sts through one loop only on 3 sides of the pillow; leave the lower edge, where the zipper is, unworked. I recommend skipping the lower edge in order to keep the zipper accessible. Be sure to put 3 sts in ea corner.
After you have finished working sc sts around 3 sides of the pillow, stitch the Partial round of sc sts to the back side of the fringe. There might be a better way to do this than the way I did it. I used sort of a whip stitch for this; I stitched through alternate loops on my round of sc and on the fringe side of things I stitched through the sort-of-running stitches I made when I originally attached the fringe to the pillow.
This seemed less awkward than stitching all the way through the fringe again. Depending on your fringe, stitching all the way through it might be preferable; use your good judgement on that.
When you are finished your stitching, weave in any remaining loose ends carefully.
Place your pillow inside its new cover; it’s now ready to be used and enjoyed.
Version 2: (Not Pictured.) Before I get into the instructions for this version of the pillow, I’d like to invite you to take a look at a photo I took of my pillow before I added the brush fringe to it.
Christmas Pillow Without Fringe
Without the addition of the dark green fringe around the outer edges, I think the pillow looks unfinished. I think it would look far better if the border were completed in a darker color; either the red or the green would be lovely, in my opinion.
Using either red or green yarn, whichever you prefer, work a round of sc st all the way around each set of joined squares. When you get to a corner, ch 3, then continue working sc st all the way around. Sl st to join the end of the round to the beg. Work several additional rounds in this manner; as many as it takes to make your pillow cover the right size. If you like, you can change yarns to make your last round or 2 in the other color before finishing off.
Whip stitch around 3 sides of the pillow, preferably the two sides and the top. Attach the zipper across the lower edge of the pillow.
Insert the pillow form inside its cover. The pillow is now ready for use; enjoy!
I have not tried crocheting this version to see how it would turn out. If you decide to make this version of the pillow, or in fact any version of it, I invite you to share pictures of it with us so that others can see some more examples of how it turns out. I’d be really grateful to have additional photos to show on the website. Thanks in advance to any of you who post your photos; I really appreciate it.
Find More Lovely Christmas Crochet Patterns
- Christmas Tree Ornament — Free Crochet Pattern
- Crochet Puff Stitch Christmas Tree Square, Plus Pillow Instructions
- Lacy Crochet Christmas Wreath Ornament
- Delightful Knit and Crochet Christmas Patterns
Knit and Crochet Pattern Books Worth Buying
- Arne & Carlos Favorite Designs features Knitting patterns for Christmas ornaments plus crochet blanket patterns, knitted doll patterns and bunches more festive designs for Christmas, assorted other holidays and everyday items.
- Poetic Crochet features glorious patterns for making shawls and evening wraps to wear throughout the holiday season. If you need patterns for making drop-dead-gorgeous party attire, you’ll definitely want to grab a copy of this book.
- Check Out the Latest Crochet Pattern Books
- Take a Look at Our Picks for the Best Knitting Pattern Books
More Crochet Pillow Patterns
This page was last updated on 6-24-2021.