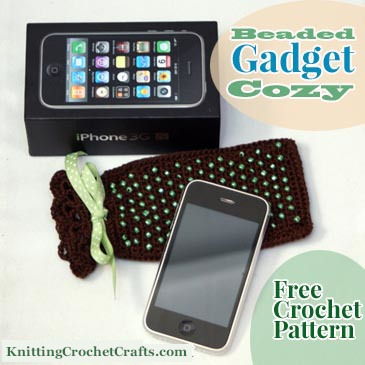
If you’re looking for a suitable spring or summer craft project, consider crocheting this pretty beaded gadget cozy. I’ve worked my sample in size 3 cotton crochet thread, which is delightful to work with even in warm summer weather.
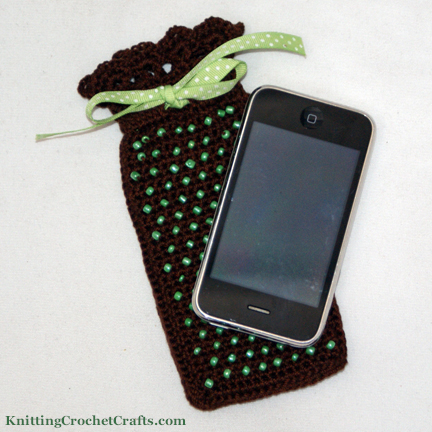
Beadwork and ribbon are also incorporated into this feminine design. The finished cozy is just the right size for holding a smartphone, camera or similar small gadget.
Related Resources: Crochet Purse and Bag Patterns | Bead Crochet | Crochet Thread Patterns | Knit and Crochet Pouch Patterns
Materials List:
- Crochet Thread: 1 ball of crochet thread, size 3 — about 24 grams.
- Beads: You’ll need a few hundred 6/0 seed beads. I counted 256 beads in the sample project, but you might use more or fewer beads in your project, depending on your individual way of crocheting.
- Crochet Hook: Size E / 4 – 3.5 mm, or size needed to get the correct gauge
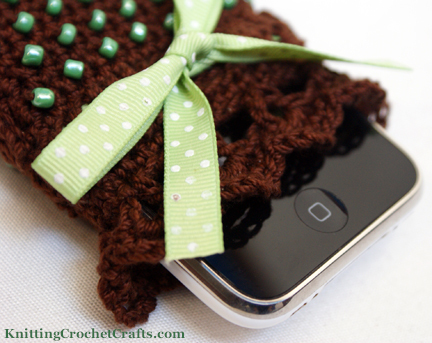
- Drawstring: You’ll need something to use as a drawstring. This is a length of ribbon in my project sample. Alternatively, you could use i-cord, a crocheted chain, paracord, string, ordinary cord, twine or a similar material to create the closure for the gadget cozy. If you use ribbon, you might also want to dip the cut edges in glue, Fray Check, or nail polish to keep it from unraveling.
- Needles: I recommend using a beading needle to string your beads onto your crochet thread; however, a beading needle is not strictly a necessity if you get beads that have large enough holes that you can fit them over your tapestry needle. Regardless, you’ll need the tapestry needle for stitching your gadget cozy together and weaving in your loose ends.
Gauge
When working in beaded stitch pattern, 6 sts = 1″; row gauge is not important.
Project Size
My finished gadget cozy measures 7.25 inches x 3.25 inches.
Abbreviations Used in This Crochet Pattern:
- beg = beginning
- ch = chain
- dc = double crochet
- ea = each
- patt = pattern
- rep = repeat
- R = row
- Rs = rows
- Rnd = round
- sc = single crochet
- sl st = slip stitch
- st = stitch
- tog = together
Special Stitch: V Stitch– Dc, ch 1, dc, all worked in the same stitch.
Pattern Notes
The gadget cozy consists of a back piece and a front piece that are stitched tog. After you’ve joined them, the next step is to crochet the drawstring casing. You work the casing in rnds around the top of the piece. Then you work an edging around the top and insert the ribbon to complete the project.
Gadget Cozy Body
Make 2 pieces as follows:
Use the beading needle to string your beads onto your crochet thread.
Loosely ch 17.
R 1: Sc in 2nd ch from hook and in ea st across. (16 sc)
R 2: Ch 1, turn, sc, [slide a bead close to the last st made, 2 sc.] Rep the instructions in brackets 6 more times across the r. Slide bead, sc. (At the end of the r, you’ll have 16 sc and 8 beads total.)
R 3: Ch 1, turn, work 16 sc sts across the r.
R 4: Ch 1, turn, [2 sc, slide a bead close to the last stitch made.] Rep the instructions in brackets all the way across the r. (16 sc and 7 beads total)
R 5: Sc all the way across the r.
Rs 2-5 form the patt rep. Rep rs 2-5 as many times as needed until the piece is long enough to accommodate your gadget of choice. I worked 35 rs for my sample. Your number of rs may vary.
Outside Rnd
This is a partial rnd; you’ll work around 3 of the 4 sides of your piece.
Ch 1, work 35 evenly spaced sc down the side of the piece. Ch 2 for corner, then work 16 evenly spaced sc across starting ch. Ch 2 for corner, work 3 evenly spaced sc up the other side of the piece.
End off. Weave in all loose ends before joining the pieces.
Blocking (or Not Blocking) the Gadget Cozy
If you want to block your gadget cozy, it’s easiest to do the blocking before you join your pieces. I didn’t think my gadget cozy was in urgent need of blocking, so I didn’t bother with it.
As I was in the process of crocheting the project, the pieces did show a bit of distortion. If your pieces get too distorted as you’re working, you could consider blocking them before joining them; that might make it easier to sew them together.
Be cautious about blocking metal beads that could rust. You can test a loose bead to see what will happen if you wet it.
Joining the Two Pieces of the Gadget Cozy
Join the two pieces using whichever method you prefer; you can either sew them or crochet them tog. My sample project was joined using a sl st join. To accomplish this, hold both pieces tog and work 1 sl st in ea st slip stitch through both pieces, working down one side, across the bottom, and up the other side. You could seam the pieces using whip stitch if you prefer.
Crocheting the Casing for the Drawstring, and the Edging
Work this part in rnds around the top of the piece.
Join thread in upper right hand corner.
Rnd 1A: Ch 3, (counts as first dc,) work 1 dc in ea st all the way around.
When you get to the side seams, you can either skip them, or work two stitches into ea seam, depending on how bulky your seams ended up being. If you have really bulky seams, skipping over them would leave a big gap; in that case, you want to go ahead and work those extra stitches into ea seam. You don’t want to have big gaps in your casing.
The seams on my sample project are quite bulky, so I worked the extra stitches into ea seam.
Whichever way you decide to do it, keep in mind that your total number of stitches needs to be evenly divisible by 4 to make the math on the edging work out correctly.
When you’ve worked all the way around, join with a sl st to the first dc in the rnd.
End off; weave in ends.
Rnd 1B: Work into the same rnd to make an upper layer, but this time around, work into the front loops of the sts. Join thread at top right hand side in front loop of the same rnd; ch 3 (counts as first dc st.) Work 6 more dcs. Ch 3 and skip next 3 front loops; this forms the opening for the drawstring. Continue working dcs into front loops all the way around. Sl st to join to the first dc.
Position the ribbon or drawstring in between the two rnds of dc sts. Feed the ends out through the hole formed by the ch-3 space.
Rnd 2: Work through both loops of both layers of the casing made in rnds 1A and 1B. Ch 1, work sc all the way around, keeping the drawstring sandwiched in between the layers of the casing. Join with a sl st.
Rnd 3: Ch 1, sc all the way around, sl st to join.
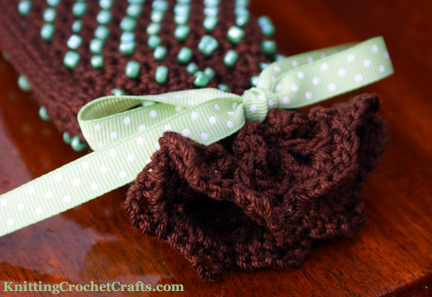
Rnd 4: Ch 4 (1st 3 chs count as 1 dc st,) dc into same st to make a V Stitch, [ch 1, skip next 3 sts, work a V-Stitch in next st.] Rep sequence in brackets all the way around. sl st to join to 3rd ch st worked at the beg of the rnd.
Rnd 5: [Work 5 sc in next V-Stitch, sl st in next ch.] Rep sequence in brackets all the way around. Join the end of the rnd to the beg of the rnd with a sl st.
Rnd 6: Ch 1, In ea grouping of 5 sc, work the sequence in brackets: ([2 sc, ch 3, skip next sc, 2 sc.] Then sl st in next sl st.) Rep sequence in parentheses all the way around. Sl st to join to beg of the rnd.
End off. Weave in all ends.
You can now place your gadget inside the gadget cozy, or give it as a gift. Enjoy!
Thanks for Visiting!
We really appreciate your interest in our free patterns and tutorials. Want to find more of them? If so, we invite you to stay and browse awhile. Here are some related resources you might also enjoy.
More Thread Crochet Patterns
- Filet Crochet Panel for Bedspreads, Pillows, Curtains or Linens
- 50 Fabulous Crochet Thread Motif Patterns — Squares, Hearts, Flowers, Circles and More
Best Knit and Crochet Pouch Patterns
- Zippered Crochet Pouch With Checkered Design — Free Pattern
- Heart-Shaped Pouch — Free Crochet Pattern
- Plarn Crochet Pouch Pattern
More About Crocheting With Beads
- Learn How to Crochet With Beads
- Free Crochet Pattern for a Beaded Snowflake Christmas Ornament
- 26 spectacular bead crochet patterns in the Beaded Edge 2
- Bead crochet jewelry plus other types of crochet jewelry-making projects
More Spring and Summertime Crochet Projects:
Find More Fantastic Knitting and Crochet Patterns
Posted By: Amy Solovay
This page was last updated on 8-10-2021.