
4 Ink Blending Techniques Revealed
Plus Ink Blending Tutorials, Ink Blending Project Ideas and Tips for Creating the Perfect Ink Blends
Ink blending is popular with card makers who are using it in various ways:
- Ink blended backgrounds;
- Ink blended sentiments;
- Ink blended flowers and motifs
- Die-cutting ink blended papers to make tags, circles, and all kinds of other shape.
Ink blending is also popular with scrapbookers, planner enthusiasts, art journalers and mixed media artists.
If you’re hoping to use ink blending in any of your craft projects, you’re invited to check out the following ink blending techniques for card making, scrapbooking and other paper crafts:
Craft Supplies You’ll Need for Ink Blending
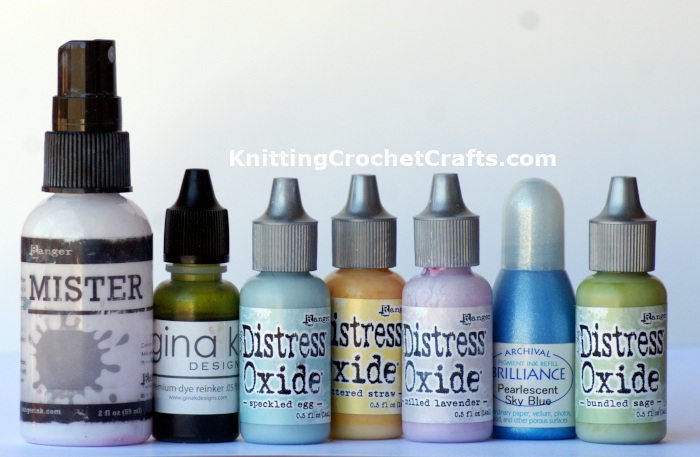
First of all, you’ll need some inks to blend.
I recommend using inks that are specifically formulated to be water reactive, like Gina K’s inks and the Distress Inks and Distress Oxides by Tim Holtz. These can safely be diluted with water in cases where you want to make really light-colored ink blends.
I like using ink from reinkers, because reinkers make it super easy to dispense exactly the amount of ink you want to use for blending.
It is also possible to do some (but not all) ink blending techniques using ink pads.
If you’re using a dauber, sponge brush or ink blending tool, you can apply your ink from either an ink pad or a reinker.
Daubers, sponge brushes and ink blending tools are all recommended supplies for ink blending. You might also want to try ink blending using squirt bottles / misters (an ideal mister is pictured, above left) or empty brush pens.
You’ll also need some plain white paper. Neenah’s Solar White heavyweight cardstock is the ideal paper for these techniques, because it withstands moisture and is less prone to buckling or warping than lighter weight cardstock.
Any papers will warp and buckle at least somewhat if you saturate them with ink; you can usually fix this by flattening them under pressure (stick your inked papers between heavy books, and pile more books on top of them and let them set overnight.)
You can also start with colored cardstock or other colored paper, but keep in mind that your paper color will affect the look of your finished ink blends.
1. Ink Blending Techniques Using Ink Pads or Reinkers (Ink Refills)
- Grab multiple ink pads and / or reinkers (ink refills.) You’ll also need paper (heavy white or light-colored cardstock) and one or more ink blending tools: some foam-tipped daubers, sponge brushes or stipple brushes are all suitable options.
- Use an ink pad to apply your first ink color to a dauber, ink blending tool, sponge brush or stipple brush.
- Transfer ink from your tool to paper.
- Before the ink is thoroughly dry, repeat using a second ink color and a second tool, paying careful attention to where you apply the ink.
- Tip: To keep your ink pads clean, avoid touching them with tools that have already been used for applying different ink colors. It’s ideal to use a separate tool for each ink color, but if this isn’t possible, be sure to clean your tools before switching to a different ink color.
- Another Tip: You can buy empty ink pads that are specifically made to use for creating custom ink blends. If there are ink blends you discover that you really like, you might wish to invest in a few of these so you don’t have to spend so much time ink blending; you can mix them up and have them readily available for repeated use.
Examples of Papers That Were Made Using This Ink Blending Technique

Examples of Ways You Can Die Cut and Stamp on This Sort of Ink Blended Paper
You Can Make a Die-Cut Tag Mini Album Using Ink Blended Papers for Your Background
Here you can see the start of a die-cut tag-shaped mini album I’m making. I used Pinkfresh Studio’s inks (Blue Jay, Regal Kiss and one other) to ink blend onto white cardstock.
Then I die cut the ink-blended papers using Pinkfresh Studio’s Shaker Tag Book Die.
I’ve temporarily gathered the pieces using a metal book ring, which will hold all the tags and ticket shapes together while I finish the project. I might use a different binder in the final project.
2. Ink Blending Techniques Using Squirt Bottles, Spray Bottles or Misters
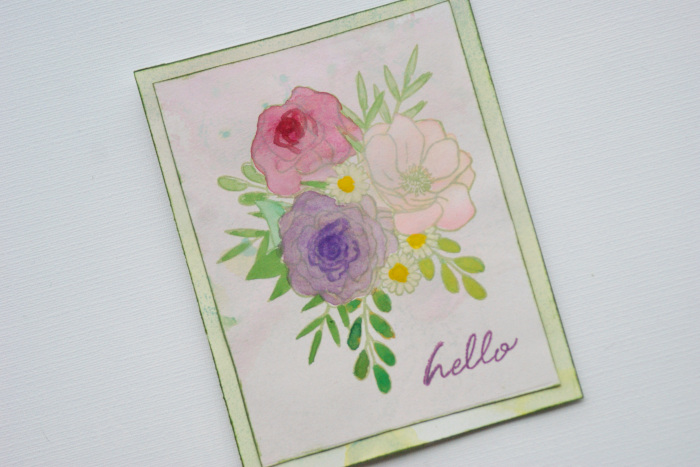
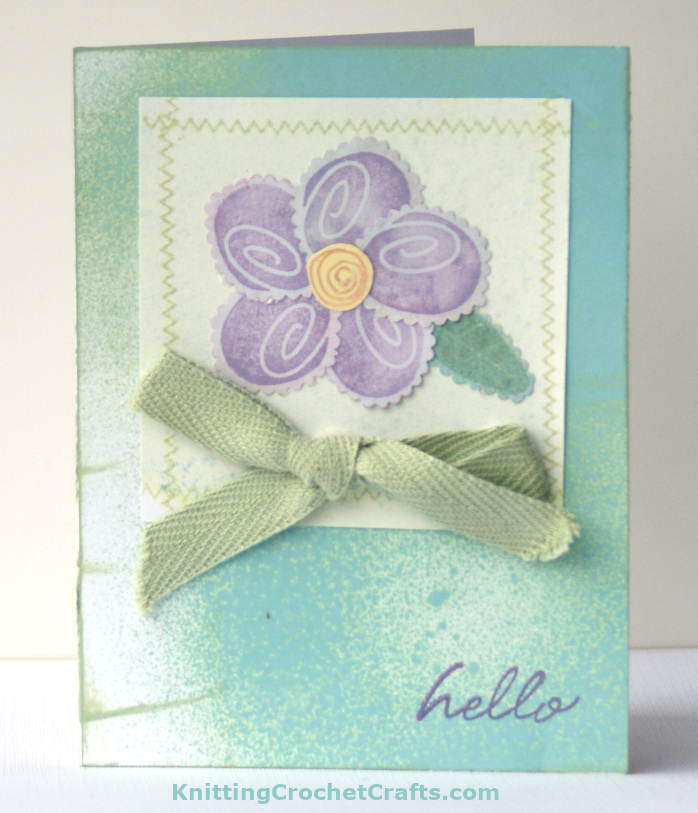
If you want to achieve a splotchy, splattered effect in your ink blends, you can use one or more squirt bottles, spray bottles or misters to mix ink blends and spray them onto your paper. You can also dilute the inks with water before blending if you want to make light colored ink blends (or if you just want the inks to go further than they would otherwise).
Project Ideas for This Ink Blending Technique:
Watercolor Floral Handmade Greeting Card With Ink Blending
Hello Greeting Card With Simple Flower and Ink Blending
3. Ink Blending Techniques Using Empty Brush Pens
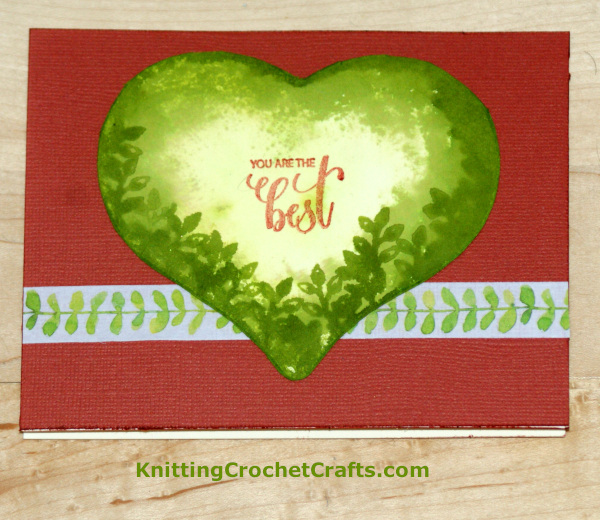
There are bunches of different manufacturers that make refillable brush pens you can use for ink blending. You can use your ink diluted with water (which I recommend) or at full strength. If you use it at full strength, be warned that you will use your ink up quickly.
To try this technique, simply fill your pens up with various colors of ink diluted with water, or not. Then draw or paint with your ink-filled pens, blending at will.
Project Ideas for This Ink Blending Technique:
You Are the Best Card Making Idea Featuring Gina K Designs Stamp and Inks
I like this technique, but I find it easier to control the flow of ink if I skip the refillable pen, and simply paint with the ink…which brings me to the next ink blending technique we need to discuss…
4. Ink Blending Techniques Using Paint Brushes
You can paint with ink just like you paint with paint. To do this, you’ll need ink and paper plus a watercolor-friendly painter’s palette, a cup or dish to hold some water, and a few paintbrushes in varying sizes. To create ink blends, you can either blend the inks in the painter’s palette ahead of time or you can grab various inks with your paintbrushes and blend them together as you paint, just as you would with actual watercolors or acrylic paints.
Blending Inks for Card Making
You can use any of the above-mentioned ink blending techniques to create backgrounds for your handmade cards, or to create smaller components to use on your handmade cards:
- You can make ink blends on your leftover cardstock scraps, and then use the ink-blended cardstock to die cut letters to use for spelling out a sentiment you’d like to use on another card.
- When stamping your focal images, you can use very light-colored ink blends rather than plain white cardstock; this adds a lot of visual interest to your card designs.
So there you have it: Those are some easy ink blending techniques you should know about if you’re interested in card making, scrapbooking, mixed media art, collage art or other paper crafts. I hope you found this information useful. Happy ink blending!
Over to You:
Have you tried ink blending?
If so, which techniques did you try? What projects did you make? How did they turn out?
Do you have any ink blending techniques, tips or ideas to share?
We’d love to hear about your experiences with ink blending. Please leave us a comment with any insights you’d like to discuss. Thanks in advance!
Please know that we really appreciate your presence here! Thanks for visiting.
Learn More About Inks
- Distress Ink Pads by Tim Holtz for Ranger Industries
- Brilliance Ink Pads for Rubber Stamping, Card Making and Paper Crafts
- StazOn Ink Pads for Stamping on Metal, Plastic, Acrylic, Leather and More
Find More Paper Craft Project Ideas
Posted By: Amy Solovay
This page was last updated on 1-4-2026.