Here’s an idea for making a DIY birthday card featuring a hand-stamped floral bouquet and a blended ink background.
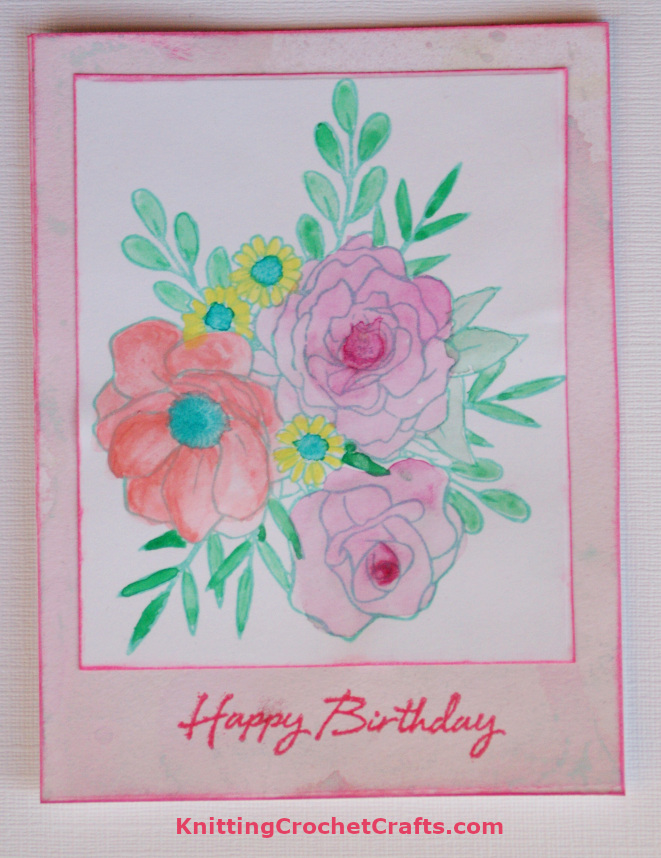
Birthday Card Making Idea Featuring a Hand Stamped, Watercolor Painted Floral Bouquet and an Ink Blended Background. The Floral Bouquet Stamp Is by Hero Arts.
I was motivated to make this card because the folks over at Hero Arts are having a challenge with the theme of “Blend It Up” — in other words, ink blending. Well, that challenge really appeals to me, so I decided I would make some projects to enter. The first project I completed is the birthday card you see pictured above.
How to Make a Similar Birthday Card
There are different ways you could approach making a card like this. I tend to make cards in batches, and this approach is different than the approach you’d take if you just want to make a single card.
If you make a lot of paper crafts project, the batch approach is typically going to be the most efficient use of your time and also the most cost-effective use of your supplies — because you waste less ink if you stamp, assembly-line style, without cleaning your stamps in between each impression. I try to stamp the same image using the same ink color at least 10 times before I clean the stamp and move on to stamping a different image or a different color. Later, when I’m ready to put together a card, a scrapbook layout or a planner layout, I have plenty of stamped images to use for making my projects. It speeds up the crafting process tremendously.
If I’m ink blending, I also tend to do that in big batches — making big batches of ink blended papers that I can later use in paper crafts projects. It is easiest to make a bunch of papers at once and let them dry before organizing them in your paper organizers and having them on hand to use.
The background paper I used in this card was made using ink blending techniques. For ink blending, I typically use several different tools and supplies including ink blending tools, misters and sponge brushes. If you’re new to paper crafts, or you don’t know how to do ink blending, I invite you to check out my article on ink blending techniques. That article includes tips and advice for how to get started.
Craft Supplies You’ll Need for Making a Birthday Card Like This One
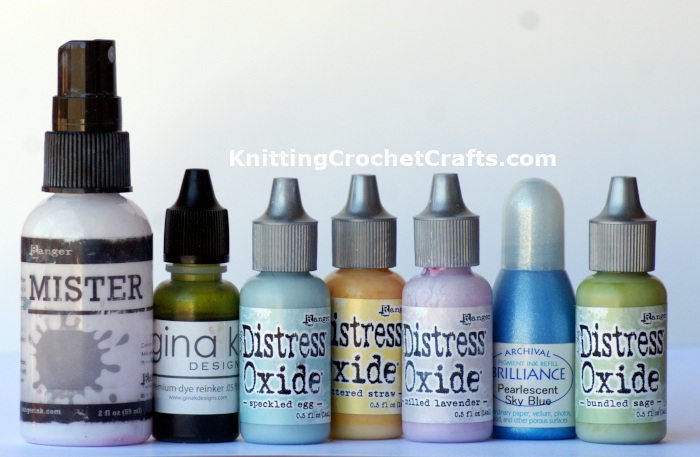
You can use a mister, water and ink from reinkers for an easy ink blending technique.
How to Make This Birthday Card
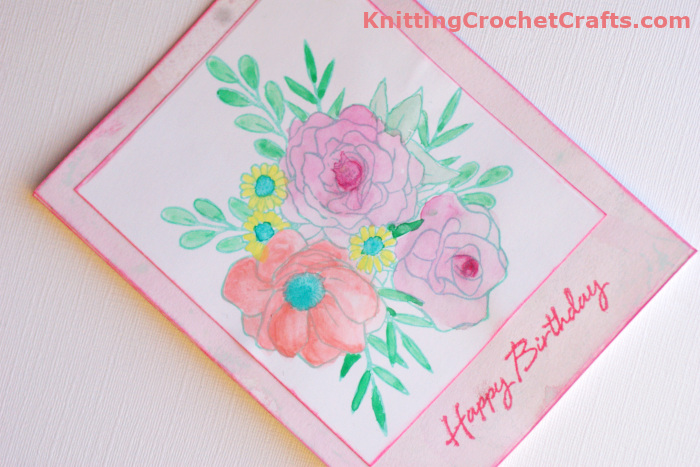
Happy Birthday Card Featuring Watercolor Floral Images and an Ink Blended Background. Stamps are by Hero Arts. Card Design Is by Amy Solovay.
Make a card base by cutting, scoring and folding a piece of ink blended paper to the size you want it.
Ink around the edges of the card base using Pink Versacolor, or the ink color of your choice.
Set the card base aside and work on the floral image. First, stamp your floral image using Salvaged Patina Distress Oxide or the ink color of your choice.
Paint the floral image using watercolor paints.
Let everything dry before proceeding.
Cut the floral image down to size and ink around the edges using Pink Versacolor or the ink color of your choice.
Attach the floral image to the card base using the adhesive of your choice.
Stamp the birthday sentiment using Pink Versacolor ink or your preferred ink color. I stamped the sentiment directly onto the ink blended paper background.
The card is now ready to personalize and send to the recipient of your choice.
Over to You
Did you participate in the Hero Arts “Blend It Up” challenge? If so, how did your project(s) turn out?
Did you make a card similar to this one? If so, how did it turn out?
We welcome any feedback and insights you have to contribute on the topic of this card, ink blending, or crafts in general. You’re invited to leave a comment in the comments area below.
Thanks for visiting! If you’d like to stay awhile, we have many other paper craft tutorials, instructions and project ideas you might enjoy. Check ’em out:
More Ink Blending Project Ideas:
- “It’s Your Birthday” Card With Dachshund Dog Motif — Stamp by Hero Arts / The Stamping Village
- Birthday Card Making Idea With Ink Blending and Da
- How to Make a Birthday Card With Bear Motif and Ink Blending
- You Are the Best Card Making Idea Featuring Gina K Designs Stamp and Inks
More Fun Paper Craft Project Ideas
- Birthday Cards to Make
- Valentine Cards to Make
- Mother’s Day Cards to Make
- How to Make Thank You Cards
- Planner Layouts: Find Layout Ideas for Your Planners
- Journaling Prompts for Scrapbooking
- Scrapbook Mini Albums
Posted By: Amy Solovay
This page was last updated on May 1, 2022.