Learn How to Do Fringe for Any Craft Project
Topics Covered on This Page: How to Make Fringe, crochet fringe, knitted fringe, beaded fringe, vintage fringe, antique fringe, leather fringe, suede fringe, ultrasuede fringe
Fringe makes a fantastic finishing touch for many different types of craft projects. No matter what kind of craft you’re working on, you’ll find a helpful method for how to make suitable fringe posted or linked below. Learn how to make fringe for crochet and knitting projects, leather and suede projects, beaded projects and more.
How to Make Fringe for Crochet or Knitting Projects
If you’ve crocheted or knitted a blanket, fringe is an attractive alternative you could use instead of blanket borders or edgings to finish it off. Fringe can add eye appeal to your knitted or crocheted scarves, and the fringe also serves as an easy way to get out of having to weave in many of your loose ends — because you can incorporate the ends right into the fringe.
Some ponchos and shawls are lovely when finished off with just the right fringe.
Fringe is also a lovely embellishment for certain purses, bags and totes. It doesn’t work for all of them, but when applied selectively, the effects can be stunning.
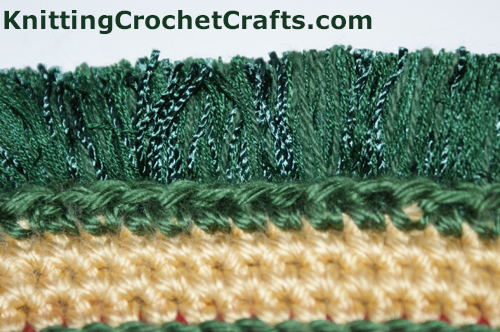
There are many different ways to make fringe for crochet and knitting projects. One of the simplest approaches is to add the fringe using a large crochet hook.
- Cut multiple strands of yarn, thread or fiber, making them each slightly longer than twice the length you want the finished fringe to be.
- Insert your crochet hook into a spot at the lower edge of your project, where you want to place that particular bit of fringe.
- Take several strands of fringe and fold them in half.
- Use your crochet hook to grab the middle portion of the fringe, the part where the fold is centered.
- Pull the fringe partway through the project. Stop.
- Grab the ends of the fringe — all of them — and pull them through to form a knotted strand of fringe.
- Tighten the knot.
- Depending on the slippery-ness of your yarn, you may need to take additional steps to secure each strand of fringe. You can get creative here. Tie additional yarn around it; stitch stuff to it; whatever it takes to get the job done and achieve the look you want.
- When you’ve attached all your fringe, you may wish to give the whole project a slight trimming to ensure that the pieces of fringe will all be even and about the same length.
More Fringe Designs for Knitting and Crochet
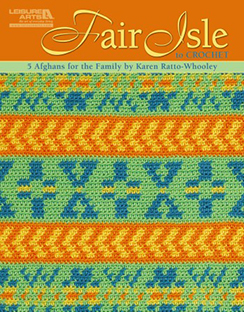
Pictured at the top of this page, above right, is my favorite collection of crochet blanket patterns that are finished with fringe. The collection is called Fair Isle to Crochet, and Karen Rhatto-Whooley is the author. The thing I love most about this book: The patterns are all colorful ones, and if you used some finishing technique other than fringe, you’d have to weave in zillions of loose ends before you could use the blanket. The author cleverly works around that by using all those loose ends to make spectacularly beautiful fringe. I think these patterns are simply genius! If you want more information about this title, you can shop for this book at Amazon. I highly recommend this book to other crafters.
- How to Make Twisted Fringe, Posted at the Berroco Yarns Website
How to Make Fringe for Suede or Leather Craft Projects
Suede and fringe go together like peanut butter and jelly. You often see fringe embellishing suede jackets, vests, bags and boots — just to name a few types of projects.
If you’re serious about leathercraft, and you have bunches of projects that need fringe, there’s a machine you can use to do it. It’s called the Table Top Lace Cutter.
If you only have a project or two that need to have fringe added — or if you enjoy doing things by hand — then you might just prefer to make your fringe the old-fashioned way.
Supply List for Handmade Leather Fringe:To make simple fringe for suede or leather craft projects by hand, you’ll need the following tools and supplies:
- A piece of suede, leather, Ultrasuede or similar fabric* to transform into fringe
- A craft project or store-bought item to attach the finished fringe to
- Tape that can easily be removed — try a wide masking tape, or similar repositionable adhesive tape
- Rotary cutter and cutting mat, preferably one that includes grid markings
- Ruler
- Marker
Suede or Leather Fringe Instructions
Cover your material with tape on one side only.
Draw a line with marker all the way across the top portion of the fabric, which will serve as the anchor for your fringe. When you cut your fringe, you’ll cut up to this line, but never beyond it.
Place the piece on your cutting mat and use the ruler to mark where you will cut each piece of fringe.
Cut the fringe using your rotary cutter.
Carefully remove the tape and discard.
Attach the fringe to your project.
Enjoy!
*These instructions could also work for fabrics that don’t unravel, such as Ultrasuede.
More Suede and Leather Fringe How-To Instructions:
How to Make Beaded Fringe
If you’d like to make beaded fringe to embellish a purse or bag, this illustration shows you an intricate high-low beadwork design you could try.
Vintage Fringe-Making Inspiration
1894 Chicago Fringe Works Catalog: This antique, public domain catalog includes numerous examples of vintage tasseled fringe and ornate fringe designs. If you want to make fringe for craft projects you plan to sell, you could copy any of these fringe designs without worrying about legal hassles; the copyright has expired on these designs.
This Antique Weldons Book includes a page with an intriguing crochet fringe illustration that could also be copied without any legal issues.
How to Sew Ready-Made Fringe Onto a Crochet Project
You don’t always need to make your own fringe; there are many lovely ready-made fringe edges and trimmings available for sale. If you want to learn how to add fringe to a crocheted pillow or other project, I invite you to check out this example of a pillow I crocheted and then embellished with ready-made fringe from the fabric store.
So there you have it; a whole bunch of different ideas for how to make fringe. No matter what kind of craft project you want to create, there’s hopefully some inspiration that will help you embellish it with beautiful fringe. Happy crafting.
This page was last updated on 5-5-2023.
Posted By: Amy Solovay