A Gift-Tag Shaped Mini Scrapbooking Album Designed by Christi Wright; Instructions Edited & Updated by Amy Solovay
Although This Is an Older Project, Supplies Are Still Available for Making Similar Mini Albums. We Just Updated the Project Instructions and Supply List to Be Current for 2022.
When Christi originally submitted this project, she was a design team member of a website that we took down a couple of years ago. However, since this project was one of the most popular projects on that site, we decided to re-post it here.
Christi originally designed this project as inspiration for a calendar challenge we posted. The challenge was to create a project that incorporated both a clear album and a calendar theme. Christi decided to take a creative approach to this challenge. Rather than doing a traditional calendar, she decided to create a time table overview of her son’s life from his birth until the present time. We hope you will be inspired by her fresh and innovative take on these ideas.
General Supply List For This Album:
These tools and supplies were used throughout the album. Please also note the additional supply lists for each page below.
- Album: The exact style of album Christi used for this project is no longer available, but you’ll find many possible alternative options for creating your own tag-shaped album. In particular, Graphic 45 is making some truly gorgeous tag albums and related supplies you’ll want to take a look at. Click here to check out multiple options for different tag albums that are currently available. Clear Scraps is also making some other tag-shaped albums you might want to consider using for this project. The album Christi originally used measured only 3”x 5”. Graphic 45 makes tags in this general size range you can use. If you have a die cutter, you could also use this die by Graphic 45 to easily embellish these chipboard tags with pretty paper.
- Adhesives: You can use the adhesive of your choice for making this album. To create the sample project, Christi used Scotch double sided tape, Glue Dots and Zots Mini glue dots.
- Patterned Papers
- Stamps and ink pads
- Embellishments: Christi used rub-ons, buttons, jewels, and ribbon to create the sample project. These days, I would recommend using washi tape instead of ribbon, because it is plentifully available and much easier to apply than ribbon is. In any case, these are just ideas; feel free to use them if they appeal to you, but keep in mind that it would be best for you to take a careful look at your photos and select embellishments that you think would enhance them the best. That might mean using entirely different sorts of embellishments than the ones pictured here in the sample album.
- Alphabet letter stickers or a similar solution such as rub-ons or hand-stamped alphabet letters
- Christi also used some calendar embellishments to dress up her album. The kind she used are no longer available. To create this type of effect for a current album in 2022, I would recommend picking up a calendar-themed stamp set and stamping your own calendar embellishments.
- Pen: American Crafts- Slick writer
- Ink: Stazon by Tuseniko in Olive Green and Jet Black
Tools Used:
Album Instructions:
Ink all of tag edges to add dimension. This also helps the pages stand out.
Front Cover Supplies:
- Embellishments
- Stamps and an ink pad
- Brads
- Mini alphabet letter stickers, rub-ons or a similar solution
- Faux flowers
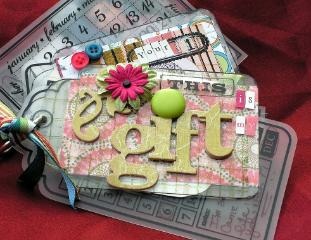
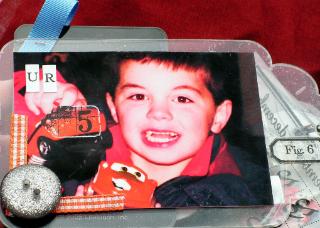
Front Cover Directions:
Ink up your stamps with ink and stamp the image on to the front cover of your album.
Add the chipboard word “gift” to inked tag cover. Then use the Big Bite and determine where to punch a hole for your brad. Punch the hole on 3/16” measurement. Add stickers or a rub-on to spell out “this”, and then add mini alphas to spell out the rest of the title. Add a flourish or other embellishment to the top left of the cover. To finish it off, place the flowers together with a brad and attach it onto the embellishment.
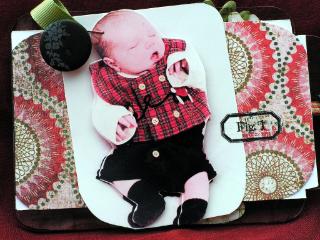
Page 1:
Page 1 Instructions:
Use a corner rounder on the patterned paper, and then attach the paper to your album page.
Christi says, “I used a wonderful technique on the photo to add dimension to the photograph. Here is how I did it. I printed 2 photos that were the same. I used my Precision scissors to cut out the picture. I then Used Dimensional Glue Dots and added it directly to the duplicate picture. I then stapled a piece of ribbon onto photograph. I then added the button with a glue dot and then added the Rub on.
You can create a similar effect on your photo if desired, or, alternatively, you could embellish your photo some other creative way.
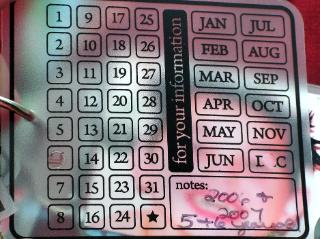
Page 2:

Page 2 Instructions:
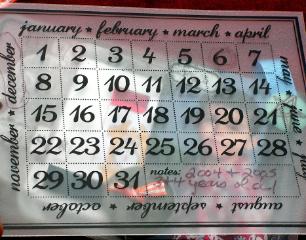
Stamp a calendar image onto cardstock or other paper and cut it out. Attach it to your tag album page. Embellish if desired.
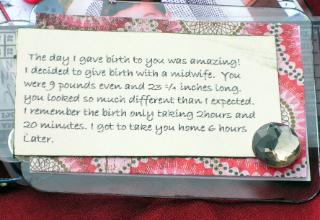
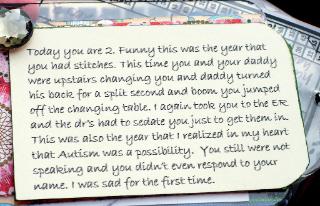
Pages 3-4: Journaling
Supplies for pages 3, 4, and 7:
- Cardstock: Bazzill
- Font: Bradley Hand ITC
Pages 3 – 4 Instructions:
Print out your journaling onto cardstock. Ink the edges of your cardstock. Adhere your patterned paper to your album page and then attach your journaling piece to the page. Then add embellishments to the edge of the page.
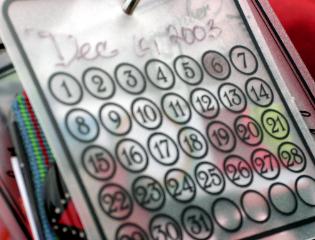
Page 5:
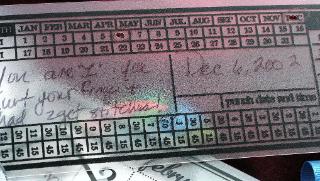
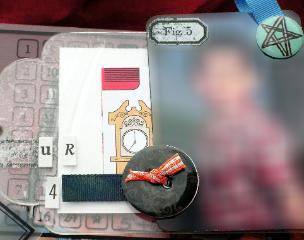
To make Page 5, use your calendar stamp set to stamp a calendar image onto cardstock or other paper. Cut it out and attach it to the album. You might wish to highlight or otherwise emphasize some details on the calendar image — perhaps a child’s birthday or other important date.
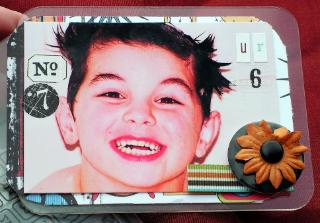
Page 6:
Page 6 supply list:
- Buttons, faux flower, brad or other embellishments
- Stamps
- Alphabet letter stickers or rub-ons
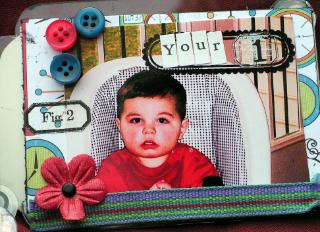
Page 6 Instructions:
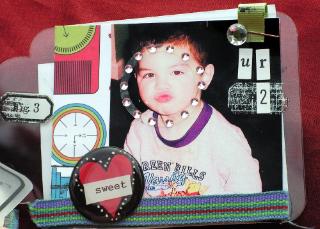
Ink your patterned paper. Then add your photograph. Embellish the page as desired. If you want to re-create the look on the sample project, you can embellish the page by placing buttons as a photo corner. Then stamp an image onto your photograph. Then add a rub-on and mini alphabet letters to your album page. Then attach a brad to make the center of the flower. Then add ribbon to your photograph. For the finishing touch, add the enhanced flower to your album page.
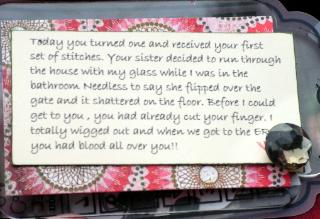
Page 7:
Page 7 Instructions:
This journaling page was completed using the same supplies and techniques used for pages 3-4.
Page 8:
To make page 8, stamp another calendar image, cut it out and attach it to your tag album page. Embellish if desired.
Page 9:
Page 9 Supplies:
- Embellishments such as stickers, jewels, ribbon and / or washi tape
Page 9 Instructions:
Ink your patterned paper. Adhere it to your page. Then stick washi tape to your photo or, alternatively, staple ribbon onto it. Add jewels or embellishments to the ribbon and embellish the page as desired. Christi added a circle to her son’s face in the photograph because he was blowing a kiss. She also added rub-ons and mini alpha stickers to her page. She adhered ribbon to her album page and then, to anchor the photo, she added an epoxy sticker.
Page 10:
Editor’s Note: Photo is blurred out, but for those of you who would like to have an idea of how to best scraplift this page, the photo used is a basic portrait photograph.
Page10 Supply List
- Patterned Papers
- Alphabet letter stickers, rub-ons, stamped letters or a similar solution
- Embellishments: Ribbon, stickers, or whatever other embellishments that would complement your photo
Page 10 Instructions:
Ink patterned papers and adhere them to your page. Then attach your picture to the page. Then add sentiments using your alphabet letter stickers or rub-ons. If appropriate, you can attach a flower embellishment or other embellishment to your page for added interest. To create the effect pictured in the sample project, you could attach ribbon or washi tape in 2 mini strips as a photo corner at the bottom right of the photograph. Continue adding stickers or other embellishments as desired. Christi added an epoxy sticker to the ribbon photo corner to anchor the photograph to her page; you could mimic this same effect if you like it, or embellish the page as you see fit.
Page 11:
Stamp a calendar image, cut it out and attach it to your tag album page. Embellish as desired.
Page 12:
Editor’s Note: The photo has been blurred out, but for those of you who would like to have an idea of how to best scraplift this page, the photo used is a portrait photograph.
Page 12 Supplies:
- Embellishments that complement your photo: perhaps stickers, gingham ribbon, washi tape or any other embellishments you like.
Page 12 Instructions:
Ink your patterned paper and attach it to page. Add washi tape, ribbon and other embellishments to page. Attach your photo to the page. Use alphabet stickers or rub-ons to add your journaling to the page, layering them over your photograph and page if desired. To finish this page in the sample project, Christi also threaded her ribbon through the button and tied it in a knot. Then she used a glue dot to adhere it to the page. You could try a similar technique if you want to; otherwise just embellish the page however you want it.
Page 13:
Page 13 Supply List:
- Gingham ribbon plus additional embellishments and supplies from the general supply list above.
Page 13 Instructions:
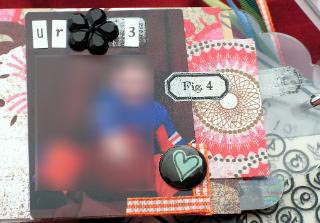
Attach your photograph to your page. Layer alphabet stickers or rub-ons onto photograph or over your page as desired. Adhere rub-on or other embellishments to your picture and page. If you want to make your page look like the project photo, you can cut 2 strips of the gingham ribbon and use them as photo corners for the picture. At this point, Christi then added the button to the photograph to anchor her photograph to the page.
Page 14:
Stamp a calendar image onto cardstock or paper and attach it to your album page. Embellish as desired.
Page 15:
Page 15 Supply List:
- The embellishments of your choice: Ribbon, washi tape, brads, faux flowers, etc
Page 15 Instructions:
Ink your patterned paper and attach it to the page. Add your picture to the page. Embellish as desired; if you want to make your page look like the sample project, rub rub-ons onto your photograph. Then add stickers to your photograph. Cut a small piece of ribbon to add flow to the page. Adhere a button onto your picture with a Glue Dot. You can push a brad though your flower and attach it at the back. Then add the flower element to the button.
Similar Projects: DIY Calendars, Planners, Planner Pages and Scrapbook Mini Albums
Christi created this calendar-themed project for a calendar challenge we posted on a now-defunct website years ago. This project remains popular now, even as we head into 2022; people are still just as interested in creating tag albums and calendar-themed projects now as they were when this project was originally posted. We’ve posted a couple of other related projects that were made for this challenge too. You can click here to see a DIY academic / student planner, or you can Click here to see Amy Solovay’s Scalloped DIY Calendar project. We hope these projects will inspire you to get busy creating your own planners and calendar albums!
See Also:
- How to Create Your Own Planners and Calendars
- Scrapbook Mini Albums
- Discbound Planners
- Art Journaling
- Travel Bucket List Planner Layout Idea
- Classic Happy Planner Review
- Are Happy Planners Refillable?
- Do Happy Planners Start in January?
- Travel Scrapbooking Ideas: How to Make a Travel Journal With Pictures
- Scrapbook Journaling: Should Every Scrapbook Page Have Journaling?
- Stamping
- Painting
- Illustration
- More Paper Crafts
This page was last updated on 10-25-2021.