School Diary Clear Album Project Idea: Designed and Photographed by Mel Nunn. Project Instructions Have Been Updated for the 2022 Calendar Year!
Original Project and Instuctions Are by Mel Nunn; This Page Was Last Updated on 10-25-2021 by Amy Solovay.
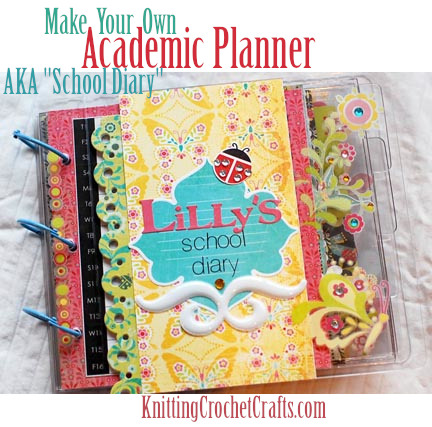
Amy says, “I used to own and maintain a website that was dedicated to clear albums. I took the website down a couple of years ago, but I still find some of the projects from that site inspiring — and worth re-posting here. This lovely academic planner / student planner, AKA “school diary”, is one of those projects.”
“At the time this student planner was originally created, Mel Nunn, the designer of the project, was a member of our website’s design team. We hosted a challenge inviting everyone to design and make their own calendars using clear albums as the basis. There were some amazingly creative entries in the challenge, and I’ll be re-posting the best of them here on this website. If you’re hoping to make your own academic planner or school calendar, I hope you will find this project, and the others from the challenge, inspiring, too.”
“If you’re hoping to create your own academic planner, the best part about this project is that extremely similar craft supplies are still available. So you can easily re-create a project that’s quite like this one if you are inclined to do so. Be sure to check out our updated list of supplies for suggestions on where to get the items you need. The supply list is current as of late 2021 / early 2022.”

There are many possibilities for different ways you could label your planner tabs. If your school uses a semester or trimester system, you could divide your pages up by semester / trimester if that would be useful to you. Or you could use one tab for your calendar, and then use the other tabs for other sections like weight loss goals, faith journaling, Christmas planning or whatever other sections you might like to have in your planner.
If you use a tabbed clear album like the one pictured, you probably will not have enough existing tabs on the album pages to label individual months. Of course, that’s no big deal, as you can always create your own tabs if you want each month to be tabbed.
How to Make a Student Planner: Instructions and List of Supplies You’ll Need for Making “Lilly’s School Diary” Clear Mini Album
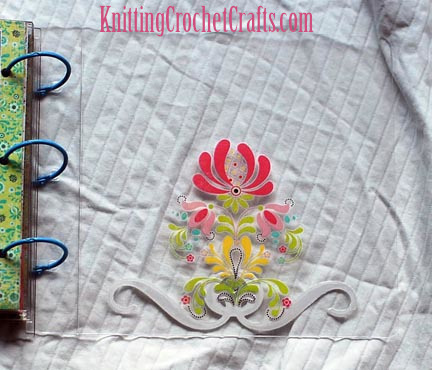
Mel says, “This diary was made so that my daughter and I could keep track of all the appointments and important dates involving her first year at school. I wanted to make the diary a type pf keepsake for her…The diary’s middle page is designed to be a photo page that she can add her favourite snaps to throughout the year.”
In the original instructions we posted for this project, Mel went on to describe the paper line she used (BasicGrey’s Urban Prairie line). This paper line has been discontinued for more than a decade. If you’ve been paper crafting for that long, it is possible that perhaps you still have some of that paper stashed; it’s also possible that you could find some of it available for sale on secondary market sites like Etsy. But, realistically speaking, the smartest move is to choose a brand new paper line to use in your planner. There are many stunning paper lines that offer you the same artsy, bohemian type of mood and feeling that the Urban Prairie line offers. I suggest checking out
In any case, you can see that you are not limited to using the usual school-themed papers for your student planner. Of course, feel free to choose school-themed supplies if that appeals to you, but also feel free to choose any other type of pattern or print that you’d be enthusiastic about looking at every day for the entire school year.
Mel says, “I designed my own calendar pages for 2009 for the diary, and have provided a template for you to print out and use.” I have also provided instructions for you to make your own diary or planner, it need not be for school use- It is pretty enough to keep for yourself!
Update: Of course, 2009 came and went a long time ago, so the 2009 calendar pages Mel designed are now obsolete. I took them down. BUT that does not mean this entire project idea is useless, because there are plenty of places you can get calendar pages. You can either make them yourself, buy pre-existing calendar pages, or buy a PDF calendar template and print out your own calendar pages. If you’re working with a 6″x6″ album, and you want to buy premade printable planner or calendar templates, it looks to me like A6 sized templates would be the most appropriate size. A6 is 4-1/8 x 5-7/8 inches (105 x 148 mm). I found multiple options for templates available for sale on Etsy:
- 2022 dated planner PDF templates — This download gives you dated yearly 2022 planner pages including a dated monthly calendar, monthly priorities and a place for writing your monthly to-do lists and task lists.
- PDF download: Multi-size planner bundle that includes A6 size plus other sizes. This bundle offers you templates for printing a Daily Planner, Weekly Planner, Monthly Planner, Study Planner, Wellness Tracker, Workout Planner, Chore List, Meal Planner, To-Do List, Shopping List, Reading List, Contacts List, and Birthday List.
- PDF Download: PDF Templates for Week-At-a-Glance Planner Pages
- PDF Download: A6 Monthly Planner Templates
- PDF download: Monthly planner extension page with task list and tracker (This download DOES NOT have calendar pages, but could be a helpful addition to your academic planner.)
The last time I made my own calendar, I was using a Mac computer, and Mac had a printable calendar function. I am not sure if that option still exists these days; you could check into that if you’re interested in printing out your own calendar. Another option is to use a set of calendar-themed clear stamps to hand stamp your calendar.
Personally, I think the easiest option would be to find a suitable calendar PDF at Etsy and pay a few bucks to download it. Then you can either print it out onto the paper you want to use (cardstock prints up well in many printers, if you want to use cardstock weight paper for your calendar pages).
Other Craft Supplies You’ll Need:
Album:
Clear Scraps still makes an album that’s extremely similar to the album Mel originally used for this project. It’s a 6″x6″ tabbed album made of clear acrylic. It has three tabs plus a front and back cover. The album comes punched with 3 holes, and the binder rings are sold separately. It’s available for sale at the Clear Scraps website.
The easiest thing to do would be to buy this album and the rings for binding it. If you buy this particular album, you also have the option to use a different system for binding if you prefer. I used to be on the Clear Scraps design team back in 2009, and at the time, some of the other design team members were using their Zutter Bind-It-All machines to bind the Clear Scraps acrylic albums together. (See one example HERE.) If you have a binding system like the Bind-It-All, it will most likely work for binding the Clear Acrylic albums Clear Scraps makes. So that could potentially be one option for you to consider.
If I were going to make this calendar, I would probably try a different approach. Instead of buying the 6×6 tabbed album, I would buy multiple clear acrylic sheets from the Clear Scraps website, plus a Crop-A-Dile disc punch by We R Memory Keepers (this is at the top of my “wish list” anyway!), plus some discs from a system like Happy Planner, Tul or Arc. The Crop-A-Dile punches punch through Clear Scraps acrylic effortlessly, so you can use the Crop-A-Dile for turning the Clear Scraps acrylic sheets into discbound planner covers, divider pages and other planner pages. You can also use the disc punch to punch your printed-out planner pages. Then you use the discs as the binding of your planner.
Adhesive:
If you use an acrylic album to make your planner, you’ll need to use adhesives that are compatible with the acrylic (not all of them are). I recommend using Glue Dots, Zip Dry paper glue, and double-sided tape
Planner Page Embellishments
There are bunches of pretty paper lines you could use for making a student planner similar to this one. Ideally, you’ll find a coordinating collection that offers stickers, embellishments and a 6″x6″ or 6″x8: paper pad. A few options to consider are as follows:
Paige Evans Wonders Collection
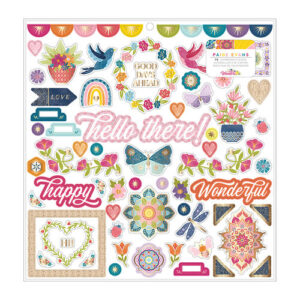
Paige Evans Wonders collection includes a colorful 6″x8″ pad with a playful, bohemian aesthetic. The collection also includes chipboard stickers and ephemera pieces that could provide spectacularly eye-catching additions to your student planner.
Other Supplies You’ll Need for Making the Inside Pages of Your Student Planner:
- To achieve the sophisticated scalloped edge on your papers, you’ll need a scalloped border punch. Mel used the Threading Water scalloped punch by Fiskars. This design has long ago been discontinued, but there are many alternatives available. Check here for scalloped border punches that are in stock and available for sale.
- Stickers
- Paper from your 6×6 or 6×8 paper pad
- Additional embellishments such as rub-on transfers, die cuts, rhinestones, etc.
- White 12″x12″ Bazzill Basics Cardstock x 4 sheets
- Calendar pages; see the links above for links to suitable A6-sized planner page templates and bundles if you want to shop for these at Etsy.
Front and back cover:
- Paper
- Stickers, Rub ons, and rhinestones or the embellishments of your choice
- Alphabet letter stickers, letter rub-ons or an alphabet stamp set and ink pad for stamping your own letters
- Binder rings — or use the binding method of your choice as described above.
Instructions:
All measurements are in inches.
Take off front and back covers and set aside.
This part is easiest if it is started from the back.
Choose 2 patterned papers from the paper pad and adhere to both sides of the last page. Adhere about 1/8 inch from the spine and punch the binding holes through the paper as you go.
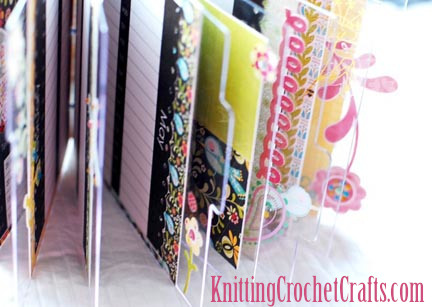
Do the same for the next 2 pages (4 sides), but for each pair of papers, trim approximately 1/16 inch off. This is so that as you see through the clear part of the diary, the patterned papers are visibly staggered. The effect is subtle and colourful.
Once you have done this to 3 pages (6 sides), set aside the next page. This will be made into a photographs page later.
Continue cutting paper shorter and adhering to pages until the last page’s (which is actually the first) paper measure around 5 ½ inches wide. You should have 6 pages covered with paper and holes punched (12 sides).
Next we need to print the templates.
Cut 3 of the white Bazzill sheets in half so that they measure 6 x 12 inches.
Open the template document and place the paper in your printer.
Adjust the paper size in your printer’s properties. This can be done by clicking on print and then going into the “printer” box, which allows you to adjust the properties of the printer. Set the paper size to “custom” and then type in 6 x 12 inches. Make sure the page is set to portrait.
Print in high quality but do not change the paper type. I found that printing with the plain paper setting had the best results.
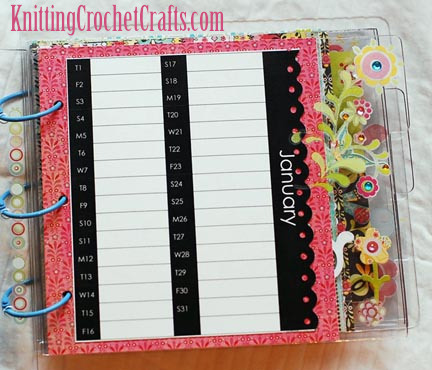
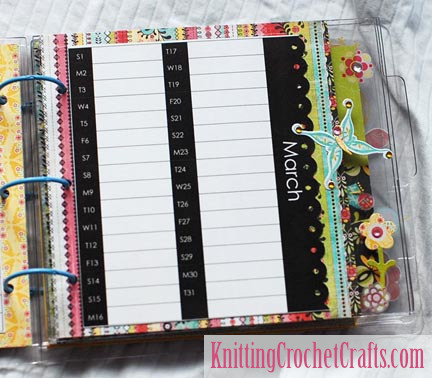
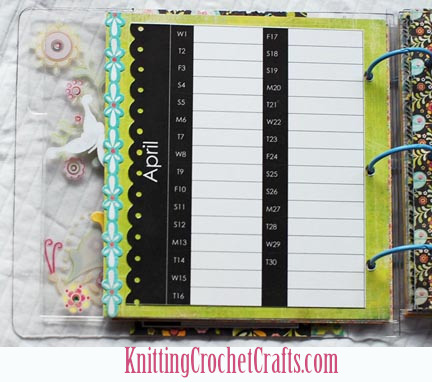
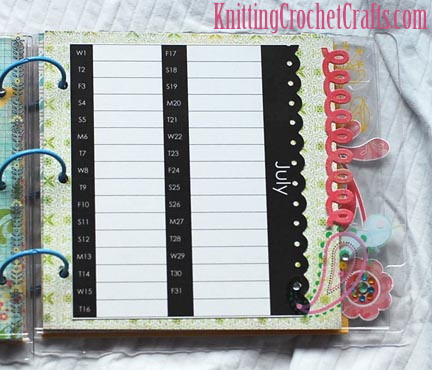
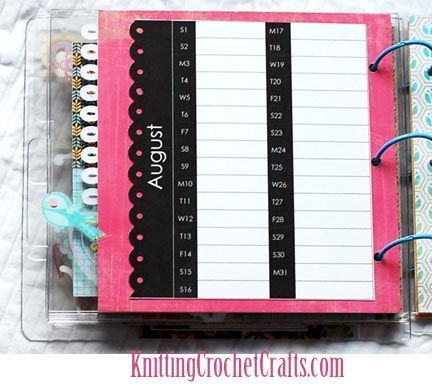
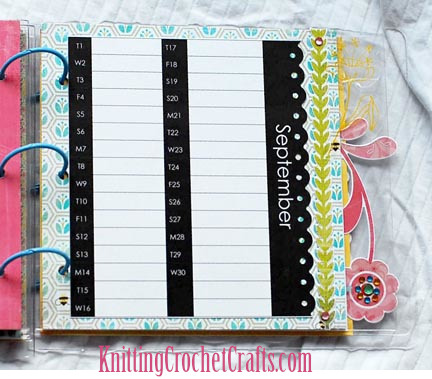
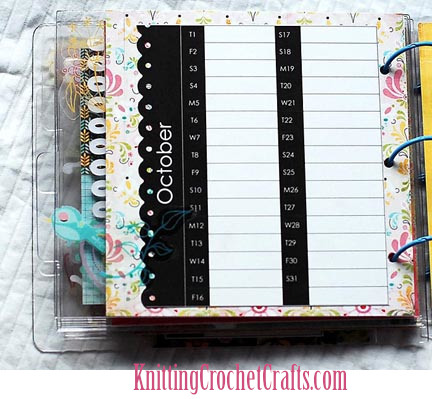
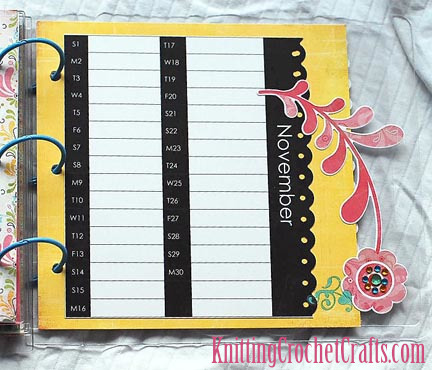
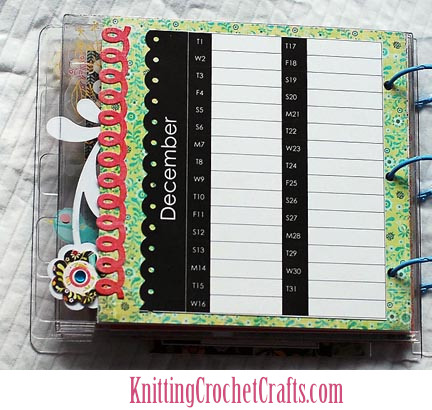
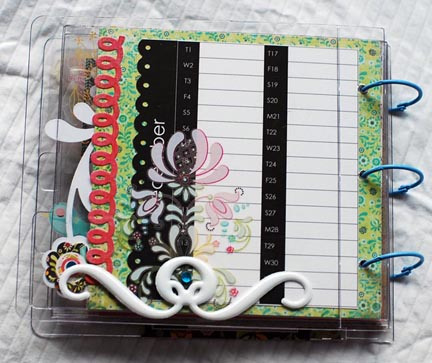
Once dry, cut out the months by trimming close to 3 sides but leaving a small white border of about 1/8 inch on the side with the month. See picture. This is because we are going to scallop the edge of the month. The Fiskars punch trims quite a bit off behind the scallops and the white will be trimmed off, leaving only black scallops.
Adhere to each page in order, with the template butting up with the binding holes.
Time to embellish the planner.
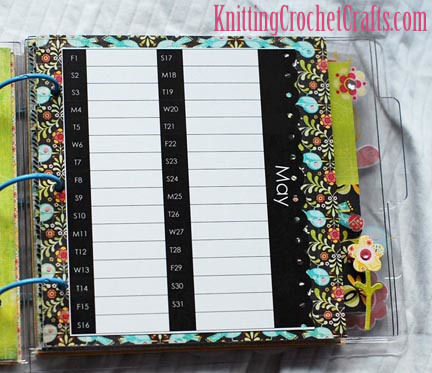
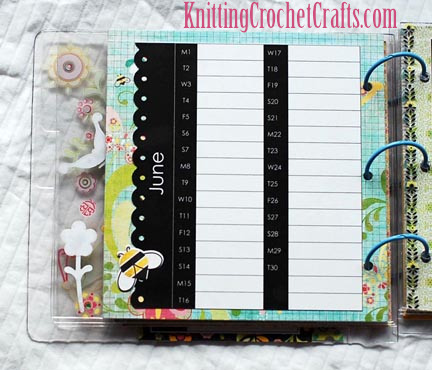
Use a variety of cardstock stickers, clear stickers and rub ons at different heights and positions on the clear parts of the pages. Do this on both sides of the pages. Use the photos as a guide and be as creative as you like!
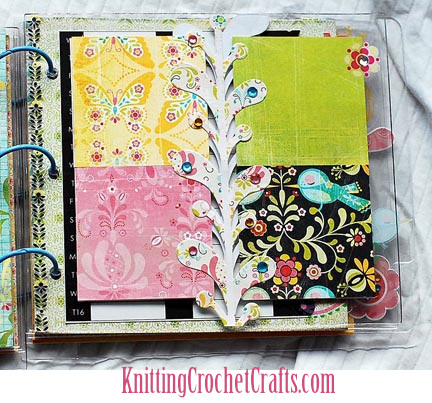
Photo Page
You place this page between the June and July pages in the diary.
Cut 8, 2 ½ inch squares from a variety of patterned papers and place them within a ½ inch from the corners of the page as shown. Do this on both sides of the page so that you have 4 squares on a page with a strip of clear down the middle.
Cut leafy cardstock sticker in half and place down the clear centre strip on the photo page. Do the same on the other side, not worrying that they don’t match up. Embellish with rhinestones and a rubon.
Photos can be placed on the squares throughout the year.
Front and Back covers:
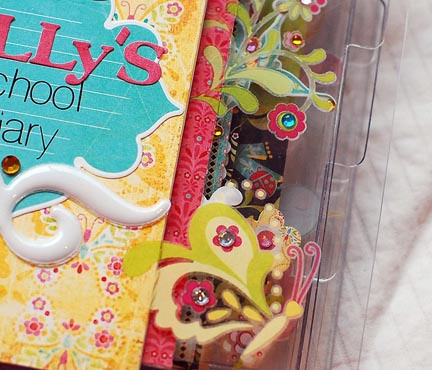
- Cut yellow and black bird paper to 3 ½ x 6 ½ and adhere to centre of both sides of the front cover. I have used the yellow butterfly paper for the cover. Adhere a blue cardstock label sticker on the centre of the yellow paper.
- Cut the blue/green cardstock scallop sticker exactly in half and adhere to the cover, to the left of the yellow paper starting from the bottom of the cover. Match up scallops on the other side of the cover with the remaining half.
- Add title with letter stickers and rub ons and embellish with white puffy sticker, bug sticker and rhinestones.
- Add an embellishment to the clear part of the cover to the right and another embellishment to the left on the other side of the binding holes. Mel used butterfly and caterpillar rub-ons for this, but you can use any embellishments you like here.
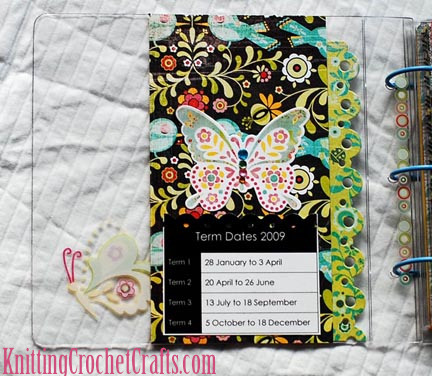
- Add table of School Term dates for the current year on the bottom half of the black bird paper on the inside of the cover. You will need to type in your own Term Dates.
- Add a butterfly sticker above the Term Dates and embellish with rhinestones.
- Inside back cover- Apply a large floral rub on to the bottom centre of the page
- Back of back cover- Add a white swirl puffy sticker and rhinestone to the bottom of the page.
- Bind with your binder rings, discs or the binding method of your choice.
More Free Project Ideas for DIY Planners and Calendars:
We hope these projects will inspire you to create some calendars and planners of your own!
Over to You: Your Thoughts on Making Planners and DIY Calendars
Did you try making one of these for yourself? How did it turn out? Please let us know in the comments.
Important note: The following comments were are older ones from the time the project was originally posted. The floor is open for comments here, too, but you have to scroll down past the older comments to get to the comments section. We invite you to share your thoughts on this project or any general ideas you might have about making your own calendars and planners. Thanks in advance for any insights you have to share.
Oct 22nd, 2008
at 3:27 pm
[…] School Diary Clear Album Project Idea For the Calendar Challenge […]
Oct 26th, 2008
at 7:13 pm
thanks for the free templates!!
Oct 26th, 2008
at 8:33 pm
You are welcome, Angie! Hope you’ll enjoy them. Thanks for dropping by.
Nov 2nd, 2008
at 3:02 am
Thanks for taking a peek at my School Diary!
Apr 10th, 2009
at 7:58 am
yoyoyoyo i am so happy i want a diary like that it is so coooool i love it please i love it i love it
Magriet Weyers Jan 29th, 2009 at 12:13 am
I would like to buy a diary like Lilly’s. 1 or 2 days per page for 2009. Can you please let me know where I can order a ready made one. Thanks. Magriet