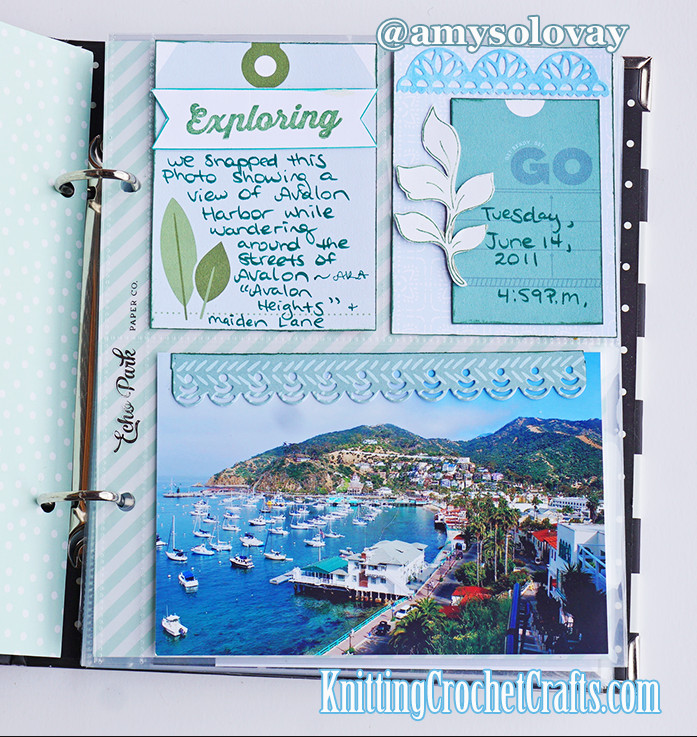
6×8 Pocket Page Scrapbooking Album Featuring a View of Avalon Harbor from Maiden Lane in Avalon, California, Santa Catalina Island
My husband, Mike, and I lived aboard sailboats and were liveaboard cruising sailors for about 5 years. The first couple of years we spent living aboard an historic vintage sailboat Called Typhoon, and we cruised the California coast. We spent a lot of that time sailing around Santa Catalina Island. I took this photo of Avalon Harbor from Maiden Lane in Avalon on June 14, 2011.
Nowadays, Mike and I are landlubbers again, and I am working on documenting all our adventures in our scrapbooks. This is a 6″x8″ pocket page scrapbooking layout I made using journaling cards, patterned papers, dies and stamps by Pinkfresh Studio.
Craft Supplies You’ll Need to Create a Similar Pocket Page Scrapbooking Layout
- Patterned Scrapbooking Papers: I used a couple of the 12″x12″ patterned papers from Pinkfresh Studio’s Happy Heart Collection to create this layout. The reverse side of the “Keep Growing” patterned paper is a gorgeous, subtle blue and white tile pattern that is quite lovely, and it is so perfect for documenting Catalina Island photos, because tile designs are an integral part of the scenery around Catalina Island — particularly in Avalon. If you spend any time at all in Avalon, you’ll notice tilework on the fountains and buildings in many places around the city. I also die cut a bit from the “New Beginning” patterned paper to create the lacy border I attached at the upper edge of the photo.
- Journaling Cards: Journaling cards make it super easy to document your adventures; you just write your journaling on the journaling card, stick it in one of the pockets of your page protector, and you’re good to go. It’s also possible to stick your journaling cards to your base paper when you make a layout. To make this page, I used two journaling cards by Pinkfresh Studio; the cards are cut-aparts that are included on one of the 12″x12″ patterned papers from the “Some Days” collection.
- Border Dies: I made the lacy border designs on this page using a couple of dies from the Lacey Edgers die set by Pinkfresh Studio.
- Stamps: I incorporated a couple of different stamped images onto this page. The first is stamped foliage made using the “Brighter Days” stamp set by Pinkfresh Studio; the second is the sentiment stamp sthat says “Exploring”, which was made by Citrus Twist Kits.
- Blue Jay Dye Ink Pad or Reinker by Pinkfresh Studio Pinkfresh Studio makes some gorgeous, dreamy ink colors that I absolutely adore! I used one of their reinkers in the “Blue Jay” colorway to create washes of ink on plain white cardstock; I die cut the inky blue cardstock using the Lacey Edger border die mentioned above to achieve the look you see pictured here. If you have outdoor pictures to scrap featuring a bright blue sky, I recommend using washes of the “Blue Jay” ink color if you’re hoping to make die cuts or any other handmade embellishments that perfectly complement your sky photos. You can use either the ink pad or the reinker to accomplish this; either one will work well for this purpose.
- Rustic Wilderness Distress Oxide Ink Pad by Tim Holtz for Ranger Industries: I used a Rustic Wilderness ink pad for a couple of purposes in this pocket page scrapbooking layout. First, I inked around the edges of all the papers and journaling cards I used on the page to make them stand out and give them more visual emphasis. Second, I stamped both the foliage and the sentiment using this color.
- Tombow Fudenosuke Brush Markers or Other Pretty Colored Pens and Markers: I used a dark green Fudenosuke marker to write the journaling for this page. I love this marker because the green color is bold and deep enough to stand out and be readable even on a colored journaling card. However, you can use pretty much any pen or marker to do your journaling.
- 6″x8″ Pocket Page Protector: I housed this pocket page scrapbooking layout in a 6″x8″ page protector by Echo Park, but you have many excellent options for 6″x8″ page protectors you could use.
- 6″x8″ Album: My layout is pictured in a 6″x8″ Sn@p Binder by Simple Stories. You have many options for 6″x8″ albums and binders you can use for storing your layouts.
So there you have it: Those are the supplies I used to create this 6″x8″ pocket page scrapbooking layout.
I didn’t create a step-by-step tutorial for how to make this scrapbooking layout, because if you look at the supply list of items I used, you can see that it’s pretty straightforward how everything on this page came together. I didn’t use any out-of-the-ordinary techniques to make this scrapbook page; it’s a truly easy paper crafts project, all things considered. However, please feel free to leave a comment if you are trying to make a page like this, and you get stuck; I’ll do my best to answer any questions you might have if any part of the crafting process doesn’t seem intuitive to you.
Thanks so much for taking a look at my paper crafts project; I appreciate your interest!
Find More Travel and Sailing Themed Scrapbooking Layouts
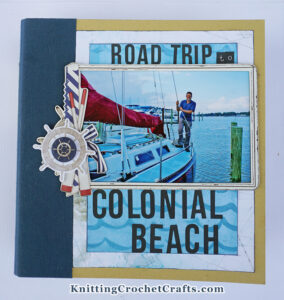
Road Trip to Colonial Beach — A Travel-Themed 6×8 Scrapbooking Album Featuring Nautical and Road Trip Themed Layouts
- Travel-Themed 6×8 Scrapbooking Album Featuring Nautical Layouts and Road Trip Pages
- Nautical Themed 6×8 Pocket Page Scrapbooking Layout Featuring Sailboat Photo
- Travel Scrapbooking Ideas: How to Make a Travel Journal With Pictures
Find More Paper Craft Project Ideas Featuring Supplies by Pinkfresh Studio
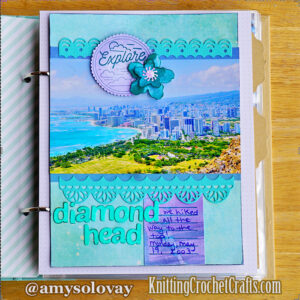
Explore Diamond Head, Oahu — Hawaii Travel Themed Scrapbooking Layout
- International Scrapbooking Day Mood Board Challenge Entry
- Slimline Card Featuring Ink Blending and Flower Stamps by Pinkfresh Studios
- Aqua Floral Themed Planner Layout for Spring Featuring Pinkfresh Studio Patterned Paper
Posted By: Amy Solovay
This page was last updated on 5-20-2023.