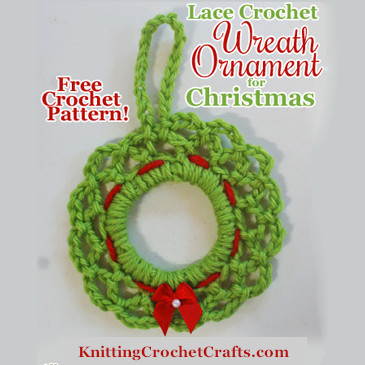
This easy wreath ornament could be a lovely addition to your Christmas décor this year. It would be ideal for hanging on your Christmas tree, or for hanging up in any spot where you want to add a little Christmas cheer. It could also make a cute door hanger, or a fun little doodad to hang from the mantelpiece — along with stockings and garlands. Omit the hanging loop, and it could become a pretty Christmas applique.
This is a fast, easy project that would also be nice for those of you who participate in ornament swaps or holiday craft sales. You have permission to sell items made from this pattern, so please do use it to support some great causes this holiday season.
Skill Level: Easy

Materials Needed to Make the Wreath Ornament:
- Medium weight green wool yarn (I used Cascade 220)
plus a small amount of red wool yarn. - 1 small red ribbon bow
- A size I / 9 5.50 mm crochet hook
- A tapestry needle and sewing thread
Gauge and Finished Size:
My sample wreath measures about 4″ in diameter, not including the hanging loop. The hanging loop adds another 2″. Gauge is not important for this project, but your finished wreath size may vary from the dimensions stated.
Abbreviations Used in This Pattern:
- ch = chain
- ch-4 space = chain-4 space, meaning a space created when you worked 4 chain stitches in the previous round.
- rep = repeat
- sc = single crochet
- sl st = slip stitch
- st = stitch
How to Crochet the Wreath:
ch 20. Join with a sl st to form a ring.
Round 1: Work 1 sl st in ea ch st around the ring.
Round 2: Rep round 1. Stop and weave in your loose end.
Round 3: 28 sc in ring. Sl st to join.
Round 4: [ch 4, skip next st, sl st in next st.] Rep sequence in brackets all the way around.
Round 5: [Sl st in next ch-4 space, ch 4.] Rep the sequence in brackets all the way around. At the end of the round, sl st into the next ch-4 space, then ch 20 or more for a hanging loop. (If you want to use this as a door hanger, keep chaining ’til you have enough stitches that the loop would fit over the door.) When your chain is the length you want it, sl st into the same ch-4 space, and then into the next ch-4 space to anchor the hanging loop.
Fasten off. Weave in loose end.
Thread your tapestry needle with red yarn and use it to stitch loosely around the wreath, working through the front and back loops in round 3.
Stitch a ribbon bow to the bottom of the wreath as pictured.
Block the wreath if desired. You may also wish to stiffen it with something like a glue and water mixture. If you crocheted this pattern with cotton, you could try starching it. I didn’t stiffen the sample wreath, but I crochet tightly, and my wreath is stiff enough on its own. If your wreath feels floppy and flexible, it could be worthwhile to stiffen it up a little.
Update:

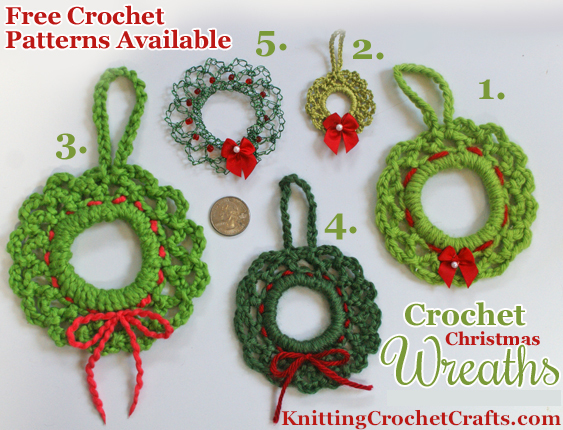
Click here to see 5 different ways this pattern could be crocheted, including a wire crochet version of the wreath.
If you found this page helpful, I invite you to return to this site often for more craft tutorials, project ideas and inspiration! You can make sure you keep this site on your radar by signing up for my newsletter and community at Substack. .
Basic subscriptions are free; I send out regular newsletters to let my subscribers know about new craft articles and tutorials as they are posted. I also share details about the craft projects I’m working on, and invite my readers to share their projects, too. So there is no need to feel like it’s just you, crafting all alone at home. I’d love to have you join us! You’re invited!!
By Amy Solovay
Please Visit My Ko-Fi Shop HERE to Find My Sample Sale, Destash Sale and Digital PDF Pattern Downloads for Sale.
Please Visit My Ravelry Store HERE to Find Digital PDF Pattern Downloads for Sale.
About the Author:
Amy Solovay is a real, live, human content creator and educator who holds an Associate of Arts degree in Textile Design from FIDM LA (The Fashion Institute of Design and Merchandising, Los Angeles) and a Bachelor of Arts degree in mathematics from Sweet Briar College. She is NOT a robot and does not use artificial intelligence (AI) to write book reviews or articles for this website.
Amy learned to crochet as a small child, and she still enjoys crocheting all these years later.

As an educator, Amy Solovay used to teach in-person college courses in trend forecasting, marketing and surface design at California Design College in Los Angeles. Nowadays she uses online platforms for sharing her knowledge about textiles, crafts, current color trends and current design trends.
Get More Christmas Crochet Patterns

- Main Directory of Christmas Patterns
- Crochet and Craft Your Own Christmas Ornaments With These Festive Patterns
- Christmas Card Making Projects and Ideas
- Big Book of Christmas Crochet Patterns: Make Your Own Christmas Decorations, Holiday Blankets, DIY Gift Boxes, and More
- Easy Christmas Tree Applique With Free Symbol Crochet Chart
- Christmas Cupcake Potholder
- More Christmas Craft Ideas
More Crochet Resources to Explore:

- Crochet Lace
- Crochet Snowflakes
- Crochet Techniques
- Crochet Tutorials
- Crochet Patterns
- Crochet Motifs
More Craft Pages You Might Enjoy:
- Winter Crafts
- Yarn for Knitting and Crochet
- Knitting
- Lace Knitting
- Knitting Supplies
- Craft Supplies
- Quilting
- Sewing
- Sewing Appliques
- Kitchen Crafts
- Paper Crafts
- Fine Art
Find More Craft Project Ideas HERE!
This page was last updated on 12-13-2024.
