Need Ideas for Using Your Sentiment Stamps to Create Components for DIY Greeting Cards, Scrapbook Layouts, Collages and Other Paper Craft Projects? Here’s What You Need to Know About Stamping Sentiments for Cards and Any Other Projects You’re Working on.
This article isn’t just about stamping; it’s actually more about getting your card-making and other paper crafts down to a system, and a science.
Lately I’ve been studying success, including successful people, and analyzing what it is they do that makes them successful. My conclusion has been this: in most cases, someone is successful because they’ve figured out a repeatable system for doing what they do, and they use the system habitually.
I think this is true of most creative people who achieve success, but it’s particularly true of successful card-makers.
Have you noticed how expensive greeting cards are at stores?
Have you ever been sucked into buying new paper crafting supplies because of the notion that you’ll make your own cards, and save money?
And then in the end have you ever kicked yourself, because you spent more on supplies than you would have spent if you just bought a box of cards and called it a day?
For me: check, check and check.
At one point in the past, I found that I was becoming a collector of stamps and craft supplies, and I wasn’t using the supplies to actually create my cards — until I worked out a system for using my supplies and getting stuff made.
In this article, I reveal part of my system for beating the spend-more-than-you-save problem: I create small card components, assembly-line-style, that are easy to grab and use whenever I need to make a card (or collage, artwork or mixed media piece.) Then I file and organize these components so that they are easily accessible when needed.
Hand-Stamped Greeting Card Sentiments:
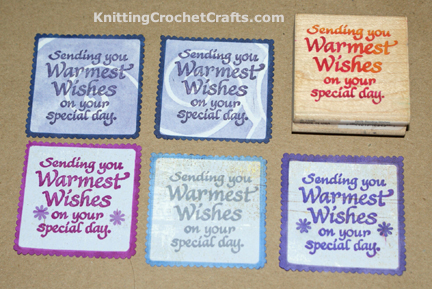
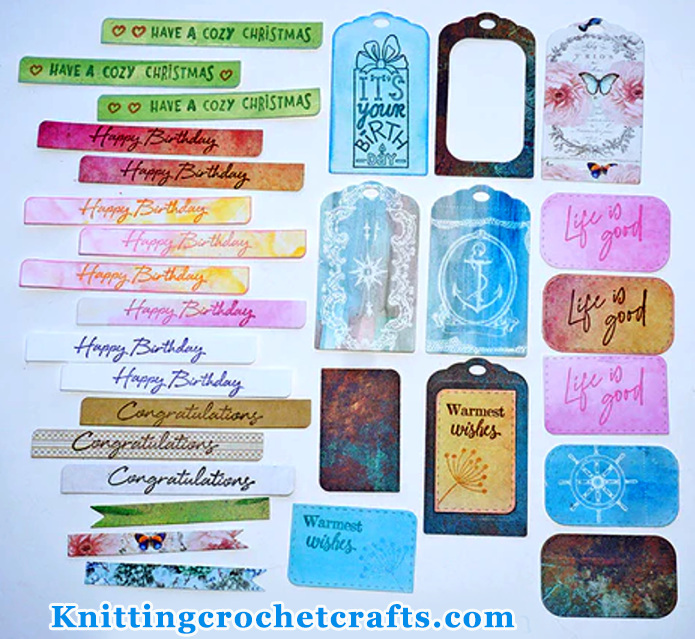
The pictures above show what used to be one of my favorite sentiment stamps, plus a bunches of different components that I’ve made using the stamp. These photos look a little dated now in Q4 of 2024 as we head into 2025, but no matter; you can still use all the latest and greatest new stamps the same way.
But there are actually a couple of amazing updates that’ll make your life easier if you want to do this:
- The first: dies and a die cutter.
- The second: A stamp positioner.
When I originally wrote this article, I didn’t have either of these items. I still don’t have a stamp positioner, and I don’t feel like I’m missing out to not have one.
I did give in to “fear of missing out” (FOMO) and get a die cutter.
However, I still also use ALL the methods discussed in this article, including fussy-cutting stamped sentiments (because many sentiments don’t come with dies, even if there are die sets available for the other stamps in the set — and because the dies they do come with don’t always do what I want them to do.)
Whether you stamp by hand with stamping blocks as I do, or you use a stamp positioning tool, either way, it’s really easy to stamp and make bunches of these little sentiments.
I stamp sentiments often. Then after stamping, I cut them out and organize them in with my other craft supplies.
Then they’re available when I’m ready to make a greeting card. I can just look through my stash of stamped images, grab a few components like these, attach them to a card base, embellish and I’m finished.
If you’ve ever been gripped by “overwhelm” when you wanted to make a card, I invite you to give this method a try.
Materials You Need:
Stamping the Sentiment
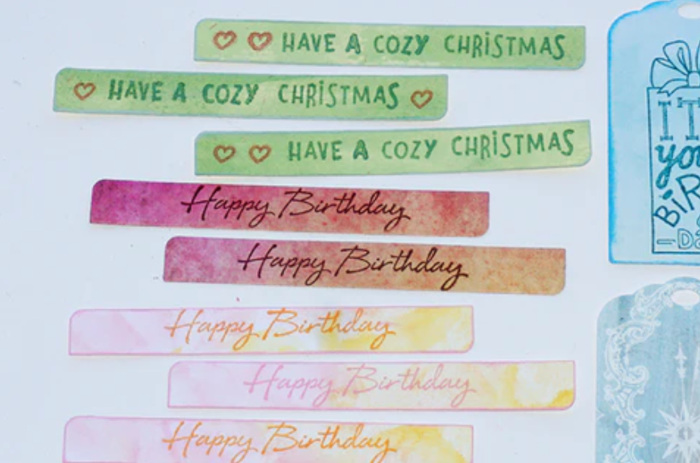
There are zillions of ways you could stamp each sentiment. The easiest way to vary the look is to change the ink color. Stamp each sentiment onto white paper using different ink colors: pinks, reds, browns, greens, blues, purples, etc. Leave enough space between stamped images to allow for cutting them out later.
Then try some tonal color combinations: Stamp the image in dark blue ink on light blue paper; stamp the image with burgundy ink onto pink paper; stamp the image in dark green onto light green paper, etc.
Next, try interesting classic color combinations; black ink on colored papers, brown ink on colored papers, navy blue ink on red paper, etc.
Next, try interesting mismatched color combinations – green ink on pink paper, for example. You can dress these stamped images up and make them look more interesting using stickers, paper punches, chalks, colored pencils, glitter and paints.
Cut Out Each Stamped Sentiment
The stamped sentiments don’t do you any good until you cut them out and use them, so that’s the next step.
If you have a die cutter, there are coordinating sets of alphabet letter stamps and dies that you could use together. I’ll teach you how to do this the old-fashioned way — with two hands and a few low-tech tools; no die cutter is necessary. But if you have a die cutter, you might just want to get yourself some of the coordinating stamp and die sets to use.
If Your Stamped Image Doesn’t Already Have an Outline, the Next Step Is to Outline Your Image Using a Template.
Depending on the stamp, you might need to do an intermediate step as well – outlining the image. Take a look at the stamp I used here:,
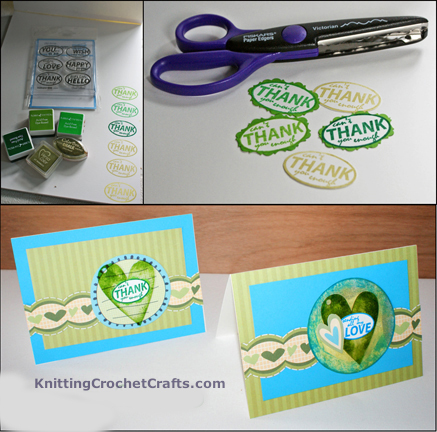
In this example, I’ve used the “Can’t thank you enough” stamp from (now defunct manufacturer) my Stampbox’s Oval Office clear stamp set; you can see that it’s already in an oval shape. I don’t need to outline the stamped image, but it also limits how much variety I can get out of this stamp.
With a stamp that is already outlined, just choose a pair of scissors – perhaps a fancy scalloped pair of scissors, perhaps a pair of pinking shears with zigzag edges, or perhaps a plain pair of scissors with a straight edge. Cut around the outline with the scissors. Then color in the area between the outline and the decorative edge.
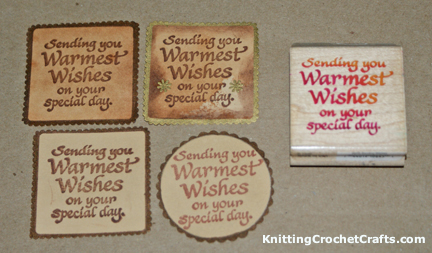
The “Sending you warmest wishes on your special day” stamp is an example of a stamp without a border. When you’re working with stamps like these, you’ll want to create your own border for this particular technique. So, if your sentiment stamp does not have a border, your next step is to give it one.
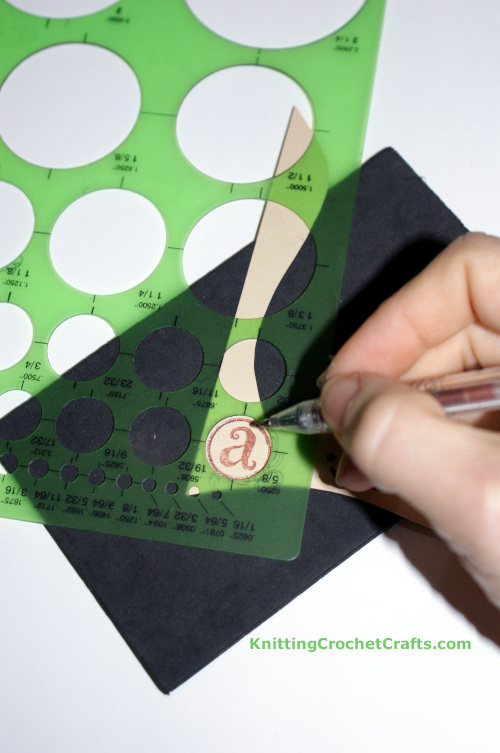
To accomplish this, take one of your templates – a circle template, an oval template, a square template, a rectangle template, or any other shaped template – and, using the template to guide you, draw around it with a pen or marker. In the picture above, I’m using a gel pen, but I think it’s even better to use markers for this purpose.
Then choose your scissors, cut the image out, and color in the edge with a marker.
I’ve tried using a variety of different borders with my “sending you warmest wishes…” stamp. My favorite happens to be square, but you can see one round example in the pictures above also.
It’s kind of subjective, which border you choose; pick one that you think looks amazing with the stamp you’re using. Or try a variety.
Even now that I have a die cutter, I still really like doing this with templates and scissors. But, this is only realistic if you have a sufficient stash of templates / stencils available (which I do).
If you have a die cutter, dies open up many more amazing and interesting options. It can be kind of mind-boggling thinking of all the possibilities. So if you have dies to use, it’ll be time well spent for you to go through your die collection and “marry up” stamps with various dies from your stash that could be compatible with them.
If you have a bunch of “old school” stamps that never came with dies, you might like to check out Emily Moore’s Card Sentiment dies. This is one of my favorite die sets to try using with random sentiment stamps. I’ve found that it’s often possible to “marry up” my sentiments with these dies. You can see a bunch of examples posted at the top of this page.
Ideas for Using Your Sentiment Stamps
Brainstorm and write down all the ideas you can think of for using each sentiment stamp.
Let’s use the “Can’t Thank You Enough” sentiment stamp as an example. This stamp is no longer available, but the same thought process will work for any “thank you” stamp you want to use.
The most obvious use for this stamp: making thank you cards. There are plenty of other ways to use it:
How about using it as the focal point for a Mother’s Day card? Or a Father’s Day card? Mother’s Day and Father’s Day are good opportunities to thank your parents for all the things they do for you.
Use it to embellish a gift or card you give to your spouse, latest crush / love interest, or best friend, thanking them for being a part of your life.
Use it to embellish scrapbook layouts where you journal about people who have been influential in your life.
If you’re into Bible journaling or keeping a gratitude journal, are there any pages where you might like to use a thank you stamp?
Or perhaps could you attach a stamped sentiment to gift tags or gift wrap when you give gifts to various people in your life. You might or might not have a child with a teacher you’d like to thank, or a trusted religious leader such as a bishop, pastor, priest, rabbi, imam, etc. There could be any number of valued individuals you’d like to thank for their contributions or presence in your life.
Of course, these ideas won’t all work for you! But brainstorming like this might introduce you to ideas that could work for you.
So keep in mind that for every stamp in every stamp set you have (or want to buy), you can use your creativity to think of different ways to use it.
Complete Your Cards or Paper Craft Projects
The next step is to use the stamped images in the projects you planned to create. You’ll probably have more stamped sentiments than time to make projects, but that’s just fine – organize your stamped images neatly with your other craft supplies, and they will be all set to use next time you need to make a quick greeting card, gift tag, scrapbook layout, or other paper craft project.
That’s it! That’s how to stamp sentiments for greeting cards and other paper craft projects. I hope you found this information helpful, and that you’ll be able to use it to ramp up your crafting productivity to its max. Happy crafting!
Over to Y0u:
This brief article doesn’t cover every last detail you might like to know about stamping sentiments for handmade greeting cards and other projects. Did you find the answers to your questions about how to do this? If not, please drop me a comment and let me know what your questions are. If I know the answers, I’ll help you to the best of my ability.
If you found this page helpful, I invite you to return to this site often for more craft tutorials, project ideas and inspiration! You can make sure you keep this site on your radar by signing up for my newsletter and community at Substack. .
Basic subscriptions are free; I send out regular newsletters to let my subscribers know about new craft articles and tutorials as they are posted. I also share details about the craft projects I’m working on, and invite my readers to share their projects, too. So there is no need to feel like it’s just you, crafting all alone at home. I’d love to have you join us! You’re invited!!
By Amy Solovay
Please Visit My Ko-Fi Shop HERE to Find My Sample Sale, Destash Sale and Digital PDF Pattern Downloads for Sale.
Please Visit My Ravelry Store HERE to Find Digital PDF Pattern Downloads for Sale.
About the Author:

Amy Solovay is a real, live, human content creator and educator who holds a Bachelor of Arts degree in mathematics from Sweet Briar College; she has also earned a separate Associate of Arts degree in textile design from FIDM LA (The Fashion Institute of Design and Merchandising, Los Angeles). She is NOT a robot and does not use artificial intelligence (AI) to write book reviews or articles for this website.
Amy learned to stamp, color and collage as a small child, and she still enjoys stamping and mixed media art techniques all these years later.

As an educator, Amy Solovay used to teach in-person college courses in trend forecasting, marketing and surface design at California Design College in Los Angeles.
Find Must-Have Craft Supplies:
Find More Fun Craft Pages, Supplies and Ideas:
- Paper Crafts
- Best Christmas Craft Books
- Holiday Crafts
- Christmas Crafts
- Illustration
- Fine Art
- Learn how to cut paper shapes, even if you don’t have a die cutter
Find More Craft Project Ideas HERE!
This page was last updated on 10-28-2024.