Cut Your Own Paper Shapes for Paper Crafts: Card Making, Scrapbooking, Collage or Mixed Media Art

Free Paper Crafts Tutorial: Making Your Own Faux Die-Cut Scalloped Papers Using Quilter’s Templates or Random Other Shapes
Die-cut shapes and papers are trendy right now, but they also tend to be expensive. A die cutter (which is a machine for making die cuts) is expensive, and it also takes up a lot of space. If you’re an occasional crafter, you might be having a hard time justifying that expense.
But even if you want to just buy some die-cut shapes, those cost a small fortune, too. A pretty sheet of die-cut paper often costs $2.00 or more! Yikes!
So how do you cut paper shapes if you don’t have a die cutter? Well, that’s totally easy — and it’s also reasonably affordable to do. It takes a little more time, but the results are lovely, and much less expensive than buying premade die-cut papers. Plus, once you know how to do it, you can use any paper you like, which gives you many more options than you’d have otherwise. I will show you the secret!
This tutorial teaches you step-by-step how to cut shapes like hearts, stars, circles (etc) using your own hands and a few cheap, low-tech tools. In the tutorial, I show you how to make a piece of scalloped paper shaped like a heart. Once you have the basic idea, you’ll be able to do this with other shapes and decorative edges as well.
Instructions
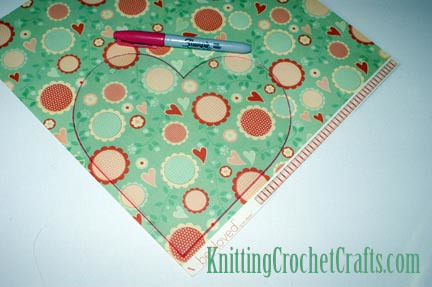
First, choose a shape you want to make. The easiest thing to do is to choose a quilter’s template or a chipboard shape made for scrapbooking or paper crafts — but those aren’t your only possibilities. You could use a clothing hang tag with a cool shape; a stencil from your kids’ stencil set; a plate from your kitchen; or even your own hand. Anything that has a cool shape and can be traced around is fair game. However, the one caveat is that it is ideal if the shape isn’t too detailed, at least for your first attempt at this.
You’ll also want to select a piece of patterned paper or cardstock, and a darker marker that coordinates with your paper.
For this tutorial, I chose…
- A page from the Clear Scraps heart-shaped acrylic album (which has now been discontinued)
- Pink Sharpie marker
- Affectionate Flowers paper from the Be Loved Collection by My Mind’s Eye (This design was discontinued long ago, but you can use any patterned scrapbooking paper for this project).
Full Disclosure: I am a long-ago former Clear Scraps design team member, circa 2009ish, and at the time I was compensated by them for this tutorial — they gave me some (but not all) of the products I used for making this. The company has changed hands since I was on their design team, but I am still a huge fan of their products. I wouldn’t recommend them to you otherwise!
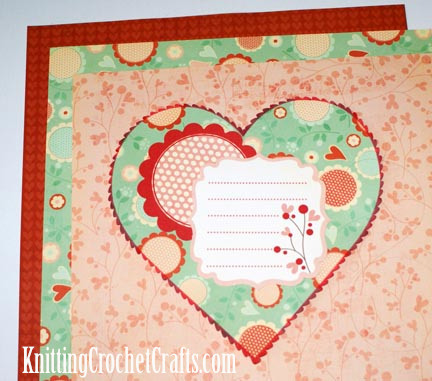
Take your shape or stencil, place it on the paper and trace around it with the marker. Remove the shape.
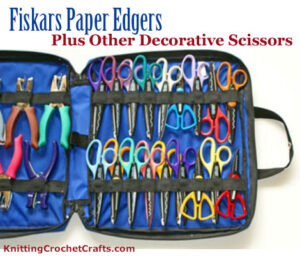
Use scalloped scissors or other decorative scissors to cut around your outlined shape. I used Fiskars Paper Edgers in the Heartstrings design to create my scalloped edges. There are lots of different decorative edges available on these scissors, so you can choose the design you like best. Update 9-10-2024 Decorative scissors like these used to be available individually, and there were a lot more designs available than there are now. These days, they’re harder to find, but you can still get them in a multi pack from Dick Blick.
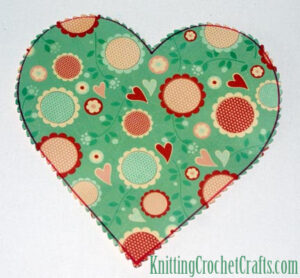
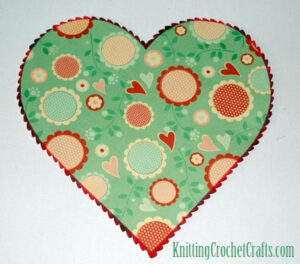
Take your marker and color in the area between the outline you drew, and the scalloped edge of the paper.
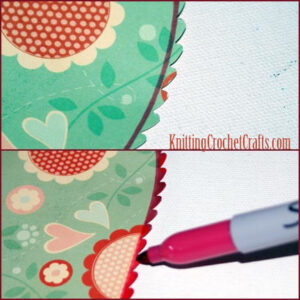
Here’s how it looks when it’s finished:
Now you can use your shape in the paper craft project of your choice — perhaps in a scrapbook layout or as part of a handmade card. There are many possibilities!
“Be Loved” Romantic Themed Scrapbooking Layout
I used my heart shape to create a scrapbooking layout with a romantic theme. This being a heart shape, it’s ideal to use for Valentine’s Day craft projects, wedding projects, anniversary projects or projects suited for any other romantic occasion.
Use Your Cut Shape in the Craft Project of Your Choice. Here’s the scrapbooking layout I made with the scalloped heart shape I cut out:
Romantic Themed Scrapbook Layout Idea
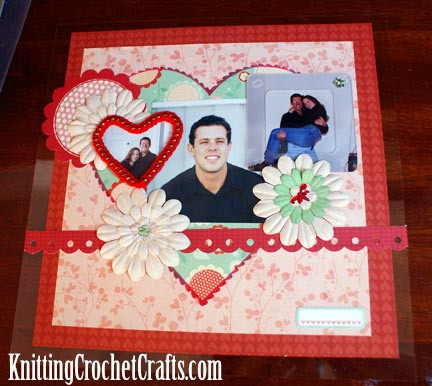
Supplies I Used to Make This Romance-Themed Scrapbooking Layout:
- Clear acrylics by Clear Scraps
- Be Loved papers and die cut shapes by My Mind’s Eye
- Beaded crochet heart shape
- Daisies and acrylic gems by Accent Scrapbooking
A frequently asked question:
I Don’t Want to Do a Heart Shape – I’d Rather Do a Cupcake / Bird / Owl / (Whatever!) Shape Instead!
There are a zillion different shapes out there, so try using whichever shapes appeal to you. When you’re using your shapes as templates, you can re-use them as many times as you like. Pretty cool!
I’ll leave you with some more inspiration, because I’ve made tons of different shaped papers using clear acrylic shapes as my templates.
Cupcake Shaped Paper

To make this cupcake shape, I placed a Clear Scraps XL Cupcake shape on plain white cardstock. I traced around it with a pink Sharpie, then cut it out with Fiskars Mini Scallop Paper Edgers, then colored in the outer edge with the same Sharpie. Then I attached the cupcake to a 12″ x 12″ sheet of pink cardstock.
Voila! It’s ready to use for making a scrapbook layout.
Bracket Shaped Paper
One more thing I should mention at this point: You can use the negative spaces as well as the positive spaces.
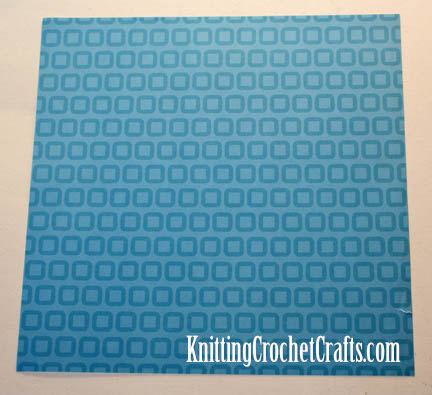
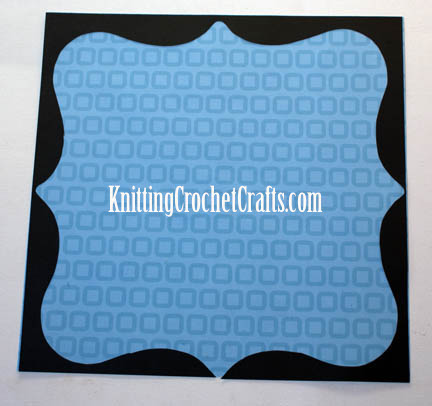
Check this out: I started with a mod blue geometric paper that’s been in my stash for years. The edges are all bent up and thrashed, but that’s OK because this technique will give me a good way to hide the messed-up edges.
I used one of the XL Deco shapes by Clear Scraps as a template for creating the dark frame around the outer edges of the paper.
I placed my acrylic shape on ink-colored cardstock and traced around it. Then I cut it out with ordinary straight-edge scissors. I used the cut out shape in a layout, and used the leftovers to enhance the mod paper with the messed-up edges. This is a quick and easy way to update papers that are looking outdated and unappealing.
More Paper Craft Ideas
Want more creative project ideas? Check these out:
- Learn how to display antique ephemera, letters and postcards easily with a clear album.
- Create a personalized academic planner for a child you love.
- Want to create an album to celebrate your favorite pet? Perhaps you’ll be inspired by this fun dog bone album.
- See even more scrapbooking project ideas!
See Also: What is fussy cutting in card making?
Posted By: Amy Solovay
This page was last updated on 9-10-2024.