Snowflake-Shaped Mini Scrapbook Album With a Skiing Theme
Have you gone on a ski trip lately? Did you take pictures of it? Here you’ll learn how to make a snowflake-shaped scrapbook album for displaying your ski vacation photos — or any winter-themed photos you might happen to have.
I used a snowflake-shaped album to create a scrapbook about one of my husband’s ski trips. If you want to make an album like this, you could use it with any winter-themed pictures. Here are free instructions for how to make this scrapbook album.
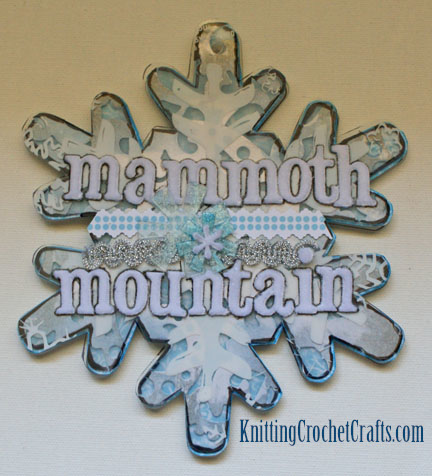
Photo of the Completed Scrapbook Album:
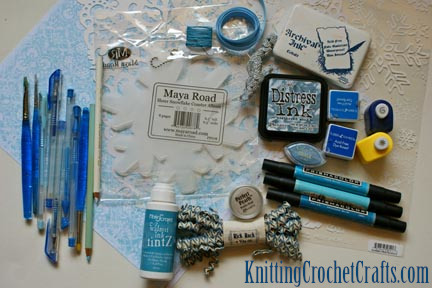
Supplies You’ll Need To Create a Ski Vacation Mini Scrapbook Album:
- Scrapbook Mini Album: I used an album that has now been discontinued, but you have a couple of options for making a similar snowflake-shaped album. Clear Scraps has a different snowflake-shaped album you could adapt for use in this project; or you could use Clear Scraps clear acrylic sheets and cut out snowflake-shaped pages to make a similar album.
- The alphabet letters in the title are Thickers letter stickers by American Crafts; I used Black Tie Velvet Thickers, but you could use any letter stickers you like – or for that matter, any other solution; rubber stamp your letters, die-cut them, or print them out on the computer and cut them out. Just be sure to choose letters that are proportionate in size to your album; you don’t want to use really big letters on a tiny album. My album is smallish, so I chose to use letter stickers with a small font.
- Patterned Paper: I used patterned paper by American Crafts, but you can substitute patterned paper from any manufacturer you like.
- Decorative Scissors: Fiskars Paper Edgers (You can buy these at Dick Blick).
- Hambly Snowflakes Transparent Patterned Overlay
- Bloom Twirl Frosty Lace Cardstock by KI Memories
- The 2 transparent blue snowflake embellishments on the front of the album are from the Fancy Pants Tabbed Book Clear Cuts Set.
- Turquoise Pearl Ex
- Tim Holtz Distress Ink in Weathered Wood
- Ice Blue Fluid Chalk Cat Eye Ink Pad
- Silver Trim
- Metallic Gel Pen
- Black Sharpie Marker
- Mod Podge or Other Adhesive. Update: I used mod podge on this project. But, I recently discovered Zip Dry Paper Glue, thanks to the ladies at Clear Scraps. I have now switched to using Zip Dry for all my clear albums. It’s really great! I recommend it. Mod Podge will always have a place in my craft supplies, but Zip Dry is definitely superior to Mod Podge for use with clear albums. It’s also great for gluing paper, because Zip Dry won’t curl the paper like Mod Podge and other liquid adhesives do.
- Plus you will also need some winter-themed photos. My photos for this project are from a ski trip.
Instructions For How To Make This Winter-themed Mini Scrapbook Album:
First, choose the photos you are going to use for your mini album. Edit and print the photos if necessary.
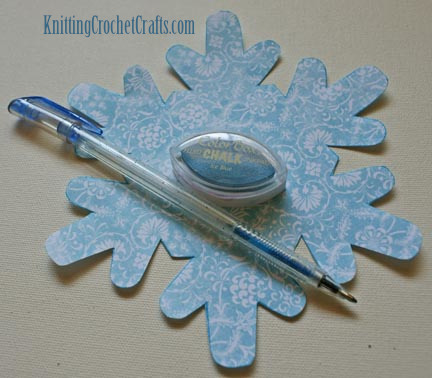
Next, gather the supplies you are going to use in one spot.
Next, prepare journaling for each photo if you want your mini album to have journaling. For this particular mini book, I am going to skip this step. The photos I am using are from one of my husband’s ski trips; I didn’t go on the trip, and I can pretty well guarantee you that my husband isn’t going to do any journaling, so forget journaling on this one. But just because I skip the journaling doesn’t mean you have to skip it if you decide to make one of these little albums.
Next, decide on the order that your photos and journaling will be displayed in the book. Figure out how many pages you will need, and whether or not you have enough pages. If your mini book doesn’t already come with enough pages, you can make more pages for it.
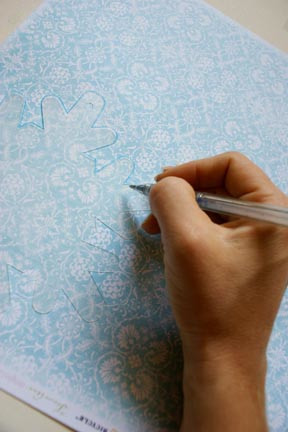
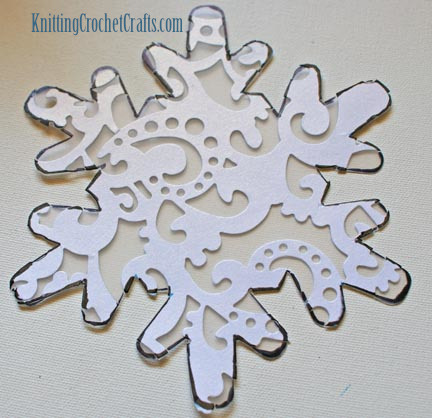
Next I am going to cut some of the papers down to the same size and shape as my album. I start with a Blue Lace patterned paper. First I trace around it with a metallic gel pen so that I can see where I want to cut.
Then I cut it out.
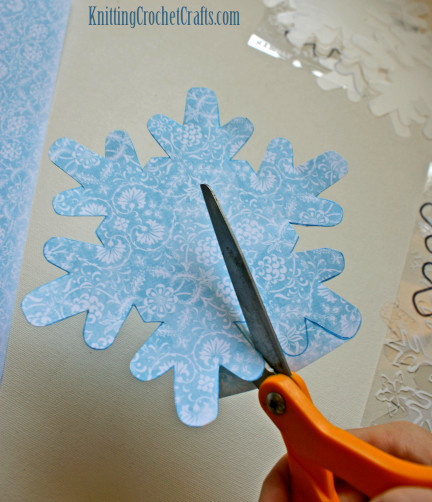
Next I inked around the edges with Ice Blue Fluid Chalk ink by Clearsnap. It’s helpful to use a smaller cat-eye ink pad (rather than using a larger inkpad) when you ink around detailed shapes like this.
I have handy the pages that I made from the Hambly Snowflakes Overlay/Transparency:
The next step is to do the same thing for the Twirl Frosty Lace Cardstock. This paper is a bit trickier to trace around and cut out because it is die cut, but it is worth the effort because the end result looks really interesting. After I was finished cutting it out, I attached it to one of the snowflake-shaped album pages. If you’re using an album that has acrylic or plastic pages, I recommend using Zip Dry paper glue as your adhesive for this. If your album pages are chipboard or paper, you can use basically any paper-friendly adhesive.
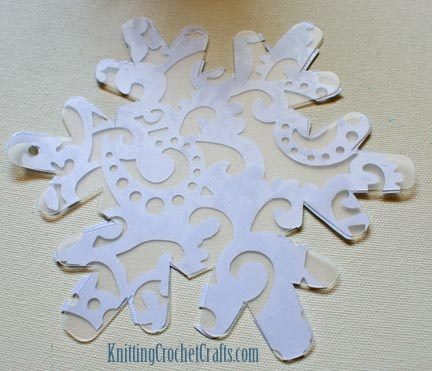
If you make this project too, you will want to flip the page over and take a look at the back (after the adhesive is dry.) See how I have uneven little bits and pieces hanging over the edges of the page? Those need to be cleaned up. Use either an X-acto knife, craft knife or tiny scissors to cut off the excess paper before proceeding. Be careful that you do not cut the actual sheer album page though.
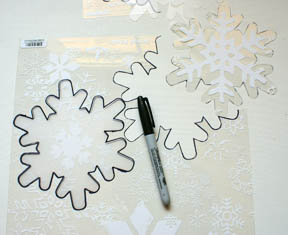
At this point, I thought the edges of the snowflake looked “unfinished” and I wanted to give them some emphasis. I roughly traced around the edges with a black Sharpie marker.
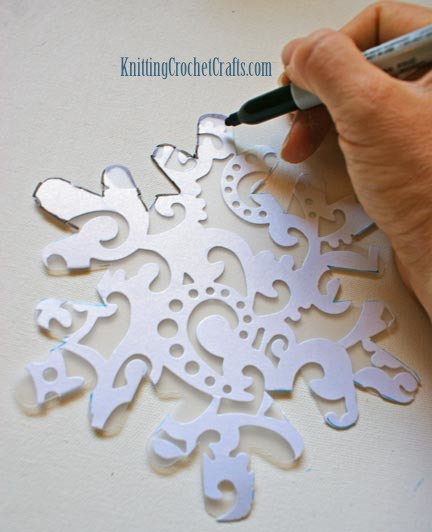
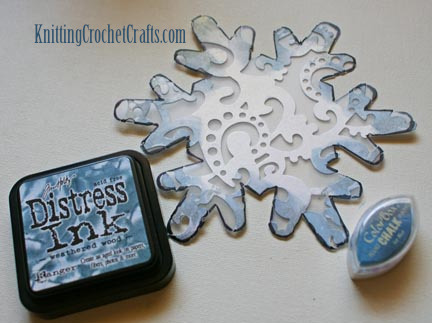
Then I inked around the edges of the snowflake page using a couple of different ink pads:
- Tim Holtz’s “Weathered Wood” Distress Ink. I used rough, uneven strokes with the ink pad to achieve a distressed effect.
- Next I used the Ice Blue Fluid Chalk again to ink the edges even more, filling in some of the more uneven places from the previous layer of Distress Ink.
Next, I added all the embellishments to finish the front cover. I spelled out “Mammoth Mountain” using letter stickers; you’ll probably want to choose a different title for your album.
I cut all my pictures for this album into circle shapes, and attached them to my album pages. For your own album, at this point, you’d want to attach your pictures, create page titles, and also attach your journaling (if you wrote any.) You’d also probably want to dress up the pictures a bit with embellishments. Or, maybe not; it depends on who you’re making the album for, and what that person likes.
My husband doesn’t like a lot of embellishments on his pages, so for my album, that was that. I left his photos plain and un-embellished. He doesn’t like having ribbon and flowers and stickers cluttering up his pages. Your mileage may vary.
So there you have it: That’s one possible way to make a snowflake-shaped skiing vacation scrapbook mini album. I hope you found this idea inspiring!
Have you taken any ski trips lately? Where did you go? Did you take pictures? Will you be documenting your photos in a scrapbook album? If so, tell us about your ideas for your ski vacation album in the comments.
Thanks for dropping by. If you’d like to find even more craft project ideas, you’re invited to stay and browse awhile. Perhaps you’d enjoy the following related resources on our website:
Check Out More Snowflake Craft Ideas:
- How to make a winter holiday greeting card with snowflake and snowman
- Free crochet pattern for a beaded snowflake Christmas ornament
- Crocheted snowflake appliques
- Crochet Snowflake Potholders
- Crochet Snowflake Trivet for Beginners
Posted by: Amy Solovay
This page was last updated on 12-3-2023.