Free Instructions for How to Tie-Dye Spiral Shapes on T-Shirts or Fabric
Hello crafty friend! So you want to learn how to do spiral tie dye projects? You came to the right place. I’m Amy, former Surface Design instructor at California Design College. I used to teach fashion design majors how to do spiral tie dye via in-person, face-to-face classes. While I highly recommend taking surface design classes if they are available to you, I’m positive you can also get excellent results by checking out the Spiral Tie Dye examples I’ve shared here and following the step-by-step instructions posted in the tutorial below. If you have any questions, feel free to leave a comment, and I’ll do my best to help if I’m able to.
Craft Supplies You’ll Need for Creating Spiral Tie Dye Designs on a T-Shirt or Fabric
- A white or very light-colored shirt made of 100% cotton; alternatively, you can use a length of 100% cotton fabric.
- Latex gloves
- Dyes (I prefer fiber reactive dyes, but you could also use Rit dye or a similar product. You could also purchase a tie dye kit.)
- Squirt Bottles
- A bucket
- A Drop Cloth or newspapers to protect your work area
- Rubber Bands
If you are using fiber reactive dyes, you will also need the following supplies:
- Dust mask or respirator to wear while mixing dye powders
- Soda ash. (Mix up soda ash solution according to the instructions included with your dyes, and soak your shirt in the solution ahead of time, before following the rest of the instructions in this guide.)
- Synthropol detergent for washing your dyed shirt
Set Up Your Work Space and Get Ready to Dye.
Assuming good weather, a water source and a hose, dyeing outside is a fantastic idea. You’ll need a flat surface such as a picnic table or perhaps some cardboard boxes to work on. Otherwise, if you’re working inside, be sure to protect your work area using newspapers and / or drop cloths.Don’t wear nice clothes for this project in case of accidents; change into clothes that you don’t mind staining or possibly ruining. Wear rubber gloves and a respirator while you prepare your dyes.
Read through the instructions that came with your dyes, and follow them carefully. Decide what colors you want to use, and mix them in squirt bottles.
Dyeing the Spiral
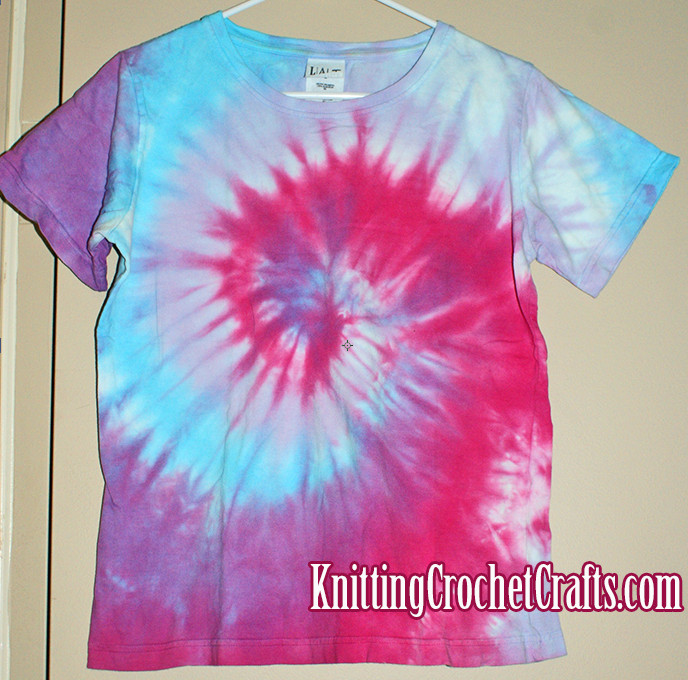
Spread your t-shirt out, laying it flat onto a flat surface. Decide where you want the center of the spiral to be. If you look at the example t-shirts pictured above, you can get an idea of where I like my spirals to center. I usually like to put the center of the spiral a bit higher than the center of the actual t-shirt. However, you could get interesting results by varying the location of the spiral — maybe even placing it in an unconventional and unique location. Feel free to get creative.
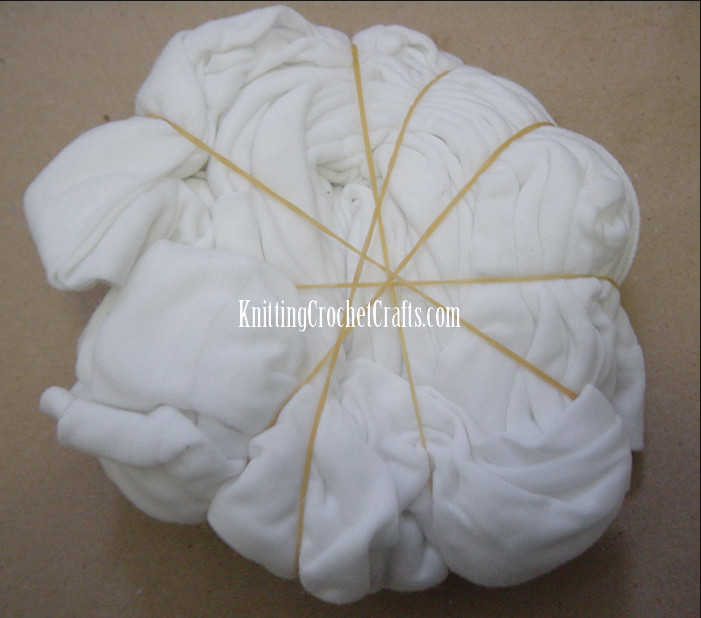
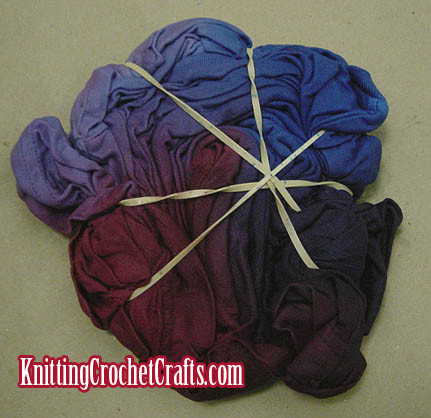
Use your fingers to gently grasp the t-shirt fabric in the spot you’ve decided on, and — without lifting it off of the flat surface — carefully twist the fabric in the clockwise direction. Your objective is to sweep the shirt into a twisted heap, then bundle it up neatly to be dyed — all the while maintaining the spiral you created. Secure the shirt with rubber bands; use the rubber bands to form multiple pie-shaped wedges as pictured.
Use your squirt bottles to saturate the shirt with dyes, blending the colors into each other in a way that you think would be attractive.
Since purple is a combination of blue and pink or red, I used those three colors together to create my spiral tie dye design. There are lots of different color combinations you can use to get similarly attractive results:
- Red, orange and yellow
- Yellow, green and blue
- Green, blue and purple
If you want your shirt to be totally dyed, without any white areas, be sure to reach all the way down into the folds of the shirt, covering every bit of it with dye. To accomplish this, you will need to keep moving the rubber bands out of your way as you work. If you don’t want white areas to appear in your design, you should make sure to get down deep into the folds of the shirt.
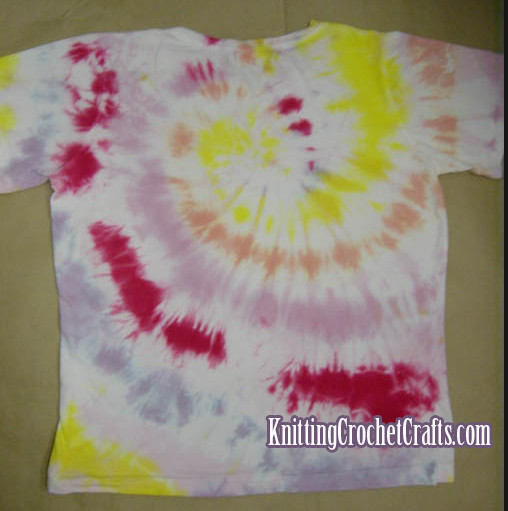
In the examples pictured above, the first t-shirt was very saturated with dyes, while the third example was not. The third example gives you an idea of what the results could look like if you do not get dyes all the way down into the folds of the T-shirt.
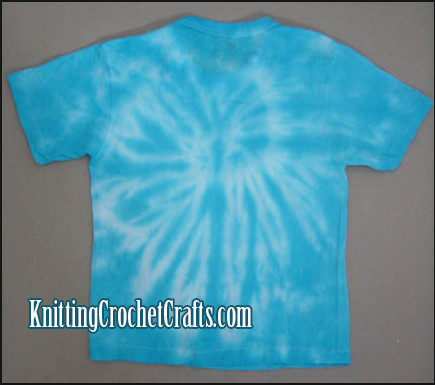
If you only want to use one color of dye, with some of the base-color of the shirt remaining, like the child’s blue and white T-shirt pictured above, then you do not want the dye to completely penetrate the shirt. You want to squirt the dyes onto the uppermost surface of the shirt, but you will also want to leave some areas of the shirt un-dyed.
Keep in mind that, when the shirt is wet, the colors will look much darker than they will look when the shirt dries. So, don’t be afraid to add as much dye as you need to, even if you think your shirt looks too dark.
From here on out, just follow the instructions included with your dyes for best results. Usually you’ll want to put the shirt in a safe place overnight. (I usually put mine in the bathtub.) Then after enough time has elapsed to set the dyes, you’ll want to rinse all the excess dye out of the fabric using synthropol. Then wash and dry the shirt before wearing it.
So there you have it: That’s how to create a spiral tie dye design on a T-shirt or fabric. I hope this tutorial was helpful to you. Happy crafting!
More Tie Dye Patterns, Tutorials, Instructions and Ideas
- Heart Tie Dye Pattern: How to Tie Dye a Heart T-Shirt (Free Instructions)
- How To Tie Dye A Stripe
- How to Dye Clothes
- Jacquard Tie Dye Kit: Fiber Reactive Dyes for Dyeing Fabric, T-Shirts and Clothing
Posted By: Amy Solovay
This page was last updated on 5-25-2023.