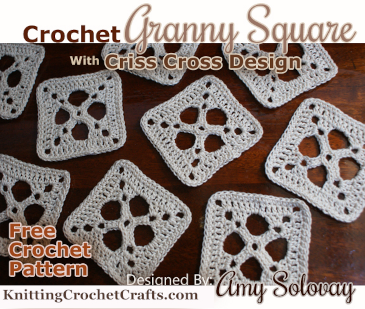
Free Crochet Pattern and Step-By-Step Photo Tutorial
Project Photos for the Criss Cross Granny Square Crochet Pattern
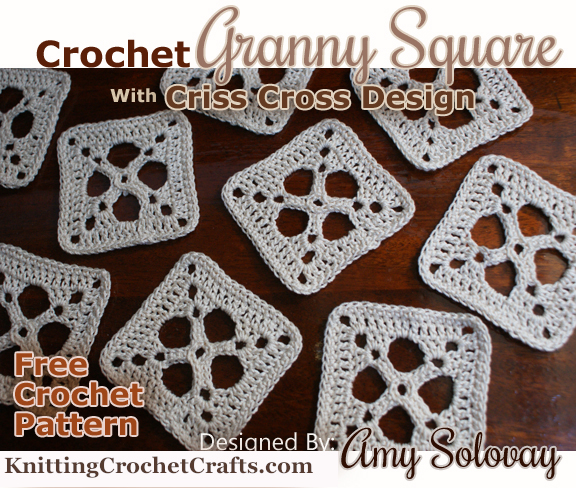
If you would like to try crocheting a square that’s unique and different from all the other granny squares you’ve seen around, the design shown above is a fantastic choice.
This one’s different because it makes use of negative space in an unusual way. There’s an x-shaped criss-cross motif crocheted right into the center of the square.
This square has many possible uses, but I think it would be nice to use for crocheting a bedspread or other linens.
Crochet Skill Level: Easy

Techniques You’ll Use to Crochet This Patern:
Crochet in Rounds: This square starts out differently than most granny squares do; but, like most other grannies, you begin working it in the center, building outward in rounds from that point.
Thread Crochet: optional but recommended; of course, you can use any yarn, thread, embroidery floss or fiber you like for crocheting this pattern.
That said, in my opinion, this square turns out nicest if you use crochet thread or a similar fine weight yarn. This is because using thicker yarns results in a larger square that has sizable holes, whereas using crochet thread results in a small square with holes of a more manageable size.
List of Supplies You’ll Need to Crochet This Granny Square:
In addition to the crochet thread, yarn or fiber mentioned above, you’ll also need a crochet hook, scissors and tapestry needle. If you use crochet thread, you’ll need either a small steel crochet hook or perhaps a size C crochet hook for working with size 3 crochet thread or embroidery floss.
Gauge: Not important for success with this project.
Size of Each Completed Granny Square:
My completed granny squares each measure about 3″ when made using sport weight yarn or size 3 crochet thread and a size C crochet hook.
Abbreviations List:
- beg = beginning
- ch = chain
- ch-sp = chain-space
- ch-sps = chain spaces
- dc = double crochet
- ea = each
- foll = following / follows
- rep = repeat
- rnd = round
- sc = single crochet
- sl st = slip stitch
- sp = space
- st = stitch
How to Crochet the Criss Cross Granny Square:
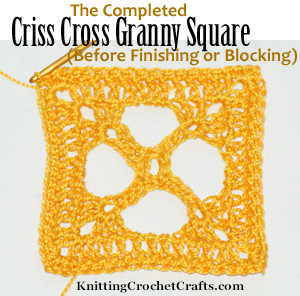
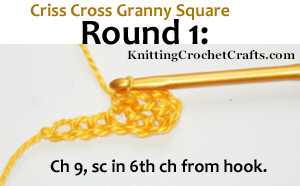
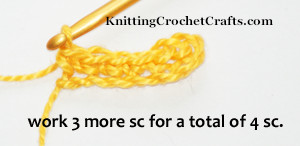
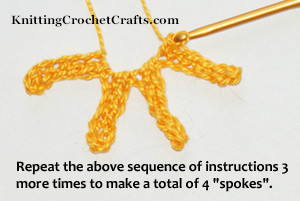
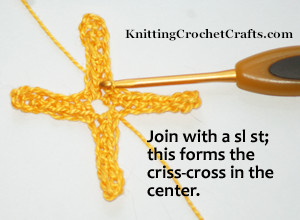
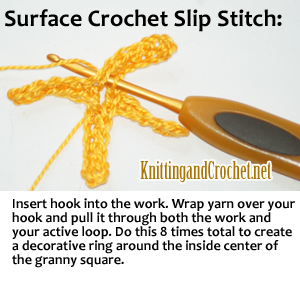
At this point, the center of this design doesn’t look all that elegant. Let’s dress it up a little and make it look more polished. To accomplish this, we’re going to work a total of 8 sl sts on the surface of the piece, around the inside of the center ring. That works out to about 2 sl sts per “spoke”:

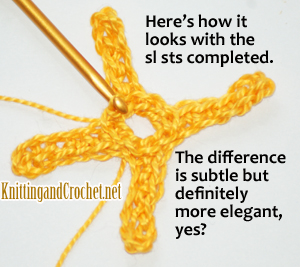
The next step is to begin working sts into the closest “spoke” of the criss-cross. In rnd 2, we’ll be working into the tips of ea “spoke”; but before we can do that, we need to work some traveling sl sts to get to the right spot in the work.
To accomplish this, work 1 sl st into ea of the next 3 sc sts formed at the beg of the rnd; then work 1 more sl st into the ch-sp ring at the tip of the spoke.
Rnd 2:
In the tip of ea spoke (formed by the ch-sps), you’re going to work the foll sequence of sts:
3 dc in ch-sp tip of spoke, ch 2, 3 dc in same ch-sp tip of spoke. Then ch 3 and move on to working the next spoke.
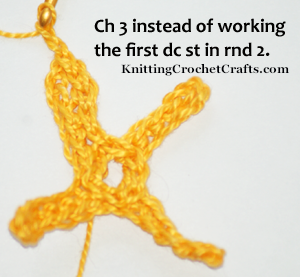
Except, to get started, you’ll ch 3 instead of working that first dc st.
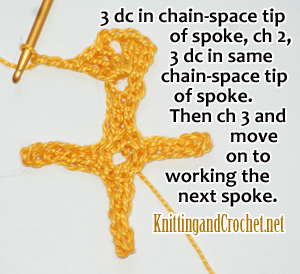
Rep this sequence of sts in ea spoke, all the way around.
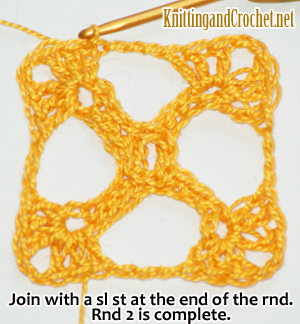
Before you start rnd 3, work a couple of sl sts to travel to the corner sp.
Rnd 3: ch 3, work 1 dc st into corner sp, ch 1 to form corner, [*2 dc in corner sp, work 1 dc st in ea of the next 3 dc, 3 dc sts in next sp, work 1 dc st in ea of the next 3 dc, * 2 dc sts in corner sp, ch 1 to form corner.] Rep sequence in brackets 2 more times, then work the sequence between *s once. Sl st to join the work to the 3rd ch from beg of rnd. Sl st in next dc, sl st in corner sp.
Rnd 4: Work 1 rnd of sc sts all the way around as foll: Work 2 sc in ea corner sp, then ch 1 to form corner, then work 2 more sc in the same corner sp. Work 1 sc st in ea dc st. At end of rnd, work a sl st to join work to the beg of the rnd. Sl st in next sc, sl st in ch 1-sp.
How to Finish the Criss Cross Granny Square
End off. Weave in ends. Use the completed granny square in the project of your choice.
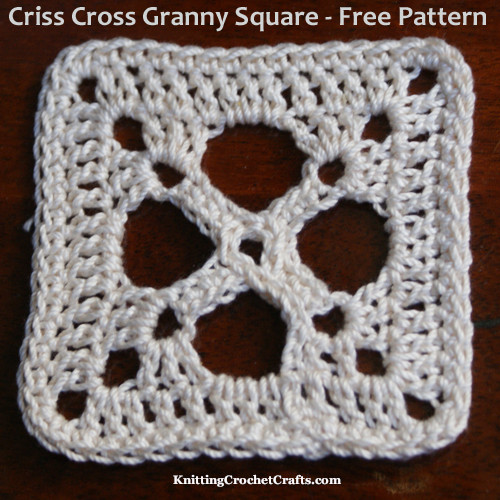
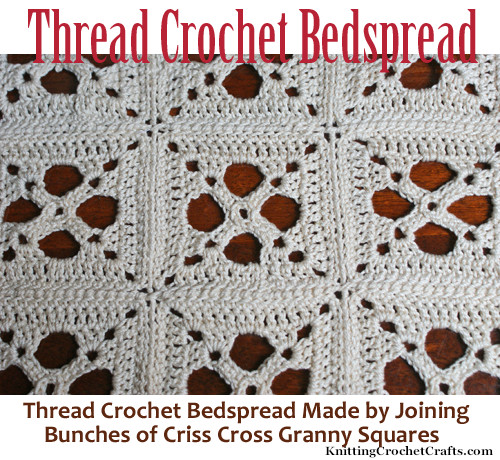
If you work bunches of these squares using crochet thread or extremely fine yarn, these squares can make a fantastic blanket or bedspread. In my opinion the pattern doesn’t work as well with yarn, because the holes in the design get to be too big. Here’s an example of how the design looks when you use thick off-white crochet thread to work it. It’s been quite awhile since I made this sample, and I forget what I made it out of, but I think it’s size 3 crochet thread.
Find More Crochet Granny Squares:
- Best Granny Square Crochet Pattern Books
- Learn How to Crochet a Basic Granny Square for Beginners
- 3d Sunflower Crochet Granny Square Pattern
Learn How to Crochet; Find Helpful Crochet Resources:
- Click here to find our main directory of crochet information.
- Click here to learn your your crochet stitches.
- Click here to learn all about crochet techniques.
- Click here to check out more craft project ideas.
By Amy Solovay
About the Author — Amy Solovay is a freelance writer with a background in textile design. She learned to crochet as a small child. After earning two degrees, one of which is in textile design, she launched a career in the textile industry. She has worked as a textile print colorist, knit designer and director of design for various Los Angeles based fabric manufacturers. Later she transitioned to writing about crochet, knitting, crafts and other topics for major media outlets. She enjoys designing crochet and other craft patterns, and she invites you to make use of them.
This page was last updated on 10-1-2024.
