Free Instructions For How to Crochet a Granny Square
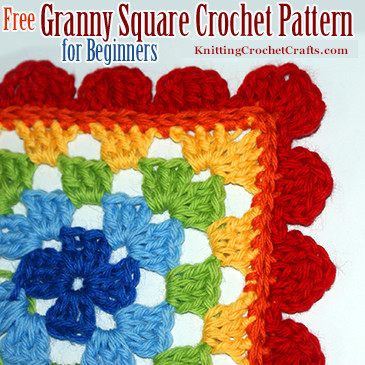
If you’re new to crochet, the granny square is a fantastic first crochet project; and if you’re an expert, there’s always a way to make a granny square look fresh and unique. If you doubt that, be sure to drop by our page of granny square patterns to check out a few of the possibilities.
The following is our beginner’s guide to the granny square; we’ve included a photo tutorial and instructions for how to crochet a basic granny square plus links to other helpful related resources.
What Is a Granny Square? Granny Square Definition:
A granny square is a type of crocheted motif that begins in the center and is then worked in a series of rounds that build outward from there.
Stitches People Use to Crochet a Granny Square:
The basic granny square is constructed using double crochet stitches, chain stitches and slip stitches, but crafters can make granny square variations using any combination of crochet stitches.
Granny Square Shapes and Variations:
Like the name suggests, the traditional granny square motif is a square. The same basic principles can be adapted to create granny triangles, granny hexagons and other shapes as well.
If you crochet along with this tutorial, you’ll learn how to make a basic granny in the traditional square shape. There are many ways to fancy up your grannies, and there are also many different ways you can use them.
Granny Square Gauge:
You can work granny squares at any gauge that’s comfortable for you.
If you’re crocheting a granny square as part of a pattern, match the gauge mentioned in the pattern as closely as possible. Otherwise you can work your granny squares at whatever gauge you like.
Supplies Needed to Crochet a Granny Square:
You’ll need yarn, crochet thread or some sort of fiber plus a crochet hook in a size that works well with your chosen fiber. Check the label on the yarn you plan to use; yarn manufacturers often suggest a crochet hook size that would work well with the yarn. Use the manufacturer’s hook size recommendation as a starting point, and begin your first granny square using your combination of selected hook and yarn. If the combination feels comfortable to you, go with it. If it feels like the work is too tight, you’ll want to start over with a larger crochet hook. If it feels too loose, you’ll want to start over with a smaller crochet hook.
It’s also helpful to have a pair of scissors and a tape measure on hand.
How to Choose Colors and Fibers for a Crochet Granny Square:
You can use any color or just about any fiber to crochet a granny square. If you’re a beginner to crochet, that can make it a bit overwhelming to choose which yarn to get started with. If you don’t already have yarn picked out for your granny squares, I recommend Cascade 220 as being the ideal yarn to get started with. Cascade 220 is forgiving of beginner’s mistakes, and it comes in just about every color you could possibly want.
Granny squares are infinitely customizable. You can make a solid-colored granny square or a multicolored one. You can use any combination of colors to create as many color variations as you can dream of.
If you’re brand new to crochet, I suggest making at least one solid-colored granny square so you get comfortable with the process before attempting color changes.
If you’ve already been knitting, crocheting or weaving for awhile, perhaps you have some yarn scraps you can use for making granny squares. Granny squares are a fantastic use for yarns that you have left over from other projects.
Granny squares are also excellent projects to use for color experiments. You can try daring color combinations that you might be too timid to use in other sorts of projects. Why not? Let the fun of the discovery process guide you in your selections, even if it takes you out of your comfort zone.
Alternatively, you can choose to use failsafe color combinations. A quick trick that always results in harmonious projects: Choose light and dark tonal gradations of the same color — for example, a light blue, a medium blue and a dark blue.
If you work with multiple yarns, the fiber contents should be the same, or compatible, to increase the likelihood that the finished project will wear evenly with repeated washing and use.
For example, do not combine cotton and acrylic in the same granny square. The cotton and the acrylic will wear differently. Acrylic is typically shrink-resistant, but cotton can shrink significantly when washed. Using these fibers together could result in a project that looks fine before washing but distorts during the washing process.
Pay attention to care instructions, and make sure that all fibers used in the same project can be cleaned using consistent methods. For example, do not use “Hand wash only” yarns in the same granny square with “Dry clean only” yarns.
Crochet Abbreviations:
- ch = chain
- dc = double crochet
- sts= stitches
- sl st = slip stitch
These Pictures Show You How to Start Crocheting a Granny Square:

Begin your granny square by crocheting 6 chain stitches. Then form a ring by taking your starting chain and joining the end of it to the beginning; to accomplish this, crochet a slip stitch into the first chain stitch you worked.
When working crochet in rounds, you’ll often substitute 3 chain stitches for the first double crochet stitch in a round; that’s what you’ll want to do here. In the first round, you work the double crochet stitches inside the ring. In subsequent rounds, you work the double crochet stitches inside the spaces previously formed by chain stitches.
Here Are the Steps for Round 1 of the Granny Square:
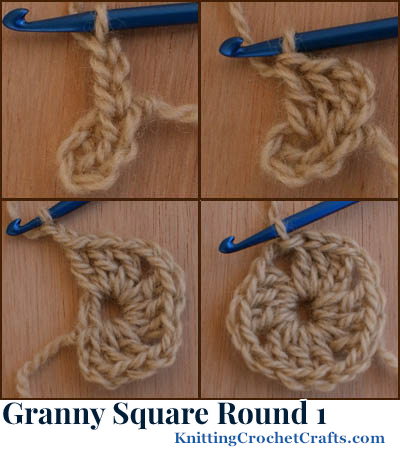
Granny Square Round 1: Ch. 3, 2 dc, ch 2, (3 dc, ch 2) 3 times, sl st to join to the 3rd chain stitch from foundation loop.
How to Change Colors Between Rounds of Your Granny Square:
You can transition from one color to the next between rounds. Work in the old color right up until the very last step of the last stitch in the round. Then pull a loop of the new color through to complete the last step. Cut the old color, leaving a long tail of yarn, and continue crocheting with the new color.
There are multiple ways to attach new yarn colors. This suggestion above is one way of doing it, but there are other ways that would work just as well.
Joining new yarn creates loose ends. Whenever possible, crochet overtop of these loose ends to hide them.
Here Are the Steps for Round 2 of the Granny Square:
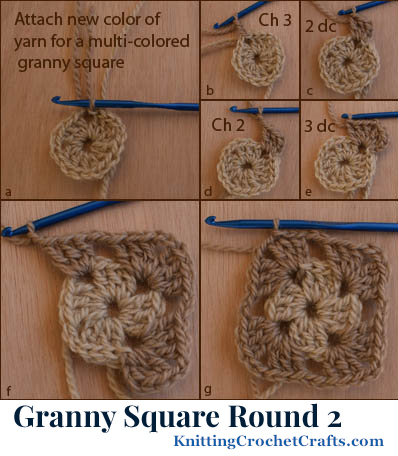
Granny Square Round 2: Work 3 sl sts (2 sl sts with the old color, and join the new color in the third) so that your crochet hook is adjacent to the space formed by the closest set of chain sts. Ch 3, 2 dc in space, ch 2 to form corner, 3 dc in same space, ch 2, (3 dc in next space, ch 2 to form corner, 3 dc in same space, ch 2) 3 times, sl st to join to the 3rd chain stitch you crocheted at the beginning of the round.
Here Are the Steps for Round 3 of the Granny Square:
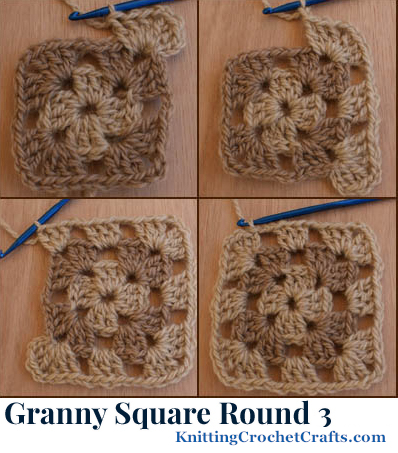
Granny Square Round 3: Work 3 sl sts (2 sl sts with the old color, and join the new color in the third) so that your crochet hook is adjacent to the space formed by the closest set of chain sts. Ch 3, 2 dc in space, ch 2 to form corner, 3 dc in same space, ch 2, (3 dc in next space, ch 2, 3 dc in next space, ch 2 to form corner, 3 dc in same space, ch 2) 3 times, 3 dc in next space, ch 2, sl st to join to the 3rd chain stitch you crocheted at the beginning of the round.
Granny Square, Round 4:
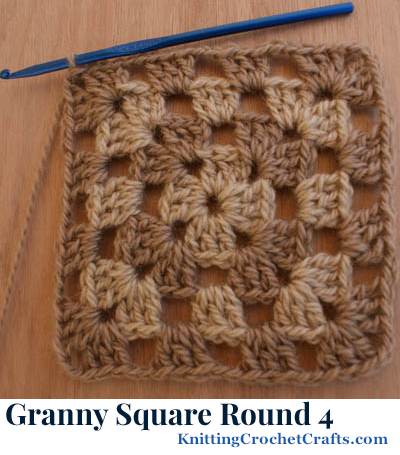
Granny Square Rounds 4 and Above: You can continue adding as many rounds as you want to your granny square. Each subsequent round will follow the same basic procedures used in the preceding rounds. You’ll start with 3 chain stitches substituting for the first double crochet. In the corners, you will work 2 sets of 3 double crochet stitches separated by 2 chain stitches. Otherwise, you will work 3 double crochet stitches in each space, separated by 2 chain stitches on either side.
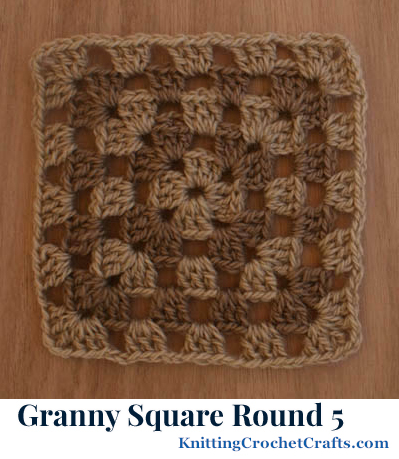
Granny Square, Round 5:
Here’s Round Five of the Crocheted Granny Square. You Can Keep Adding Rounds Until the Square Is As Big As You Want It to Be. Next, It Should Be Blocked; It Can Then Be Used in an Afghan or Other Project.
How to Finish Your Crochet Granny Square
Weave in all loose ends. You may also want to block the granny square.
Now What?
OK, so you crocheted a granny square. What will you do with it now? Need some ideas?
Make a Granny Square Blanket — To make a granny square blanket, you’ll need to crochet more granny squares. Then sew them together in an attractive arrangement that makes best use of the yarn colors you used. Whip stitch is a good stitch for sewing granny squares together. Then choose a border pattern to crochet around the edges, finishing the look of the blanket beautifully.
Make a Granny Square Pillow — You could use your granny squares to make a granny square pillow or pillow cover. Cover a pillow form with fabric that complements the color and fiber of your granny squares. Then crochet enough granny squares to cover the pillow form. Whip stitch enough squares together to form identical front and back pieces. It’s ideal if you insert a zipper along one side of the pillow cover, then stitch the other three sides of the pillow cover together; this makes it easy to remove the pillow form when you want to wash the granny square pillow cover. You can also add fringe, trim or an edging around the pillow cover if you like.
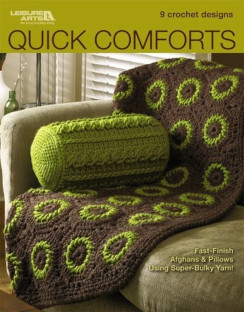
These are just a couple of ideas, but there are zillions of things you can do with your granny squares. My favorite resource for granny square project ideas is this lovely book featuring more than 49 granny square patterns. You might also wish to check out our picks for the best crochet granny square pattern books.
I hope you’ll enjoy the creative process. I wish you much success and much joy with crocheting your granny squares.
Learn More About Crochet:
- Click here to find our picks for the best crochet books — or click here to find our suggestions on the best crochet books for beginners.
- Click Here to Learn How to Crochet; This Link Takes You to a Total Beginner’s Guide to Crocheting.
- Click here to find crochet stitch tutorials and instructions.
- Click here to learn more crochet techniques.
- Click HERE to Find Fabulous Yarn for Crochet and Knitting
- Click here to learn about crochet hooks.
- Click here to find my favorite crochet project bag.
Learn About Other Crafts: Knitting, Sewing, Quilting, Paper Crafts and More
- Click here to get updated on the latest craft supplies.
- Click here to learn about knitting.
- Click here to find our beginner’s guide to knitting needles.
- Click here to find outstanding craft project ideas.
Posted By: Amy Solovay
Page last updated on 7-1-2021. Thanks for visiting!
One thought on “Granny Square ”