Related Resources: Christmas Patterns to Knit and Crochet | Crochet Blanket Patterns | Crochet Square Patterns
Skill Level: — Intermediate
Materials:
Yarn: You’ll need 3 different colors of yarn for this project:
- A Background Color (abbreviated as “MC” for “main color”) — This is the off-white color used in my project sample.
- Green — or the tree color of your choice.
- Brown — or the tree trunk color of your choice.
For best results, use yarn of the same weight and fiber contents for all 3 colors. You can use any yarn weight you like. Be aware that your choice will affect the size of your finished piece. If you crochet the piece in crochet thread or fine yarn, it will be much smaller than my project sample. I used a medium weight (worsted weight) yarn for making my sample square.
Crochet Hook: You’ll want to choose a crochet hook that’s a comfortable size for working with your chosen yarn weight. I used a size I / 9 – 5.50 mm crochet hook for working my project sample. If you tend to crochet tightly, this is a good size for working with medium weight yarn; a size H would also be a great choice for most crocheters to work with. If you crochet loosely, a size H would probably be a better choice.
Optional: If you want to make this a Christmas tree rather than just an ordinary pine tree, you might wish to stitch on some pretty three-dimensional extras that would resemble Christmas ornaments on the tree. You could use colorful buttons, sequins, bows or other eye-catching baubles for this. Or you could embroider some interesting Christmas-inspired designs onto the surface of the piece using a tapestry needle and bits of scrap yarn. You have many options for embellishing this design to make it more festive.
Supplies Needed for Making a Pillow — If you’d like to make your completed square into a pillow, you’ll need appropriate supplies to complete it. I suggest using a zipper and either a pillow form or appropriate stuffing material. For a custom designer pillow style, you may also wish to purchase a fancy fringe or other trim for stitching around the outer edge.
Other: Tapestry needle for weaving in ends
Gauge:
Unless you have a need for squares that are exactly the same size as my original project sample, it is not important for you to match my gauge when you crochet your own squares. However, if you want to join your squares together to form a larger project, it is critically important for you to match your own gauge — so be sure to check your gauge and measure each square. This will make it much easier for you to join your squares together when you are finished crocheting them.
This is less important if you crochet using a block-able fiber like wool. When you can block all your squares to the same size, like you are able to with wool projects, small size discrepancies between squares won’t be a big deal.
Finished Size:
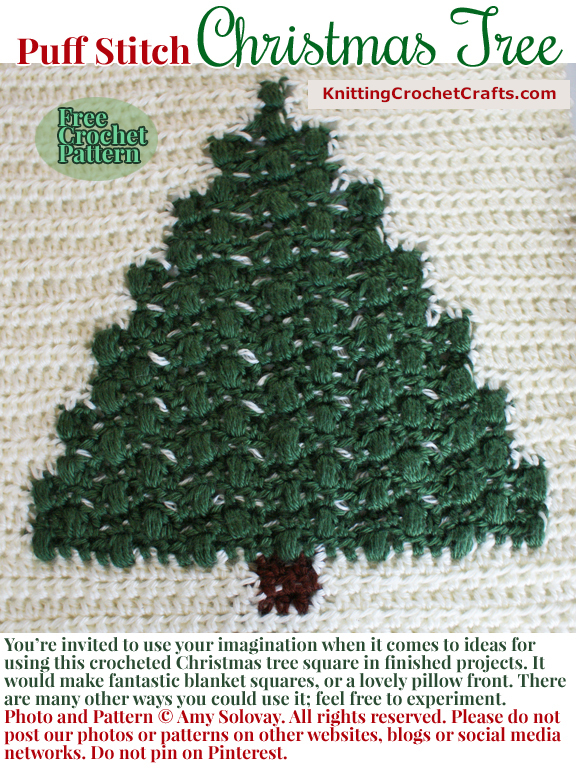
My sample square isn’t actually square; it turned out rectangular, measuring a bit taller than it is wide. My project sample measures 13 inches wide by 14.5 inches tall.
Abbreviations Used in This Pattern:
- ch = chain
- Cont = continue
- dc = double crochet
- ea = each
- hdc = half double crochet
- MC = main color (on the chart, this = white; in the project sample pictured, this = off white.)
- rep = repeat
- sc = single crochet
- sl st = slip stitch
- tr = treble crochet
- st = stitch
- sts = stitches
Special Stitch — The Puff Stitch: In this pattern, you’ll want to use a puff stitch comprised of 4 modified hdc sts, worked as follows:
- Begin as you usually would for the half double crochet: wrap the yarn over your hook.
- Insert your hook into the next stitch to be worked.
- Grab the yarn and pull it through.
- DO NOT complete the half double crochet.
- Instead, wrap the yarn over the hook again.
- Insert the hook into the same stitch as before.
- Grab the yarn and pull it through.
- Repeat the same steps again until you have 4 unfinished half-double crochet stitches in progress. There will be 9 loops on your hook all together.
- To close the puff stitch, wrap the yarn over your hook, grab it and carefully pull it through all the loops on your hook.
- Ch 1.
Design Notes: Be sure to work a turning chain of 2 hdc sts between each row.
Color Changes: To change colors, work as far as the last step of the last st in the old color. Then grab the new color of yarn and complete the last step of the st in the new color. Then cont working in the new color until you get to the next color change.
There are different techniques you utilize for making sure you have your yarn colors in the right positions for working this project. You can use the tapestry crochet technique, the intarsia technique, or a combination of both.
I used both when I made my first project sample. Because I didn’t feel like dividing my yarn and joining a second ball of it when working the sides of the tree, I carried the MC using the tapestry crochet technique.
However, now that I’ve seen the results, I’d advise you to not get sloppy like I did. With this particular pattern and color combination, it would have been better to use the intarsia method instead. The carried yarn is visible on the surface of the design, as you can see in my pictures. The intarsia method will be neater, and you won’t have that carried yarn peeking out.
Project Instructions:
ch 37.
Rows 1-5: hdc in 3rd ch from hook and in ea st across the row for a total of 35 hdc sts. Ch 2, turn. Cont working in hdc until you’ve reached the end of row 5.
Rows 6-9: In these rows, you’ll create the tree trunk on the Christmas tree. Cont working in hdc st for the first 16 sts in ea row. Then change colors to brown and work 3 hdc sts using brown yarn. Before completing the last step of the last brown hdc st, change colors back to the MC. Cont working in hdc using MC across the row until the end.
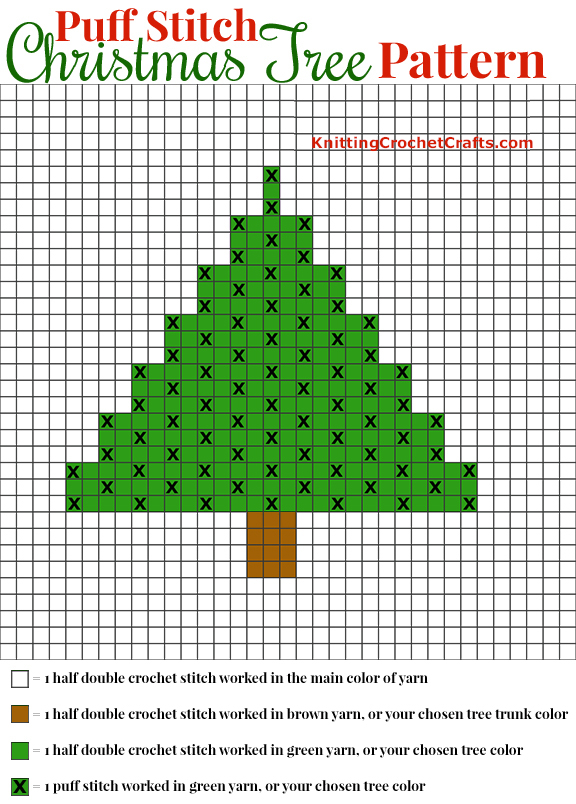
Rows 10 – 30 Work the tree portion of the design as shown on the chart. The white squares on the chart represent the areas in which you should use the MC of yarn for working hdc sts. The green areas on the chart represent the areas in which you should use green yarn. The areas on the chart marked with an X note the spots where you’ll want to work a puff st, and the plain green squares note the spots where you’ll want to work a hdc st. In row 10, you may wish to join a second ball of the MC so you can have a ball of the right color convenient to work with on either side of the tree. This makes it possible for you to work in the intarsia technique; you can just drop each color when you are finished working with it, and pick it up again when you need it again in the next row.
Rows 31 – 35 Use the MC to work these rows in hdc st.
Finishing Your Crocheted Square
There are an overwhelming number of possibilities for using or finishing this square.
Making a Pillow: I suggest using this design as a pillow front. If that’s how you want to use it, you’ll probably want to crochet some more around the edges of the piece, perhaps using one of the basic crochet stitches.
You’ll also need to make a pillow back. To create a reversible pillow, you could make a second square identical to the first one. Or you could simply work the back of the piece in hdc st, and then add the same amount of crochet work around the edge of the piece so your pillow back is the same size as your pillow front.
Weave in all your ends before finishing the pillow.
Pin your pillow pieces together with the wrong sides together and the right sides facing outward. Pin zipper in place along one edge of the pillow, and stitch to secure it. Then stitch around the other 3 sides to make the pillow cover.
You can either crochet an edging around the pillow cover, or stitch decorative fringe or trim around the edges.
Insert a pillow form or stuffing into the pillow to complete it. Enjoy!
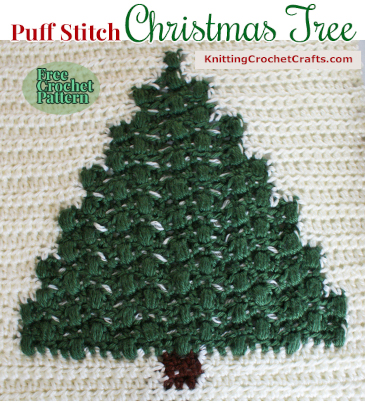
Making a Blanket: If you want to create a blanket using this design, there are zillions of different ways you could do it. One option would be to crochet bunches of squares in the same size, then join them all together, and then add a blanket border around the outer edge. Before joining the squares together, you’ll want to make sure to weave in all your ends securely.
So there you have it: That’s how to crochet a puff stitch Christmas tree square; I hope you enjoyed seeing this free crochet pattern and finding a few ideas for using it in your future craft projects.
Happy holidays to you and yours!
If you found this page helpful, I invite you to return to this site often for more craft tutorials, project ideas and inspiration! You can make sure you keep this site on your radar by signing up for my newsletter and community at Substack. .
Basic subscriptions are free; I send out regular newsletters to let my subscribers know about new craft articles and tutorials as they are posted. I also share details about the craft projects I’m working on, and invite my readers to share their projects, too. So there is no need to feel like it’s just you, crafting all alone at home. I’d love to have you join us! You’re invited!!
By Amy Solovay
Please Visit My Ko-Fi Shop HERE to Find My Sample Sale, Destash Sale and Digital PDF Pattern Downloads for Sale.
Please Visit My Ravelry Store HERE to Find Digital PDF Pattern Downloads for Sale.
About the Author:
Amy Solovay is a real, live, human content creator and educator who holds an Associate of Arts degree in Textile Design from FIDM LA (The Fashion Institute of Design and Merchandising, Los Angeles) and a Bachelor of Arts degree in mathematics from Sweet Briar College. She is NOT a robot and does not use artificial intelligence (AI) to write book reviews or articles for this website.
Amy learned to crochet as a small child, and she still enjoys crocheting all these years later.
As an educator, Amy Solovay used to teach in-person college courses in trend forecasting, marketing and surface design at California Design College in Los Angeles. Nowadays she uses online platforms for sharing her knowledge about textiles, crafts, current color trends and current design trends.
Find More Christmas Craft Ideas and Patterns
- Best Christmas Craft Books for the Holiday Season
- Classic Christmas Crochet: Traditional Holiday Ornaments, Decorations and Gifts
- Unique DIY Christmas Ornaments to Make
This page was last updated on 12-13-2024.
