Craft Project Idea: DIY Christmas Stocking With Bead Embroidery

Bead Embroidery Projects: Christmas Stocking and Hand Dyed Heart Applique
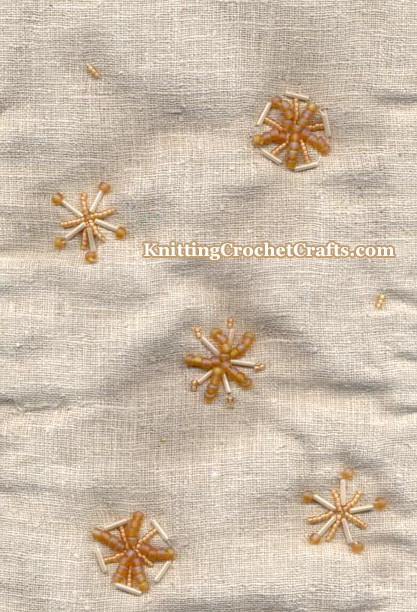
Bead Embroidered Snowflakes on a Christmas Stocking
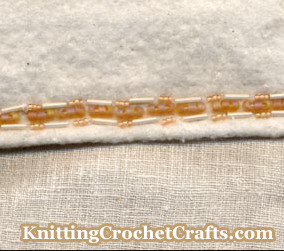
Close-Up Detail Photo of the Bead Embroidery on the Christmas Stocking
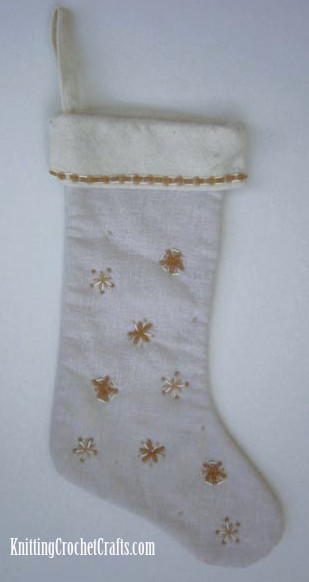
Christmas Stocking With Bead Embroidery
This bead embroidered Christmas stocking is an older craft project I made sometime in the early 2000s. I no longer have the stocking; I sold it on eBay a long time ago. So I will do my best to explain to you how I made the project, but I don’t have a precise pattern to share.
I used two layers of fabric on my stocking, but you don’t have to do it that way. My outer layer is plain weave fabric, and my inner layer is cotton quilt batting. The cuff and hanging loop are also made from the same quilt batting.
At the time, I made two different but similar Christmas stockings. I didn’t have a Christmas stocking pattern in hand, so I made my own.
This is your first step: Grab a Sharpie or other marker and freehand draw a Christmas stocking shape onto brown paper. You can grab a sock out of your sock drawer to use as inspiration, if that would be helpful to you. Alternatively, if you do happen to have a Christmas stocking pattern in your sewing pattern stash, by all means, use that instead of winging it.
I had to redraw my stocking several times before I was happy with it.
When you get to the point where you’re happy with it, cut it out.
You’ll need to cut 2 of your stocking shapes if you’re using a single layer of fabric, or 4 of your stocking shapes if you want your stocking to be double layered, like mine is. If you’re going for a single layer, you can do this by folding your fabric in half, pinning your pattern through both fabric layers, and cutting around it.
I also made a cuff for my Christmas stocking by cutting a separate piece that is ever so slightly wider than the width of the body of the stocking.
I think I used a ruler and pencil to lightly draw lines where I wanted the bead embroidery, but I just made up the pattern as I went. If I can do that, I feel sure that you can do it, too. Keep in mind that this was my first bead embroidery project, although it was not my first sewing project.
This Part Is Important: You have to do the bead embroidery before you sew the pieces of your Christmas stocking together!
Well, you don’t have to, but it will be much more challenging to do the bead embroidery once you’ve stitched all the pieces of your project together.
If you want to hang up your stocking, remember to also create a hanging loop.
After you complete your bead embroidery, pin the stocking pieces together the way you want them and stitch them together. Add the hanging loop.
So those are the basics you need to know about making yourself a DIY Christmas stocking with bead embroidery. I hope you found this project idea interesting and inspiring. Happy crafting!
Want to find more Christmas craft ideas or more beadwork projects? You’re invited to browse our related project ideas, some of which are linked below:
Find More Christmas Craft Projects:
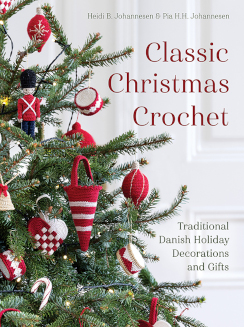
Classic Christmas Crochet Pattern Book: Traditional Danish Holiday Decorations and Gifts, by Heidi B Johannesen and Pia HH Johannesen, Published by Trafalgar Square Books
- Best Christmas Craft Books for the 2023 Holiday Season
- Beaded Crochet Snowflake Christmas Ornament: Free Pattern
- Candy Cane Lane and Elegant Swirls Christmas Card Making Project
Check Out More Beadwork Projects and Ideas:
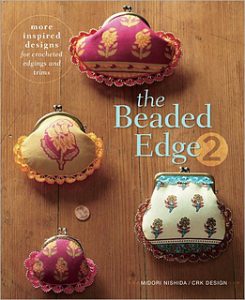
The Beaded Edge 2: A Bead Crochet Pattern Book Published by Interweave
- Beaded Christmas Napkin Rings (Free Crochet Pattern)
- Best Beadwork Books
- Wire Crochet Christmas Lace Cuff Bracelet With Beads: Free Pattern
- Wire Crochet Necklace With Green Jasper Beads: Free Pattern — This is not specifically intended to be a Christmas necklace, but it does actually end up being Christmas friendly if you make it using green and / or red beads.
- Southwestern Turquoise and Red Coral Chip Bead Bracelet — This is another Christmas-friendly craft project that can also be used for everyday wear, long after the Christmas season has passed.
Posted By: Amy Solovay
This page was last updated on 8-16-2023.