Free Card Making Instructions
Project Overview:
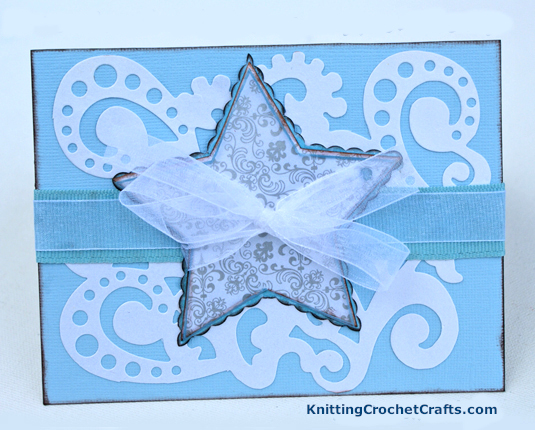
This pretty design makes an ideal Christmas card, but you could also use it for other holidays or special occasions. My sample card was not personalized with a specific sentiment or greeting on the front, but I encourage you to add a sentiment if you like.
The finished card dimensions are 7 inches wide by 5 inches high.
Supply List:
You’ll need the following materials to create a similar greeting card:
- Several different papers, including cardstock, patterned paper, and a heavy white paper like Strathmore bristol board.
- A die-cut shape such as a flourish, or a small portion of a larger piece of diecut paper
- A couple different types of ribbon
- Fray check, to keep ribbon ends from fraying or unraveling
- A small clear acrylic star shape. In the sample project, my star shape is a page from this star-shaped mini scrapbook album by Clear Scraps.
- Pencil
- Paint markers
- Scalloped scissors
- Stamping ink in the colors of your choice; I used blue and brown pigment inks to create the sample card.
- A scoring tool — bone folder, Scor-Pal tool or similar
- A paper trimmer or scissors and a straight edge
- Adhesive such as Zip Dry paper glue
- Optional, but recommended: a means of creating a sentiment for the card front. This could be done using letter stickers, an alphabet stamp set, a sentiment stamp, etc.
How to Make the Card:
Gather your supplies and let’s get started!
First, cut a piece of cardstock measuring 7″ wide by 5″ high. Ink the edges. In my sample card, I used blue cardstock and brown pigment ink, but you should use whatever colors and inks you want to.
Use adhesive to attach your die-cut shape to your cut piece of cardstock.
Adhere a couple of pieces of ribbon overtop of the die-cut shape and the cardstock.
This piece is the card front, which will be adhered to the card base to make your card. Set this card front aside for a moment so that you can work on making the base for the greeting card.
Cut a piece of Strathmore Bristol board or similar heavy white paper measuring 10 inches long by 7 inches wide. Score it using a scoring tool and then fold it in half along the score line, resulting in a card base measuring 7 inches by 5 inches.
Use your adhesive to attach the card front to one side of the card base.
Use the clear star shape as a template for drawing a star in pencil onto the back of a piece of cardstock. Use scalloped scissors to cut around the pencil lines to create a star shape with scalloped edges.
Apply ink around the edges of the star, making sure to place the ink on the textured side of the cardstock if it has a textured side.
Trace around the star shape again using pencil, this time on the back of your patterned paper. This time, you want to use straight-edged scissors to do the cutting. Apply Ink to the outer edges on the patterned side of the paper, all the way around the star.
Use a paint marker to outline around the outer edge of the clear acrylic star shape.
Layer the star-shaped papers on top of each other, with the patterned-paper star on top of the cardstock star with scalloped edges. Attach the shapes together with small dots of glue. Then use ribbon to bundle the clear star shape together with the star-shaped papers. Tie the ribbon in a bow. Treat the ends of the ribbon with Fray check to keep them from fraying.
Use a liberal amount of adhesive to attach the layered bundle of stars to the front of the card.
Not Pictured, But Important! Create a sentiment or greeting to put on the front of the card, such as “Merry Christmas” or “Happy Holidays!” or “Thank You” or “Happy Birthday, Mom!”
There’s a good reason why my sample card is pictured without an appropriate greeting already on the front if it. It’s simple; I usually don’t do this at the time I make my card. I often store the card blank, without a sentiment, and then add an appropriate sentiment at the time I’m getting ready to give the card to someone. That way, the card can easily become whatever type of card I happen to need it to be at that particular time. This idea has saved me quite a bit of time in the past, and I hope you’ll find the idea useful too.
I tend to stamp my card sentiments using either sentiment stamps or an alphabet stamp set and pigment ink. You could also use letter stickers, or create the sentiment digitally and then print it out, cut it out and attach it.
Address the card to the recipient and include a note or letter inside. It’s now ready to give, or to send.
More Card Making Ideas
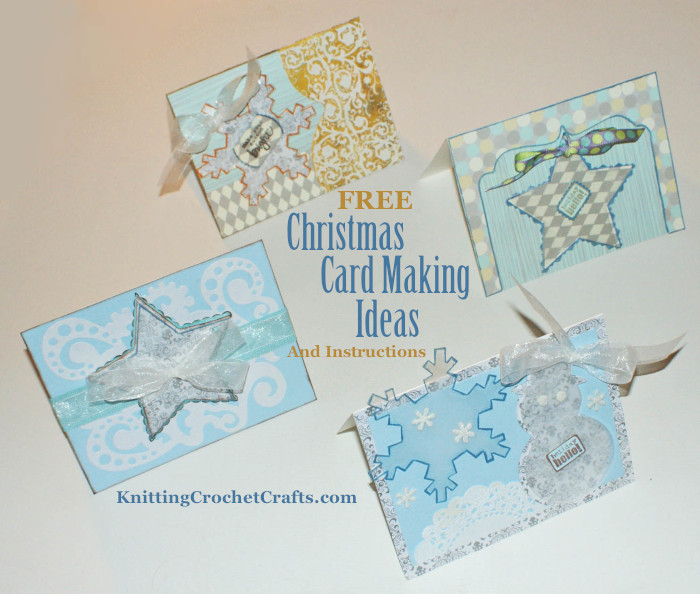
- Click here to find our main directory of card making project ideas.
- Click here to check out more Christmas card making ideas.
By Amy Solovay
About the Author: Amy Solovay is a freelance writer with a background in textile design. She holds a bachelor’s degree with a studio art minor; and she has also obtained another degree in textile design.
This page was last updated on 8-10-2021.