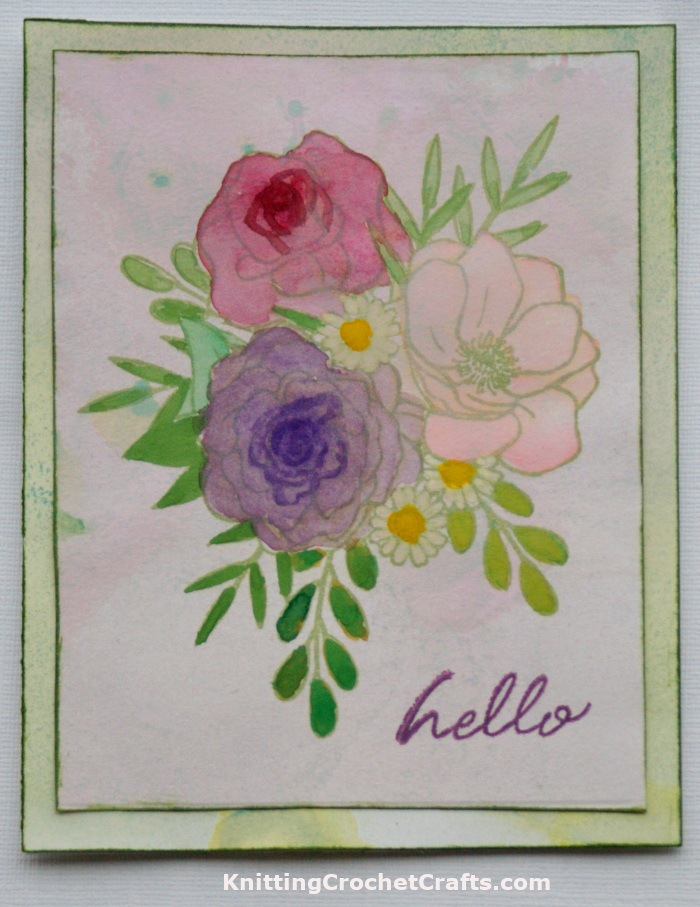
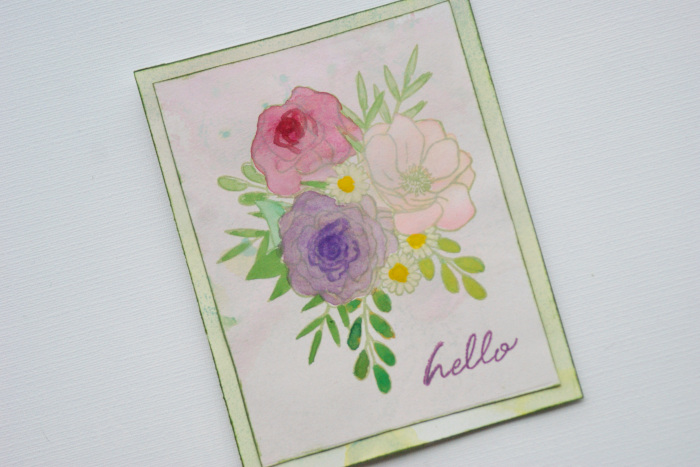
Here’s an idea for making an all-occasion greeting card featuring a hand-stamped, watercolor painted floral bouquet and a blended ink background.
I was motivated to create this new card design because the lovely people over at Hero Arts are having a challenge with the theme of “Blend It Up”. Specifically, the blending we’re all trying for this challenge is ink blending. I LOVE AND ADORE INK BLENDING, so this challenge really appeals to me. I decided to make a whole bunch of ink-blended papers to use for making projects for the challenge.
How to Make a Similar Greeting Card
There are different ways you could approach making a card like this. I tend to make cards in batches, and this approach is different than the approach you’d take if you just want to make a single card.
If you make a lot of paper crafts projects, the batch approach is typically going to be the most efficient use of your time and also the most cost-effective use of your supplies — because you waste less ink if you stamp, assembly-line style, without cleaning your stamps in between each impression. I try to stamp the same image using the same ink color at least 10 times before I clean the stamp and move on to stamping a different image or a different color. Later, when I’m ready to put together a card, a scrapbook layout or a planner layout, I have plenty of stamped images to use for making my projects. It speeds up the crafting process tremendously.
If I’m ink blending, I also tend to do that in big batches — making big batches of ink blended papers that I can later use in paper crafts projects. It is easiest to make a bunch of papers at once and let them dry before organizing them in your paper organizers and having them on hand to use.
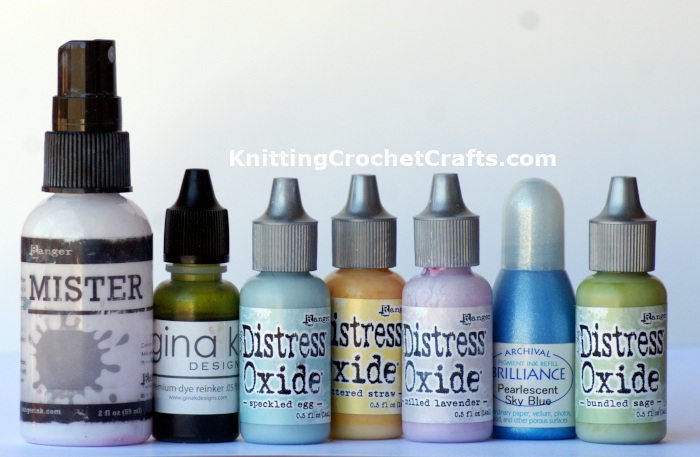
Both the border and the paper I stamped on were made using ink blending techniques. For ink blending, I typically use several different tools and supplies including ink blending tools, misters and sponge brushes. If you’re new to paper crafts, or you don’t know how to do ink blending, I invite you to check out my article on ink blending techniques. That article includes tips and advice for how to get started.
Craft Supplies You’ll Need for Making a Greeting Card Like This One
How to Make This All-Occasion Greeting Card
Make a card base by cutting, scoring and folding a piece of ink blended paper to the size you want it.
Ink around the edges of the card base using Forest Glades Crisp Dye Ink, or the ink color of your choice.
Set the card base aside and work on the floral image. First, stamp your floral image using Bundled Sage Distress Oxide or the ink color of your choice.
Paint the floral image using watercolor paints.
Let everything dry before proceeding.
Cut the floral image down to size and ink around the edges using Forest Glades Crisp Dye Ink or the ink color of your choice.
Attach the floral image to the card base using the adhesive of your choice.
Stamp the “hello”sentiment using Dusty Concord Distress Oxide ink or your preferred ink color. I stamped the sentiment directly onto the ink blended paper background.
The card is now ready to personalize and send to the recipient of your choice.
My heartfelt thanks to the folks at Hero Arts for sponsoring this challenge! It is lovely to have a bit of additional motivation for completing craft projects, and I am happy that my card stash has increased as a result of this challenge.
I invite you to return to this site often for more craft tutorials, project ideas and inspiration! You can make sure you keep this site on your radar by signing up for my newsletter and community at Substack. .
Basic subscriptions are free; I send out regular newsletters to let my subscribers know about new craft articles and tutorials as they are posted. I also share details about the craft projects I’m working on, and invite my readers to share their projects, too. So there is no need to feel like it’s just you, crafting all alone at home. I’d love to have you join us! You’re invited!!
By Amy Solovay
Please Visit My Ko-Fi Shop HERE to Find My Sample Sale, Destash Sale and Digital PDF Pattern Downloads for Sale.
About the Author:

Amy Solovay is a real, live, human content creator and educator who holds a Bachelor of Arts degree in mathematics from Sweet Briar College; she has also earned a separate Associate of Arts degree in textile design from FIDM LA (The Fashion Institute of Design and Merchandising, Los Angeles). She is NOT a robot and does not use artificial intelligence (AI) to write book reviews or articles for this website.
Amy learned to stamp and color as a small child, and she still enjoys stamping techniques all these years later.

As an educator, Amy Solovay used to teach in-person college courses in trend forecasting, marketing and surface design at California Design College in Los Angeles. Nowadays she uses online platforms for sharing her knowledge about textiles, crafts, current color trends and current design trends.
Thanks for visiting! If you’d like to stay awhile, we have many other paper craft tutorials, instructions and project ideas you might enjoy. Check ’em out:
More Ink Blending Project Ideas:
More Fun Paper Craft Project Ideas
- Mother’s Day Cards to Make
- How to Make Thank You Cards
- Planner Layouts: Find Layout Ideas for Your Planners
- Journaling Prompts for Scrapbooking
- Scrapbook Mini Albums
This page was last updated on 1-4-2026.