A Free Crochet Pattern for a Blanket Edging Worked in Single Crochet Stitch
Simple Single Crochet Blanket Border — Free Crochet Pattern
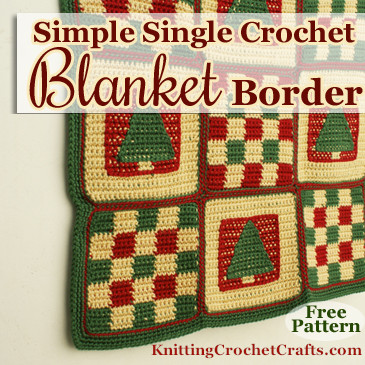
Looking for a simple border pattern to use for finishing off a crocheted blanket? If so, you might be interested in learning how to crochet this ultra-easy edging. It’s a basic, go-to pattern that not only looks simple, it’s totally beginner friendly as well.
This edging isn’t only for beginners to crochet; it’s suitable for everyone to use. I’m an experienced crocheter, and it’s still one of my favorite edgings for using on fancy blankets involving colorwork or complex crochet stitches. It’s also one of my go-to patterns for finishing off boys’ baby blankets, and afghans for guys.
Materials Needed:
- A blanket that’s in need of a border, but it’s finished otherwise
- The same crochet hook you used for crocheting your blanket
- The same type of yarn or crochet thread you used for crocheting your blanket; it can be the same color, or a contrasting color
- A tapestry needle for weaving in your loose ends at the end of the project
Pattern Notes: If you already have some loose ends accumulated around the edges of the blanket, you may want to weave those into the area around the edge of the blanket, then crochet overtop of them when you work the first round of the edging. This is how I like to weave my ends in — but it’s up to you how you do the end-weaving.
If you haven’t ended off your active loop from working your blanket, use the active loop as your starting point for crocheting the edging.
If you already ended off, start your edging by making a slip knot on your crochet hook. Then you can insert your hook into the work in a corner spot where you want to begin working your edging.
There are two different versions of this edging, which give you slightly different corners. Choose whichever one you prefer.
Round 1: Work single crochet stitch all the way across one edge of your blanket. When you get to the corner, work 2 chain stitches, and turn the corner. Continue working single crochet stitch all the way across the next edge. Continue working in this way, all the way around the blanket. When you get to the final corner, work 2 chain stitches, then work a slip stitch in the first single crochet you made at the beginning of the edging.
If you only want one round of single crochet for your edging, you can end off now and weave in your remaining end(s). If you want to keep going, work 1 chain stitch to help get your next round started, then use the following instructions:
Version 1, Round 2: chain 1. Work 1 single crochet stitch in each single crochet stitch. In the chain-2 space in each corner, work 3 single crochet stitches. At the end of the round, slip stitch to join the end of the round to the beginning
Version 1, Rounds 3 and Up:chain 1. Work 1 single crochet stitch in each single crochet stitch across the edges of the blanket. When you get to a corner, work 1 single crochet stitch in the first single crochet stitch. In the center stitch in each corner, work 3 single crochet stitches. Work 1 single crochet stitch in the last stitch in the corner. At the end of each round, slip stitch to join the end of the round to the beginning.
Scroll down to the section for finishing instructions, below.
Version 2: Rounds 2 and Up: Add as many rounds as you want by working one single crochet stitch in each stitch; when you get to a corner, work 1 single crochet stitch in the chain-two space of the previous corner, then work 2 chain stitches, then work another single crochet stitch in the same chain-two space. At the end of each round, slip stitch to join the end of the round to the beginning, then work a single crochet stitch to get your next round started.
Finishing Instructions:
Weave in any remaining loose ends. Block your blanket if desired.
Get More Free Edging Patterns
Learn More About Crochet:
- Click here to find the best crochet edging pattern books
- Click here to find our picks for the best crochet books.
- Click here to find crochet stitch tutorials and instructions.
- Click here to learn more crochet techniques.
- Click HERE to Find Fabulous Yarn for Crochet and Knitting
- Click here to learn about crochet hooks.
- Click here to find my favorite crochet project bag.
Learn About Other Crafts: Knitting, Sewing, Quilting, Paper Crafts and More
- Click here to get updated on the latest craft supplies.
- Click here to learn about knitting.
- Click here to find our beginner’s guide to knitting needles.
- Click here to find outstanding craft project ideas.
Page last updated on 6-6-2021. Thanks for visiting!