Document Your Seattle Vacation (or Your Life in Seattle, if You Live There) With a Lovely Scrapbook! This Page Will Give You Some Inspiration for Creating a Seattle-Themed Mini Scrapbook Album.
Sample Album Designed and photographed by Amy Solovay
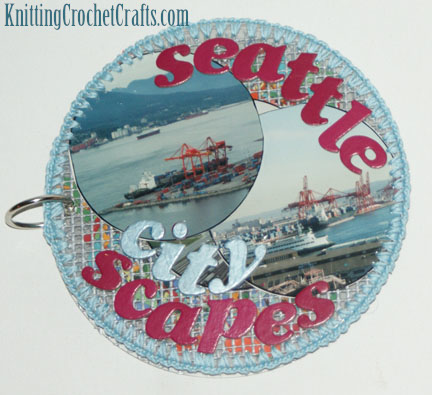
Seattle Cityscapes Scrapbook Mini AlbumAbout a Trip to Seattle, Washington
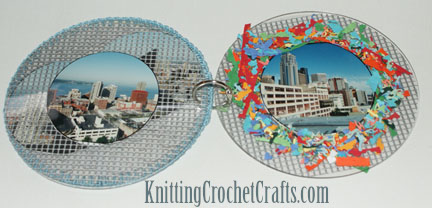
This mini album documents a trip I took to Seattle, Washington. I was meeting some people in Seattle for a get-together, and I arrived in Seattle slightly ahead of schedule. So I grabbed my camera and headed out to see the sights. These are some of the landscape / cityscape photos I took as I wandered around. I think the circle-shaped clear album by Clear Scraps makes a perfect backdrop for these photos. I hope that this project will inspire you!
Vacation Scrapbooking Idea: Mini Scrapbook Album About a Trip to Seattle, Washington
Vacation Scrapbooking Idea: Mini Scrapbook Album About a Trip to Seattle, Washington
Vacation Scrapbooking Idea: Mini Album Documenting a Trip to Seattle, Washington
Vacation Scrapbooking Idea: Mini Album Documenting a Trip to Seattle, Washington
Vacation Scrapbooking Idea: Mini Album Documenting a Trip to Seattle, Washington
Seattle City Scenes From a Scrapbook Mini Album Documenting a Trip to Seattle, Washington
Seattle City Scenes From a Scrapbook Mini Album Documenting a Trip to Seattle, Washington
A Vacation Scrapbooking Idea: Seattle, Washington Themed Mini Scrapbook Album Called Seattle Cityscapes
A Vacation Scrapbooking Idea: Seattle, Washington Themed Mini Scrapbook Album Called Seattle Cityscapes
Technique: Combining Thread Crochet With Acrylic Albums
Thread crochet and scrapbooking are both crafts, but that’s about all they have in common. You probably wouldn’t think of using them together in the same project. Well, with a little bit of out-of-the-box thinking, you definitely can! Thread crochet work adorns the front cover of this fabulous clear acrylic album, and it is really simple to do. We’ll show you how in the project instructions below!
Supplies:
- 6″ Circle-Shaped Clear Acrylic Album by Clear Scraps. Please note: this technique has been tested with Clear Scraps acrylic and it works. Other brands of acrylic might or might not work. Some brands of acrylic are thick and inflexible, and those definitely WILL NOT WORK. Clear Scraps acrylic is going to be the smartest choice for use with this particular technique because Clear Scraps acrylic is not prone to splitting and cracking. This technique definitely pushes the limits of what can be done with acrylics, so choose your supplies carefully and be prepared to toss a page if you goof up in your punching. Keep in mind also that most imperfections will be hidden by the actual crochet work, so if you make a minor mistake it really is not a big deal.
- Fiskars 1/16″ Circle Hand Punch
- Thickers Darling Mulberry Letter Stickers
- Silver Magic Mesh
- Assorted Cardstock / Paper Scraps
- A tiny thread crochet hook that would typically be used for bead crochet or fine lace crochet work or thread crochet. The most important consideration is that it fits through the holes punched with your 1/16″ circle hand punch, because that’s what you’ll be using it for. Try a size 7/.5 mm crochet hook and see if that works for you. You might have to experiment a bit depending on how you crochet and how thick your thread is.
- Blue Embroidery Floss
- Circle Template and / or circle cutter (I used the Fiskars Shape Xpress and one of the circle templates that were made to use with it, but you could probably use any circle cutter with good results.)
- Zip Dry Paper Glue, or other adhesive of your choice.
Album Instructions:
Cut your photos into circle shapes and set them aside to be used throughout the album. You can outline them with black marker if you wish. Mine are all outlined, but that is optional.
How To Make the Front Cover of the Clear Album:
- Punch evenly-spaced holes all the way around the edge of the front cover of the clear album using the Fiskars 1/16″ dot hand punch.
- Begin crocheting by inserting your tiny thread crochet hook into one of the punched holes that is close to the larger hole where you will attach the book ring. Single crochet in punched hole, then chain 2, then single crochet in punched hole, then chain 2, and repeat all the way around. When you get to the hole for the book ring, single crochet twice in that hole and then slip stitch to your first single crochet to finish.
- Attach Thickers letter stickers to front cover. I painted some of my Thickers with a mixture of Pearl Ex and Zip Dry Paper Glue. (That part is optional.)
Page 1:
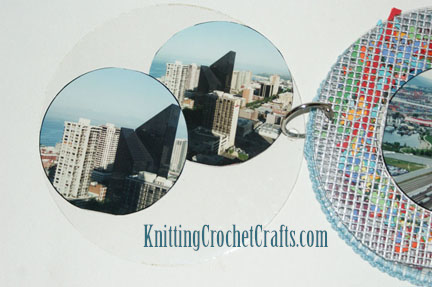
Attach 2 circle-shaped photos to your clear album page so that they are slightly overlapping.Page 2:Repeat on the opposite side of the page, attaching the photos in the same spots as the ones on the other side.
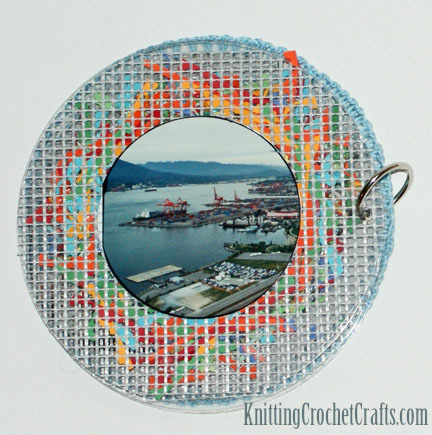
Page 3:
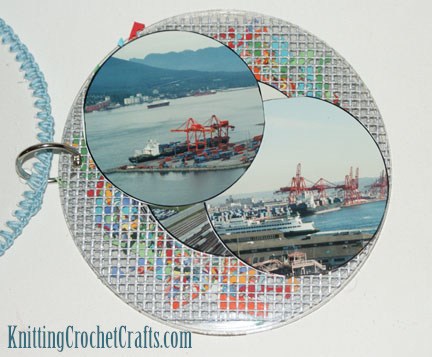
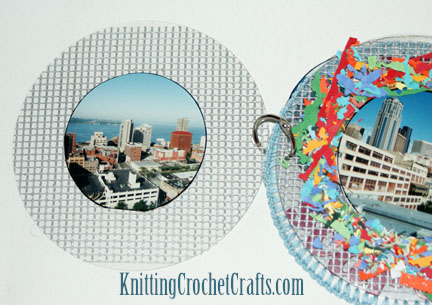
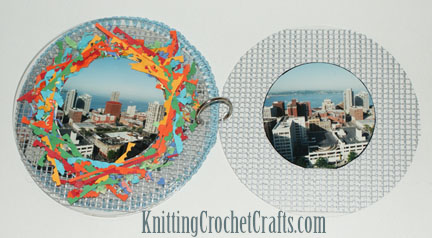
Attach Magic Mesh to the page and cut around it so that it forms a circle shape that matches the clear album page. Attach a photo overtop of the Magic Mesh in the center of the clear album page.
Page 4:
Attach another circle-shaped photo in the center of the page.
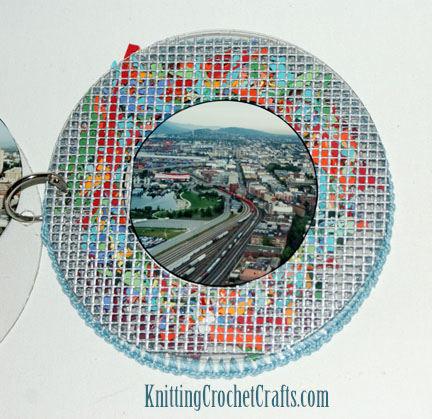
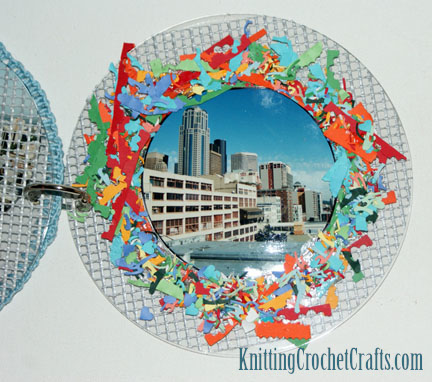
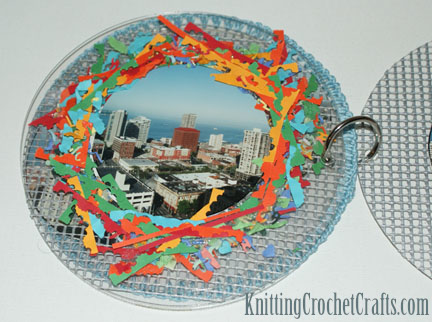
Page 5:
Attach another circle-shaped photo in the center of the page, and glue colorful paper scraps all around it.
Page 6:
Repeat instructions for page 5 on the opposite side of the album page.
Page 7-8:
Repeat instructions for pages 3-4.
So there you have it: That’s one possible scrapbooking idea for documenting a trip to Seattle, Washington. I hope you found this project inspiring. If this wasn’t quite the idea you’re looking for, or if you simply want to see a whole bunch more scrapbooking ideas, I invite you to take a look at the related resources on our website:
- Vacation Scrapbooking Ideas
- More Scrapbook Mini Albums
- More Scrapbooking
- More Paper Crafts
- More Craft Project Ideas, Techniques, Instructions and Tutorials
Posted By: Amy Solovay
This page was last updated on 9-18-2021.