Free Crochet Pattern
This pretty bead crochet necklace is made with colorful glass beads in colors reminiscent of cotton candy. Looking at it reminds me of delightful trips to the carnival with my family and friends when I was a child. Even as a teenager, I secretly adored cotton candy, and would buy it at every opportunity.
These days, I’m into organic food and a healthy lifestyle; the thought of eating cotton candy doesn’t hold quite the same appeal that it did for me back then. But I haven’t stopped loving vibrant pinks and blues, like the cotton candy colors I remember so fondly.
My wardrobe consists almost entirely of basic pieces in neutral colors and black. I rely on pretty jewelry and accessories for touches of color — so this necklace is just what I need to introduce a bit of brightness into some of my ensembles. The extra sparkle is a nice touch, too.
If these colors wouldn’t work well into your wardrobe, you can crochet your necklace in other colors; just substitute several different beads or bead mixes in colors that you’d like to work with. You can significantly change the whole look of the necklace just by choosing different beads.
Craft Supplies You’ll Need for Crocheting This Necklace:
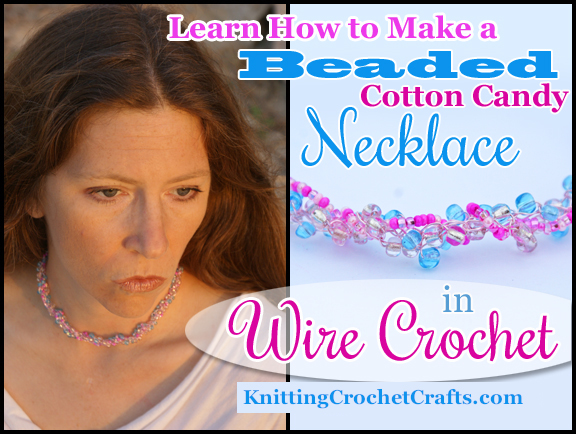
- Beads: The sample necklace is comprised of beads in two different sizes and multiple colors. The larger beads I estimate are 6/0 seed beads. I used two different colors of these; there’s a translucent blue color, and a pink that’s so pale it’s almost clear. Then there are smaller 10/0 Czech glass seed beads by Beader’s Paradise in a color mix they call “Neon Pink.”
- Wire: I used two different types of wire in this necklace. The larger wire is 26 gauge permanently colored copper wire in the pink silver-plated color, manufactured by Darice. The finer wire is 34 gauge craft wire in a silvertone color.
- Jewelry Findings: I used a silver-tone lobster claw clasp. Any similar type of closure will do.
- Crochet Hook: I used a size B / 1 – 2.25 mm aluminum crochet hook.
- Important Update, 8-5-2021When I originally designed this project, I was not aware of crimp beads, crimp tubes and crimping tools. Had I known about them, I would have designed this project to utilize them — because as this pattern was originally written, with the ends simply being woven into the project, it is possible that your ends of wire could end up poking you in the neck when you wear the necklace. So instead of doing it the way I recommended, I would suggest getting some crimp beads and a crimping tool, and using the crimp beads to hide your ends of wire instead of weaving them in. See this article on jewelry tools for more information about tools and supplies that come in handy for jewelry making.
How to Crochet the Necklace:
This necklace is made up of 3 different beaded wire strands. One strand is crocheted using the blue beads, one strand is crocheted using the pale pink beads, and one strand is made using the 10/0 pink seed bead mix. The smaller strand is not crocheted but is simply strung onto the finer gauge wire.
To Make the Two Beaded Crochet Strands: String your seed beads onto your craft wire.
Leave a length of at least 5 inches or so unworked, then make a slip knot in the wire. [Slide a bead right up close to the work. Reach around the bead with your crochet hook and grab the wire; pull it through your active loop to make a chain stitch with a bead sandwiched inside.] Repeat the sequence inside the brackets until the strand is the length you want it to be. I made strands of about 16 inches. It’s a good idea to make your strands a few inches longer than you actually want the beaded part of the necklace band to be; you’ll lose a bit of length during the finishing process.
For the third strand, just string beads from your pink bead mix randomly onto the finer-gauge wire.
Slowly braid your three strands together, manipulating the wire and beads as you work to achieve the nicest possible effect.
You can also braid your three loose wire ends together on each side.
Attach your closure, one part at each end, by stringing it onto the wire and doubling the wire over itself and twisting it bunches of times. With any left-over ends, unbraid the last little bits and weave each individual bit of wire into the end of the work. You can hide the bits of wire inside beads and then snip the ends so that the ends are buried inside beads.
Wear and enjoy the necklace, or give as a gift to a friend, colleague or loved one.
Thanks for checking out this wire crochet necklace pattern. I appreciate your interest!
I invite you to return to this site often for more craft tutorials, project ideas and inspiration! You can make sure you keep this site on your radar by signing up for my newsletter and community at Substack. .
Basic subscriptions are free; I send out regular newsletters to let my subscribers know about new craft articles and tutorials as they are posted. I also share details about the craft projects I’m working on, and invite my readers to share their projects, too. So there is no need to feel like it’s just you, crafting all alone at home. I’d love to have you join us! You’re invited!!
By Amy Solovay
Please Visit My Ko-Fi Shop HERE to Find My Sample Sale, Destash Sale and Digital PDF Pattern Downloads for Sale.
Please Visit My Ravelry Store HERE to Find Digital PDF Pattern Downloads for Sale.
About the Author:

Amy Solovay is a real, live, human content creator and educator who holds an Associate of Arts degree in Textile Design from FIDM LA (The Fashion Institute of Design and Merchandising, Los Angeles) and a Bachelor of Arts degree in mathematics from Sweet Briar College. She is NOT a robot and does not use artificial intelligence (AI) to write book reviews or articles for this website.
Amy learned to crochet as a small child, and she still enjoys crocheting all these years later.

As an educator, Amy Solovay used to teach in-person college courses in trend forecasting, marketing and surface design at California Design College in Los Angeles. Nowadays she uses online platforms for sharing her knowledge about textiles, crafts, current color trends and current design trends.
This page was last updated on 11-9-2025.
Related Resources
- Jewelry Making Projects and Ideas
- Best Crochet Accessory Pattern Books
- Learn How to Do Wire Crochet
- Best Crochet Womenswear Pattern Books
- Find Beadwork Patterns, Instructions and Ideas