For Fabric Crochet, Fabric Knitting or Other Crafts
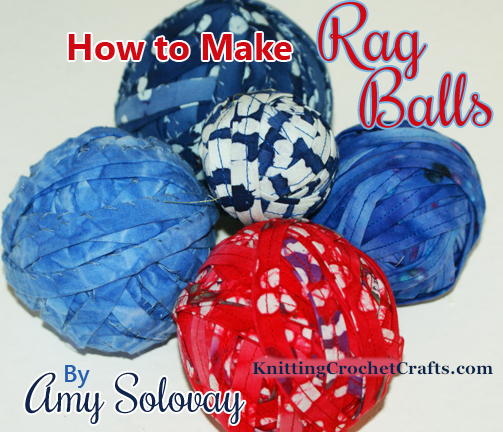
If you want to try fabric crochet or fabric knitting, you’ll want to know how to make a rag ball. Here are the basics you’ll need to know.
Why Make Rag Balls?
If you want to use rag balls, most of the time, your only choice is to make them; there aren’t many opportunities to buy them. If you don’t mind spending some time hunting for them online, you can sometimes find rag balls available for sale at places like Etsy.com, ebay.com or from other savvy crafters. However, for the most part, they are not commercially available, and I don’t know of any manufacturers who are consistently producing them.
There are bunches of different uses for rag balls. For knitters and crocheters, they make lovely yarn substitutes. For crafters, they’re lovely elements to incorporate into decorative displays — particularly country-style and “prim” style décor.
Rag Balls Start Out as Fabric Strips
Rag balls are basically strips of fabric that are sewn together (or sometimes knotted together) and then wound into balls, in much the same way that knitters and crocheters often wind their yarns into balls before knitting or crocheting.
Bias-Cut or Straight Grain Fabric Strips
(Note: The following info applies to woven fabrics, and not to knitted fabrics.)
There are two basic directions in which you can cut or tear your fabric strips.
In order to understand which direction you’re cutting / tearing, you need to closely examine the fabric to see which way the threads are positioned.
If you cut (or tear) the fabric in the same direction as the warp and weft threads, you’re cutting (or tearing) with the grain of the fabric.
If you cut your fabric on the diagonal, in other words, cutting through the warp and weft threads diagonally, then you’re cutting on the bias.
Both methods have their pros and cons, not to mention their fans and nay-sayers.
Bias-cut fabrics became popular in the 1930s, for multiple purposes not limited to just fabric crochet and knitting. Bias-cut fabrics were also popular for sewn clothing as well.
Bias-cut fabrics have remained popular for a number of reasons:
- The fabric tends to fray less at the raw edges.
- Many patterns specify this method of processing fabric strips.
- Some prints can look much more interesting when cut on the bias. This depends on the print. For example, certain plaids might look more appealing when cut on the bias than they would if cut with the straight grain of the fabric.
- Bias-cut fabric has outstanding drape.
One major downside to bias-cut fabric strips: the fabric can stretch and distort quite a bit, making it a challenge to work with. Due to this stretch and other factors, it can also be challenging to duplicate another crafter’s results precisely when working with it. For example, when crocheting from a pattern for a round or oval rag rug, it’s typical for crafters to sometimes discover that their work doesn’t lie flat — even if they followed the pattern precisely. This is due to both individual variations in crochet work, plus the stretch factor — different fabrics might stretch and behave differently, and unless you work with fabric that behaves in exactly the same way as the fabric used in the pattern sample, your results could vary.
Fabrics cut with the grain tend to stretch less, but fray more.
The fraying can be perceived as either a good thing or a bad thing, depending on your objectives. If you’re going for a “prim” type of look, or you want your project to look raggedy, scrappy, and / or country-chic, the fraying might be just what you want. If you’re after a cleaner, more polished look, the fraying maybe isn’t such a good thing.
However, you can process the fabrics in such a way that you minimize the frayed look. You can accomplish this by folding the frayed edges to the insides so that they don’t show, and optionally securing them by either sewing or ironing them.
I prefer a cleaner look, without the fraying. So I like using fabrics cut on the straight-grain, and then folded, sewn securely, and wound into rag balls.
If you want a raggedy look, it’s far less work; you can make your rag balls without the extra final step(s) of folding and sewing or pressing.
Rag Ball Instructions
- Decide whether you want to cut your fabric strips on the bias, or with the straight grain of the fabric.
- Decide how wide you want to cut your strips. If you’re going to work from a pattern, consult your pattern for guidance on this.
- Measure and cut. Optional: before cutting, you can use a special fabric marker with disappearing ink to mark the lines where you will cut. A ruler is helpful for this.
- Stitch the fabric strips together, end to end, to form one long continuous piece.
- If you are not concerned about frayed edges, you can begin winding your fabric strips into a rag ball as soon as the length of fabric gets to be unmanageable.
- Leave a small amount of fabric unwound so that you can stitch the next strip to the ball you’re making.
- Then once you’ve joined the next strip, continue winding.
- Repeat until the rag ball is the size you want it to be.
If you want to be sure that frayed edges will be hidden from view, you will need to do some additional processing to the fabric strips. There are different ways you could accomplish this. A couple of options:
1. Lay the fabric strip flat across your ironing board with the printed side down. Fold each raw edge in towards the middle. Then fold the whole thing in half again so that the raw edges are tucked inside the fabric strip. Then press the folded fabric strip using your steam iron to secure the fold.
This is the faster method. I don’t usually do it this way, because a steam iron uses significant amounts of electricity. For most people, this isn’t a problem, but I am a cruising sailor. I don’t always have enough power readily accessible to use for this purpose. So I often do things the low-tech way.
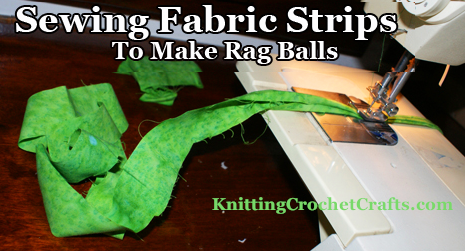
2. Option #2: Sew the fold in place. You can do this either using a sewing machine or by hand. I’ve done it both ways, and would advise you to use the sewing machine to save time if you are able to do so. I’ve sewn many of my rag balls by hand, and can say that it’s slow and tedious. I don’t particularly recommend hand-sewing them, although it’s the method I use most often. When I am able to actually borrow a sewing machine, the rag balls get processed much, much more quickly than they do when hand-stitched.
When stitching to secure your rag balls, you don’t want to sew all the way to the end of the fabric strip — at least, not if you want to join another fabric strip. You should leave a length un-stitched in order to be able to easily join the next fabric strip. I usually stop sewing at somewhere around 10-12 inches away from the end.
As soon as your pile of fabric strips gets to be unmanageable, be sure to begin winding it into a ball. You can alternate winding and stitching, winding and stitching, winding and stitching.
When you’re finished joining new fabric strips, then you can sew all the way to the end of the piece, and also backstitch a bit to make sure you’ve ended securely.
Voila! There you have it; that’s how to make rag balls.
What to Do With Your Rag Balls
There are bunches of things you can do with rag balls. Here are a couple of ideas:
This page was last updated on 5-23-2021.