A Step-By-Step Card Making Tutorial for How to Make This Slimline Card With Paper Flowers and Washi Tape

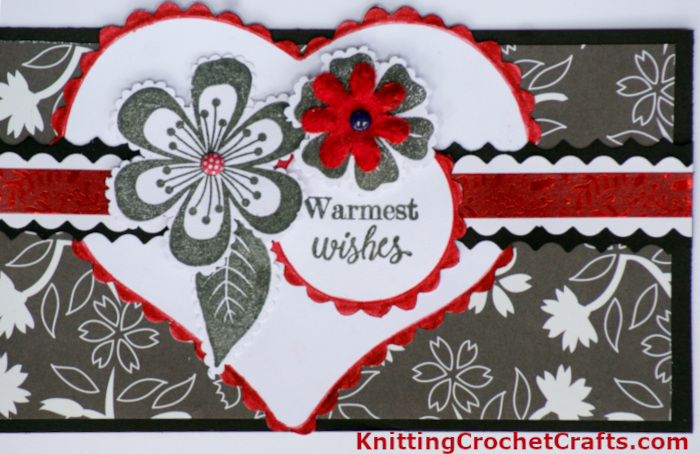
Here we have a black, white and red slimline greeting card featuring hand-stamped paper flowers as the focal point.
I used the Fancy Flowers Mini Stamp Set by Gina K Designs to create the flower images, and then I cut them out using Fiskars Mini Scallop Paper Edgers.
I layered the stamped images with some other elements including a three-dimensional fabric flower by Petaloo, a scalloped heart design, and a paper lace border design. I fussy-cut those scalloped elements using scalloped scissors by E.K. Success.
Craft Supplies You’ll Need for Creating a Slimline Card With Paper Flowers
- Fancy Flowers Mini Stamp Set by Gina K Designs
- Charcoal gray / black ink pad; I used Distress Oxide ink in the “Black Soot” color.
- White cardstock or a pre-made slimline card base
- Black cardstock
- Black and white floral patterned paper; the paper I used is an older design that is no longer available, but many paper manufacturers make black and white patterned paper that would work for this.
- Decorative scissors: I used Fiskars Mini Scallop Paper Edgers and Scalloped Scissors by E.K. Success.
- Red sparkly washi tape is by Recollections
- Scoring tool such as a scoring board or bone folder
- Adhesive
- Small fabric flower; I used an older one from my stash that I think was made by Petaloo.
- Paper / cardstock scraps to use for stamping the flowers, making the heart and making the scalloped border
- Heart die, stencil or template; I used an older heart stencil from my stash, but there are zillions of heart dies and stencils available you could use for this — or you could cut a freehand heart shape.
- 2 brads or other small, round embellishments you can use for flower centers. I used older metal brads by Queen and Company; these days, the trendy thing to do would be to use enamel dots, small pearls or small jewels for this.
- A slimline envelope (actually, a regular business envelope will also work, but it would be more elegant to send your card in a pretty colored envelope that coordinates with your card).
- Red marker
- Circle die, template, stencil or stamp
How to Make This Slimline Card With Paper Flowers
If you’re not using a pre-made card base, you’ll first need to make your card base using white cardstock and a scoring tool. Make it and set it aside.
Cut your black cardstock to the size you want your card front. Attach it to your card base using a paper-friendly adhesive.
Cut your black-and-white patterned paper to measure 1/2″ less than your card front. Layer it on top of your card base using adhesive.
Create a heart shape using a heart die or template and white cardstock. If you have a die cutter and a scalloped heart die, use that. If you’re using a heart template, cut it out using scalloped scissors to get the effect pictured above. Color the edges using red marker.
Layer the heart onto your card front using adhesive.
To make the scalloped border design, attach a strip of washi tape to paper and cut along each edge using scalloped scissors. Attach the strip to black cardstock and cut along each edge holding your scalloped scissors in the opposite direction. Then attach the finished border design to your card front using adhesive.
Stamp your paper flowers and a leaf. Layer at least one fabric flower into the bunch. Attach your flower centers. Attach the flowers and leaf to your card base using the adhesive of your choice. I used thick foam dots for this so there would be a bit of dimension.
Make a frame for your sentiment using a circle die, template, stencil or stamp. I used a circle template that originally came with the Fiskars Shape Xpress tool, which was long ago discontinued. The trendy thing to do these days would be to die-cut a scalloped circle using a circle die — but since there are zillions of different ways to achieve basically the same outcome, you can use whatever you happen to have handy to create the frame for your sentiment. I drew the circle, stamped my sentiment and then to finish it, I cut around my circle with scalloped scissors and used a red marker to color the scalloped edges. After you have your sentiment cut out, attach it to your card front using adhesive.
There you have it: That’s how to make this Slimline Card With Paper Flowers and Washi Tape. Hope you enjoyed this step-by-step card making tutorial!
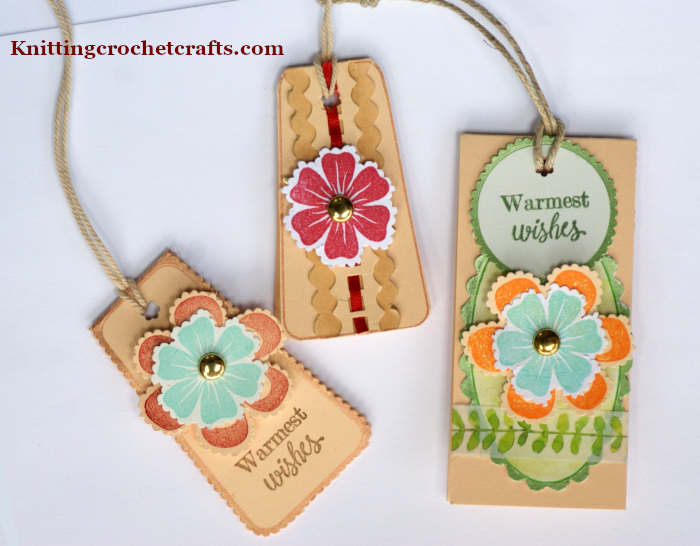
Want more card making ideas and paper craft ideas? You might also enjoy the following related resources on our website:
Find More Fancy Flowers
Gina K’s Fancy Flowers stamp set is one of my most-used, all-time favorite sets. You can find my review of this stamp set, plus more project ideas for using it, HERE.
More Ideas Featuring Stamps and Supplies From Gina K Designs
More Card Making Ideas
Posted By: Amy Solovay
This page was last updated on 1-12-2026.