Here’s a Christmas Card Making Idea You Might Like to Try If Your Card Recipient Enjoys Festive Colors and Christmas Jingles!

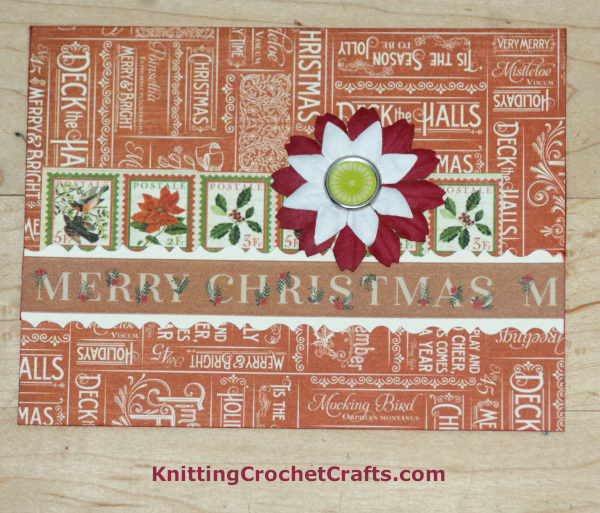
Christmas songs make me smile with delight! And the thing I love best about this festive Christmas card is the lovely Graphic 45 background paper featuring Christmas-y sentiments pulled from popular Chrismas songs: “Deck the Halls”, “‘Tis the Season to Be Jolly” and “Merry & Bright”, which are some of my all-time favorites to sing throughout the holiday season. (Is it weird that the background paper is my favorite part of this card? Yes, it is. That’s pretty weird. I own it. But I also do love the pretty faux postal stamps, which are absolutely gorgeous.)
This card was incredibly quick and easy to put together, unlike many of the other cards on my list of card making ideas. It doesn’t require any stamping or coloring, so if you’re in a hurry to be done with your Christmas card making, this is a fantastic design to consider trying.
Supplies You Will Need to Make This Christmas Card:
- Papers from the “Time to Flourish” 8×8 pad by Graphic 45: This pad features 2 papers for every month of the year. I used elements from the December papers to make this card.
- Heavy cardstock Paper: You’ll need a stiff, substantial cardstock paper or similar paper to use as a card base. If you have cardstock in your craft supply stash already, you can use whatever looks good. If you’re buying new cardstock for this project, and you want to use exactly what I used, that would be Core’dinations Great White.
- Scor-Pal tool, bone folder or other scoring tool
- Envelope: I’ll be mailing this card in a plain white envelope. I like these Cardmaker’s Choice envelopes by Paper Accents, but there are many possibilities for envelopes that will complement this card design well.
- Adhesive: I used Cherry Tape and Glue Dots as the adhesives to make this Christmas card, but you could use pretty much any paper-friendly adhesive for putting this design together.
- Faux flowers and a brad in festive holiday colors that match your patterned papers. You’re unlikely to find the exact supplies I used to make the sample card, because I used some older doodads that have been in my stash since 2008ish. If you don’t already have some suitable faux flowers in your stash to use on your card, I recommend taking a look at the flowers by Graphic 45, which are presumably a good match for their patterned papers.
- Christmas themed Washi Tape by Recollections
- Decorative Scissors: I used Fiskars Paper Edgers to create the fancy borders that accent the Christmas-themed washi tape. If you happen to have any decorative scissors in your craft supply stash, you can pull them out and use them to make a similar border for your card. If you don’t already have decorative scissors on hand, I’m not necessarily recommending you buy them just for this project; you’Cd want to carefully evaluate whether they really are a must-have item for you. For me personally, they ARE a must-have item. I use my decorative scissors ALL THE TIME — multiple times each week and sometimes even multiple times each day when I am making scrapbook albums or preparing to send out a batch of holiday cards. I’ve used my decorative scissors in several hundred projects so far (this is not an exaggeration), and counting, so for me they have been a more-than-worthwhile investment. However, I do not have a die cutter, I do a lot of fussy cutting, and I happen to be extremely proficient with scissors. If you have a die cutter, you might be better off grabbing a border die that serves the same purpose. In any case, the goal for this particular card is to make an attractive border, so use whatever tools you happen to have on hand that will help you accomplish this goal.
- Paper Trimmer
- Scissors
How to Make the “Merry Christmas” Card
The first step in making this card: Transform one sheet of 8.5″ x 11″ Heavystock or cardstock into 2 card bases. You can use them both to make these cards, or you can use one and put one aside to use for making some other card later. To accomplish this, you’ll cut the sheet of cardstock into 2 identical pieces measuring 8.5″ x 5.5″ each. Then use a scoring tool to score and fold the cardstock to create a card measuring 5.5″ wide by 4.25″ tall.
Cut out several of the cut-aparts from the “Time to Flourish” paper pad. For this card, I used a larger piece of the overall
December background paper plus the faux stamps from the December cut-apart sheet. Cut these apart and tape them to the front of your card base.
Cut one piece of Christmas-themed washi tape measuring 5.5″ across. Stick it onto a die-cut border or a scrap of off-white cardstock. If you stick it to cardstock, you can use decorative scissors to cut across and make fancy edges for your border as pictured on the sample card. Tape your boder to your card.
Attach the faux flower to your card front using one or more glue dots.
Add the card to your card stash, or personalize a greeting on the inside and send it off to its recipient.
That’s it! That’s how to make this Christmas card, step-by-step. I hope your recipient will be thrilled to receive it!
Merry Christmas to you and yours.
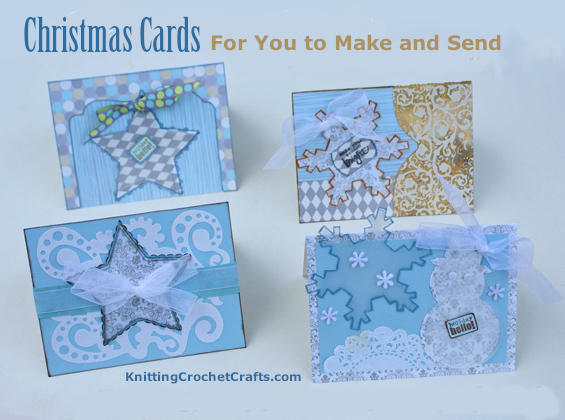
More Christmas Cards to Make

More Christmas Craft Ideas

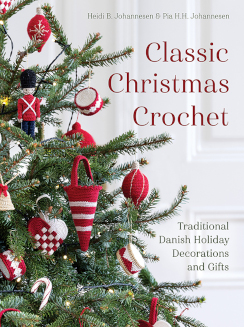
- Classic Christmas Crochet Pattern Book
- Jorid Linvik’s Big Book of Christmas Knits: Knitting Patterns for the Holidays
- Very Merry Christmas Card With Poinsettia Flower Design and Graphic 45 Patterned Papers From the Time to Flourish Collection
- Winter Wishes Christmas Card With Cardinal Bird Design and Graphic 45 Patterned Papers From the Time to Flourish Collection
- Best Christmas Craft Books
- A Merry Crochet Christmas Book Review:
More Paper Craft Ideas:
- Birthday Cards to Make
- Valentine Cards to Make
- How to Make Thank You Cards
- Christmas Card Making
- Best Ink Pads for Stamping on Paper: Card Making and Other Paper Crafts
- More Paper Craft Ideas
Posted By: Amy Solovay
This page was last updated on 10-26-2023.