Free Crochet Pouch Pattern
This checkered crochet pouch has a fun, retro look about it, thanks partly to the colors and choice of lining fabric. You could change its “personality” by customizing it in different colors and choosing a different style of print for the lining fabric.
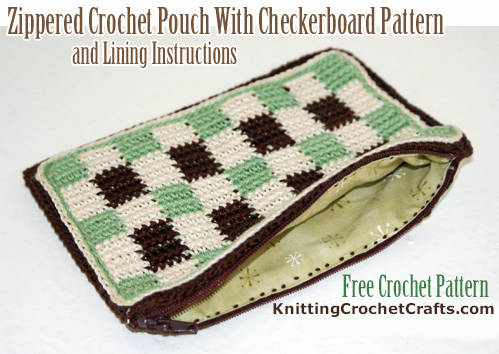
Techniques Used to Make This Pouch:
- Tapestry crochet
- Thread crochet
- Crochet in rows
- Machine sewing to make the lining of the pouch; if you don’t have a sewing machine, you could sew the lining by hand instead.
Related Pages on Our Website: Crochet Pouch Patterns | Free Crochet Bag Patterns | Crochet Thread Patterns | Free Tapestry Crochet Patterns | Checkerboard Patterns
Crochet Skill Level: This is an intermediate level crochet pattern; however, as far as tapestry crochet patterns go, this is one of the easiest types of designs to work on — because it is so predictable.
Craft Supplies Needed to Make the Zippered Crochet Pouch With Lining:
To crochet the pouch, you’ll need the following craft supplies:
3 different colors of crochet thread: The sample pouch features size 3 Royale Fashion crochet thread in Sage (the green color — color A); Natural (the off-white color — color B) and Coffee (the brown color — color C).
Crochet hook: Size C aluminum crochet hook or size needed to obtain the correct gauge.
To sew the pouch lining, you’ll need the following craft supplies:
- Woven fabric and matching sewing thread
- Scissors
- Sewing machine and needles
- Zipper of about the same length as the upper edge of your pouch
- A steam iron
- Straight pins
- A small piece of paper, cardboard or acrylic for making a template
Gauge:
Gauge is not crucial for success with this project, because a pouch will be useful to you no matter what size it turns out. But if you want to check your gauge, you’ll want to work to a stitch gauge of around 6 – 6.25 sts per 1 inch when working sc sts using the tapestry crochet technique in the checkerboard pattern, carrying your unused thread color.
Size of the Finished Crochet Pouch:
The completed crochet pouch measures about 7.75 inches wide by about 5 inches tall.
Crochet Abbreviations List:
- ch = chain
- rep = repeat
- sc = single crochet
- sl st = slip stitch
- st = stitch
Pouch Crochet Instructions:
You will crochet the checkerboard pattern by following a chart and using the tapestry crochet technique
Using color A, ch 46.
Begin carrying color B starting with the very first stitch in row 1.
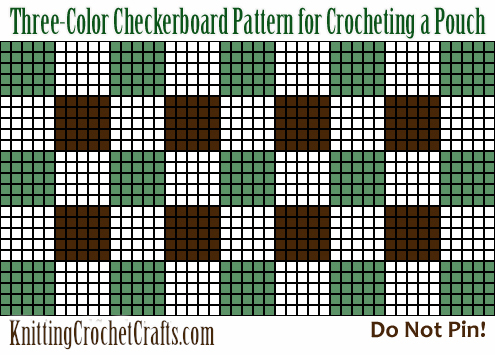
Rows 1-5: [Work 4 sc in color A; begin the fifth st in color A but change to color B before completing the last step of the st. Work 4 sc in color B; begin the fifth st in color B but change to color A before completing the last step of the st.] Rep in brackets all the way across the row. End the row with 5 sc sts worked in color A.
Rows 6-10: (Work 4 sc in color B; begin the fifth st in color B but change to color C before completing the last step of the st. Work 4 sc in color C; begin the fifth st in color C but change to color B before completing the last step of the st.) Rep sequence in brackets all the way across the row. End the row with 5 sc sts worked in color B.
These 10 rows form the checkerboard pattern repeat. Repeat them until your pouch is the desired height. My sample pouch is 25 rows high.
End off. Weave in your loose ends.
Pouch Edging:
Using color C, work 3 rounds of sc st around the outer edge of the checkerboard piece. When you get to a corner, work 3 sc sts in the corner st, then continue working sc all the way around.
Surface Crochet Details: Using color A, work a round of surface crochet slip stitches where the checkerboard pattern touches the edging worked in color C. Using color B, work another round of surface crochet sl sts right next to the first round you worked in color A.
Make a second piece identical to the first using the instructions above.
Thread a tapestry needle with color C and use it to whip stitch the pouch pieces together down one side, across the bottom edge, and up the other side. Do not add your zipper until after you’ve completed the lining.
How to Sew a Lining for Your Crocheted Pouch
Press your fabric to remove wrinkles.
Create a template measuring 1/2″ wider than your pouch plus 1/4″ higher. The extra height and width is for seam allowances on the bottom and side edges of the pouch.
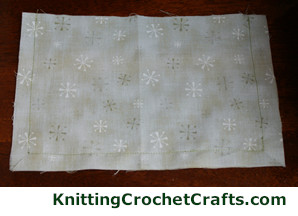
Use your template to cut out 2 identical pieces of fabric to form the lining.
When you unzip your pouch, you’ll want to be able to see the printed side of the fabric lining. So, when you sew the pieces together, be sure to put the right sides facing each other.
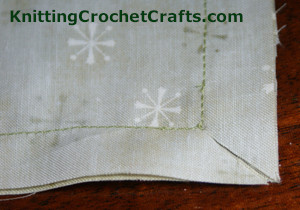
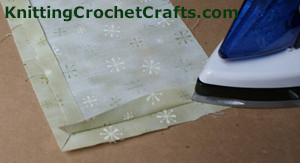
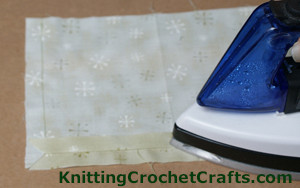
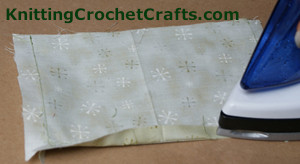
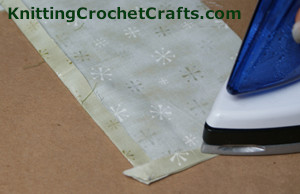
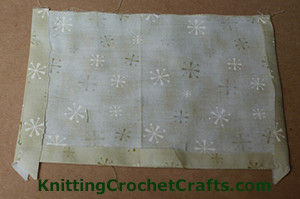
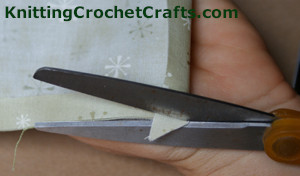
Insert the lining into the pouch.
The lining extends above the upper edge of the crocheted pouch. On my project sample, this excess lining fabric is about 3/8 inches taller than the pouch. Fold this bit of fabric down to the wrong sides so that it will be hidden inside the pouch. You may need to clip the side seam a bit to accomplish this.
I like to stitch the lining and the zipper to the pouch in one step, so there is only one seam all the way around. It’s also possible to stitch the lining to the pouch at this point and then add the zipper in a second step. It’s up to you which way you want to do it. If you want to do it in two steps, go ahead and stitch the lining to the pouch at this point.
Pin the zipper to the pouch using straight pins. Sew it in place on one side.
Open the zipper, then pin it in place and sew it to the other side.
If there are any areas on the sides that are still opened, sew them closed.
Voila! You now have a zippered crochet pouch, complete with lining. You can fill it with goodies and give it as a gift, or you can have fun using it yourself.
More Free Crochet Pouch Patterns
Learn More About Crochet:
- Click here to find our picks for the best crochet books.
- Click here to find crochet stitch tutorials and instructions.
- Click here to learn more crochet techniques.
- Click HERE to Find Fabulous Yarn for Crochet and Knitting
- Click here to learn about crochet hooks.
- Click here to find my favorite crochet project bag.
Learn About Other Needlework Techniques: Knitting, Sewing, Embroidery, and More

- Click here to get updated on the latest craft supplies.
- Click here to learn about knitting.
- Click here to find our beginner’s guide to knitting needles.
- Click here to find outstanding craft project ideas.
Posted By: Amy Solovay
This page was last updated on 8-6-2023.