It is so easy to cut your own mosaic tile from vintage plates! I invite you to check out this free tutorial for how to cut mosaic tile, and take a close look at the pictures and examples I’ve shared on this page; I cut all these mosaic tiles myself, by hand, using tile nippers, old plates, and a few other easy-to-obtain supplies. If I can do this, you can, too!
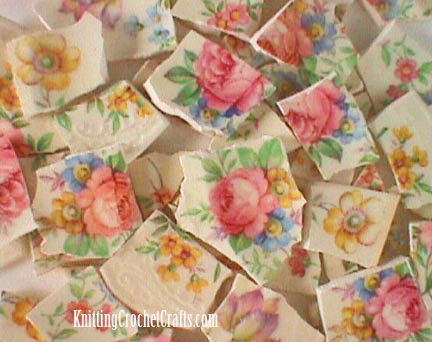
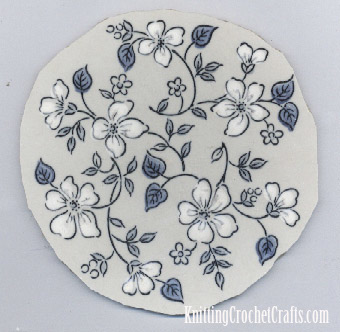
Floral Mosaic Tiles I Hand Cut From Vintage Papoco Plates; It’s hard to find dishes made by this particular brand, but vintage Homer Laughlin plates offer the same vintage floral aesthetic, and they are more common (although still not as common as you’d hope if you’re into making shabby, romantic mosaic projects).
When I first began creating mosaic art, I started by buying gorgeous shimmery, iridescent glass tiles at the craft store. That is a perfectly valid way to approach mosaic art, and it is one of the easiest approaches. Problem is, it’s also relatively expensive. If you’re hoping to affordably upcycle or recycle furniture pieces with mosaic art, like I was, you quickly discover that it can be prohibitively expensive to buy sufficient amounts of tile to complete your projects.
So I sought out and perfected a less expensive, and more creative, option: cutting my own mosaic tiles out of vintage plates and other dishes.
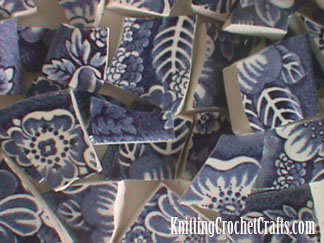
Mosaic Tiles That Were Hand Cut from Blue and White Transferware Plates Using Tile Nippers
Many mosaic artists reach a point, as I did, when they realize they are over-paying for mosaic tile, and it occurs to them that they could save a bundle of money by cutting their own tiles. If that’s you’re situation, you’re in luck: I’m here to explain to you, step by step, how to cut mosaic tile from vintage plates (or, for that matter, from new plates — there isn’t any good reason why you couldn’t use new plates for cutting your tiles, if that’s what you want to do).
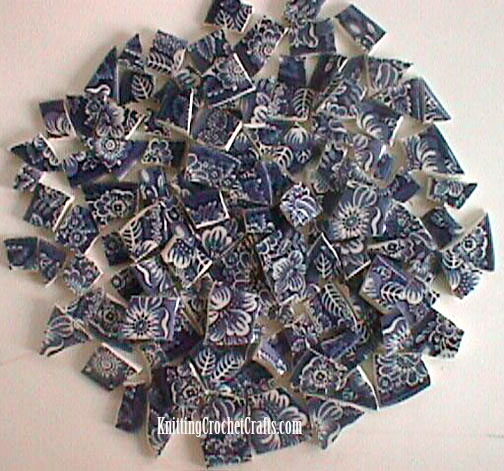
Mosaic Tiles That Were Hand Cut from Vintage Blue and White Transferware Plates Using Tile Nippers
It took me some trial and error, and much shed blood, before I discovered the methods that work best for this. I am hoping I can save you some time, not to mention physical pain, by sharing what I’ve learned about how to cut your own mosaic tiles.
Cut Mosaic Tiles With a Wet Tile Saw
There are two methods I know of that work well for cutting mosaic tiles. The first is to use a wet tile saw. I haven’t tried this method, but I wish I could have. I know of several mosaic artists who cut plates with a wet tile saw, and their tiles turn out amazingly perfect. Their finished mosaic art looks professional and polished.
If you are serious about mosaic art and you plan to devote a significant amount of time to it, I think it would be worth it for you to research wet tile saws, and to consider buying one.
Cut Mosaic Tiles Using Tile Nippers
If you are just dabbling with mosaic tile work and you aren’t yet ready to commit to such a large purchase, the other method is a great place to get started. This is the method I have much more experience with: using tile nippers to hand-cut your mosaic tiles. This method is low-tech, but it can also give satisfying results.
Tools and Supplies You’ll Need for Cutting Your Own Mosaic Tiles
Tile Nippers: You can get tile nippers at most hardware stores.
Hammer: You can get a suitable hammer from the hardware store. A larger, heavy, hefty one is ideal for this purpose; smaller hammers don’t work as well for the task of cutting mosaic tile.
Protective Goggles: Please don’t even think about cutting mosaic tiles without wearing eye protection.
Thick gloves: I use gardening gloves with leather palms. Please do not skimp on the gloves; they need to fit you well, and they need to offer heavy-duty protection. Otherwise your fingers will be a bloody mess by the time you’re finished cutting your tiles.
Vintage Plates or Dishes: I buy mine at thrift stores and garage sales. Some mosaic artists buy dishes and plates on ebay, but I have not had any success with buying these items on ebay, personally. Your mileage may vary.
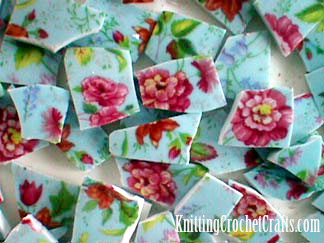
Floral Mosaic Tiles That Were Hand Cut From Vintage Plates Using Tile Nippers
It’s ideal if you can use chipped, cracked or damaged plates, bowls and dishes for this because otherwise, those items would be thrown away. But if mosaic art is your art form of choice, you’ll quickly find that it is challenging to find enough cracked, chipped and damaged plates to use for making your projects. It’s still fantastic if you can repurpose and upcycle otherwise-unloved plates and dishes from thrift stores.
Paper Grocery Bags: Double or triple them for best results.
Broom and Dustpan: For cleaning up your work area when you are finished. If you are anything like me, your workspace will be a complete mess after you’ve cut your tiles.
Containers for Storing Your Tiles: If you aren’t going to use your tiles in a project right away, you’ll need to figure out something to use for storing them. Don’t use plastic baggies for anything more than short-term storage, as the tiles will cut holes in them and fall out. Disposable plastic food storage containers would work better for this purpose.
How to Cut Mosaic Tiles Using Tile Nippers: Free Step-By-Step Instructions:
If possible, go outside! It’s ideal to use an outdoor concrete patio or flat paved surface for this purpose, if you have one. That will make the cleanup easier, because you are likely to end up with broken bits of china scattered about, and you will want to be in a place where you can easily sweep them up after your mosaic tile cutting session.
Put on your goggles and gloves.
Pick a plate that you want to cut. Start with an ordinary plate; a plain white one is a good starter plate if you’ve never done this before. This is also a good method to use with plates that have white centers and patterned outer edges, or plates that have the same pattern all over.
Mosaic Focal Tile That Was Hand Cut From a Vintage Plate Using Tile Nippers
If your plates have beautiful focal designs in the center I’d hold off on cutting those until you’ve cut dozens of less-fabulous plates. The method I’m about to describe isn’t necessarily the method you’d want to use with those; you’d want to cut into them differently, taking care not to harm the design in the center.
After you’ve selected a plate, put it upside down inside your paper bag, so that the “foot” of the plate is facing up. Fold the opening of the paper bag so that the plate is sealed inside. I put my dishes inside bags like this to avoid having pieces of china flying everywhere. I am sure there must be a better way to do this, and if you can think of a better way, please do it your way. (And please also leave a comment so that the rest of us can try your method too!)
Whack the plate hard with your hammer. You’ll be whacking through several layers of paper bag, so be aggressive about it. I usually prefer to whack the “foot” of the plate; depending on the plate, that is usually what has yielded the most usable tiles for me in the past. Each plate is a bit different, and as time goes on you will get good at analyzing which way to smash any given dish to get the most tile out of it.
For most plates that are white in the center and have patterning around the outer edge, I try for one good whack that breaks the plate into two pieces. If you end up with more than two pieces, that’s fine.
Open up the bag and pull out the usable pieces of china. Take your tile nippers and use them to cut tiles out of those pieces. Voila! – You now have hand cut tiles.
Transfer your tiles to your storage containers, or use them in the mosaic art project of your choice.
When you are finished, be sure to sweep your workspace thoroughly. I recommend sweeping it at least twice at the end of each session.
So there you have it: That’s How to Cut Mosaic Tile from Vintage Plates. I hope you found this information useful, and that you’ll be able to use it to save yourself a bundle on the cost of mosaic tiles. Happy cutting, and happy crafting!
Over to You:
Do you have comments or questions about how to cut mosaic tile using vintage plates? If you have better ideas, or different ideas, or observations to share on the topic of cutting your own mosaic tile, we’d love to hear them. The floor is open for comments. If you have questions on how to cut your own tiles, please feel free to post; we’ll help if we are able to.
Thanks so much for dropping by today. We appreciate your interest!