Find Excellent Crochet Patterns for Making Squares Including Granny Squares and Other Types of Squares
Squares hold universal appeal; significant numbers of knitters and crocheters create them.
Squares are popular craft projects for a number of reasons; they’re small, portable, and relatively quick to work. They’re not too intimidating in regards to skill level, supplies needed or time-commitment. They’re easy to combine when you’re ready to do something impressive with them. They’re fun to work, creative and even more fun to use in finished projects. Best of all, you can build some exquisite and complex-looking knitting and crochet projects using humble squares.
Want to get started with a crochet project involving squares? If so, we hope you’ll enjoy this list of crochet square patterns.
For your convenience, we’ve included the dimensions of our sample projects on this page. Please keep in mind that you might end up with a square in a slightly different size, due to individual variations in crochet work.
1. 3D Sunflower Crochet Granny Square
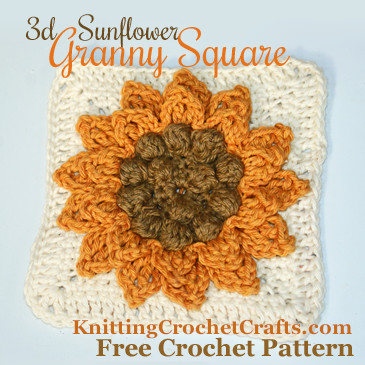
Measurements: This square is likely to measure approximately 6.5 inches if you crochet it with worsted weight yarn and a size H / 5.0 mm crochet hook.
Sunflowers provided the inspiration for this three-dimensional granny square.
In this sunflower variation, I’ve used popcorn stitches in the center to mimic the look of the sunflower seeds. The square is worked in rounds, from the center outward, just like you’d expect from a granny square pattern.
Pattern Details:
- A Free Crochet Pattern is available for this design.
- Crochet Skill Level: Not mentioned in the pattern.
2. Crochet Square With Angled Stripes
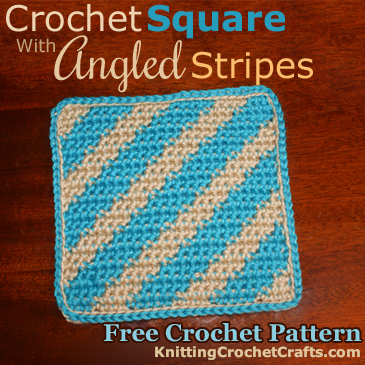
Measurements: This square is likely to measure approximately 6.5 inches if you crochet it with worsted weight yarn.
Asymmetrical angled stripes are the focus of this interesting crocheted square. The page linked here includes the free graph for crocheting the square, plus bunches of different ideas for things you can do with it. There are also some links to free tutorials and other goodies that might be of interest.
This square is part of the “Pattern Sampler” series. What that means: I have a whole bunch of patterns for squares that are similar; they are the same size, and are all designed to be used together — mixed, matched, coordinated and grouped together as you see fit. Some, but not all, of the squares mentioned on this page are part of the same series. If you want to design your own blanket without having to do ALL the work of designing a blanket, this series of squares could be fun for you to work with. There are endless possibilities for what you could make with these!
Pattern Details:
- A Free Crochet Pattern is available for this design.
- Crochet Skill Level: Intermediate.
- Pattern Designer: Amy Solovay
3. Cross Stitch and Crochet Pine Tree Square Pattern
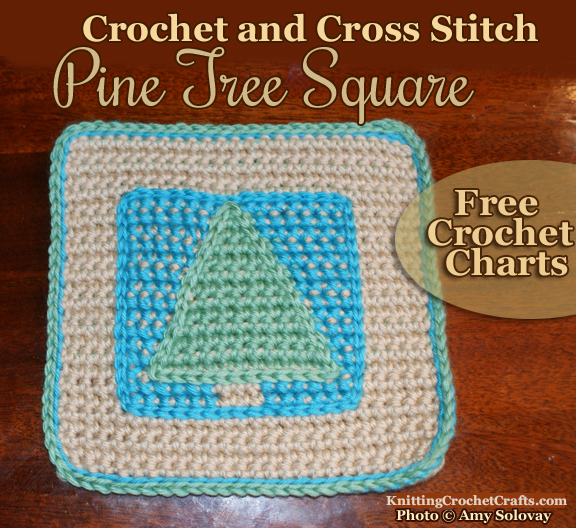
Measurements: This square is likely to measure approximately 6.5 inches if you crochet it with worsted weight yarn.
This is a versatile design that looks different depending on how you color it. I have an example showing this design used as part of a boy’s baby blanket, but you can recolor it to use it for other purposes. To make that project, I colored the square in restful shades of turquoise, green and beige (the same colors you see used in pictures of some of my other “Pattern Sampler” series projects, shown on this page. This square is also part of the Pattern Sampler series.
Pattern Details:
- A Free Crochet Pattern is available for this design.
- Crochet Skill Level: Intermediate.
- Pattern Designer: Amy Solovay
4. Easy Color Block Scrap Afghan Square
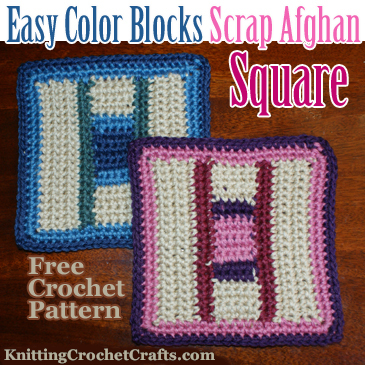
One square measures about 6 inches if crocheted in worsted weight yarn.
This is a practical crochet pattern you’ll want to have on hand for all those times when you accumulate yarn scraps you want to use up. The pattern makes use of bunches of different yarn colors — but don’t worry, you don’t need complex colorwork skills to succeed with this pattern. You only use one color at a time, working in single crochet stitch.
If you don’t have a yarn stash accumulated, no worries, you can also use this pattern for making blankets or other projects in carefully planned color combinations using brand new yarn.
Pattern Details:
- A Free Crochet Pattern is available for this design.
- Crochet Skill Level: Easy.
- Pattern Designer: Amy Solovay
5. Basic Crochet Granny Square — Free Pattern and Tutorial
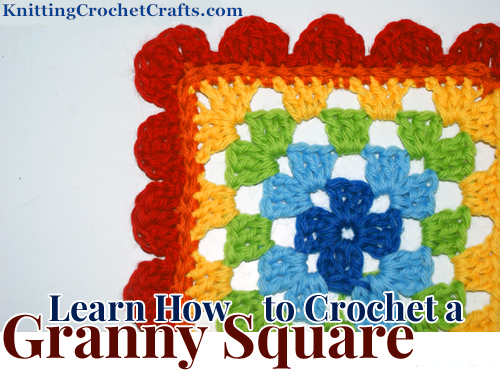
Measurements: The dimensions of this square will depend on multiple factors: how many rounds of the pattern you crochet, what size thread or yarn you use, the crochet hook size you choose, and your individual way of crocheting.
If you’re new to crochet, this is the pattern I recommend using to make your first crochet project — a granny square. Why this one? Bunches of reasons. For starters, a granny square is sooooo easy. Not only that, it’s easier to hold onto as you get started — unlike projects worked in rows, that can be fiddly and hard to grip onto for the first few rows. Furthermore, a granny square is a reasonably interesting project that is likely to hold your attention as you work on it. This cannot be said of all crochet projects — so if you choose one that isn’t as interesting, it’s possible that you could conclude crochet is a boring hobby and give up on it. I sure don’t want that to happen to you — because, the more you learn about crochet, the more you’re likely to be absolutely enchanted and fascinated by it.
Pictured here is a rainbow version of the classic crochet granny square; it’s finished off with a lovely scalloped crochet edging. I love the rainbow colorway, but you can use your scrap yarn to crochet this square in unlimited numbers of other color combinations. Or you can buy new yarn and carefully plan out your color combinations if you prefer a less random, more coordinated look.
Pattern Details:
- A Free Crochet Pattern is available for this design.
- Crochet Skill Level: Beginner
- Pattern Designer: This is a classic vintage pattern; I’m not sure who the originator is. Amy Solovay created the free tutorial teaching you how to crochet this design.
6. Double Rainbow Crochet Square: Free Pattern
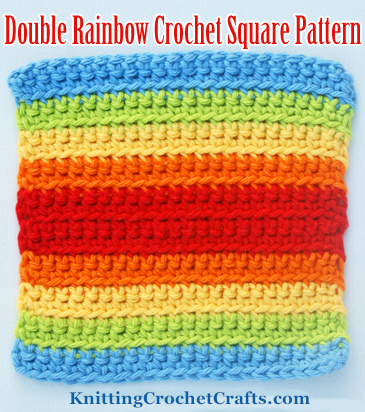
Measurements: This square measures approximately 6 inches wide by 6 inches tall if you crochet it using worsted weight yarn and you work at the recommended gauge.
This striped square is useful for a variety of purposes. If you crochet it using cotton yarn, it makes a fantastic dishcloth or washcloth. Crochet it in wool or any other warm, substantial yarn to make squares for constructing pillows, blankets, afghans or similar projects. I suggest using Cascade 220 for this project because Cascade 220’s extensive color palette is ideal for crocheting rainbow designs such as this one.
Pattern Details:
- A Free Crochet Pattern is available for this design.
- Crochet Skill Level: Easy
- Pattern Designer: Amy Solovay
7. Crochet Granny Square With 3-D Flower Motif
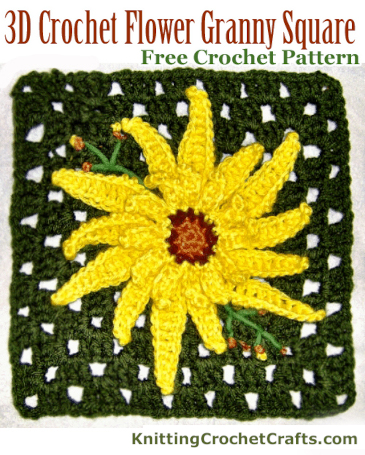
Measurements — Approximately 8 inches by 8 inches when you crochet it using the materials suggested in the pattern.
Pictured here is a classic crochet granny square with a three-dimensional flower embellishment. The flower is modeled after a real-life aster flower, and it does actually resemble an aster. Lori Jean Karluk designed this pattern, along with a couple of different projects you can use it in. You can incorporate this design into a lovely granny square tote bag or granny square pillow. All 3 patterns are are available here on our website for free.
Pattern Details:
- A Free Crochet Pattern is available for this design.
- Crochet Skill Level: Easy.
- Pattern Designer: Lori Jean Karluk
8. Cupcake Square
There you have it: A whole bunch of different squares to crochet. We hope you’ll enjoy using these crochet square patterns to make enchanting blankets and other projects. Thanks for your visit to Knittingcrochetcrafts.com today!
Related Resources
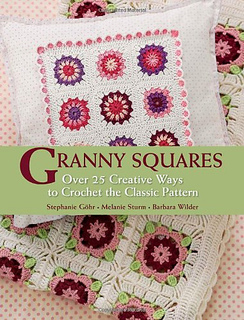
- Granny Squares: Over 25 Ways to Crochet the Classic Pattern
- Scrappy Afghans Book by Leisure Arts — This book includes instructions for crocheting blankets made from squares and motifs, as well as blankets made in other ways, too — stripes, strips, etc.
- Granny Squares
- Best Crochet Granny Square Pattern Books
- Best Crochet Blanket Pattern Books
- Find More Excellent Crochet Books:
Learn More About Crochet:
- Click Here to Learn How to Crochet; This Link Takes You to a Total Beginner’s Guide to Crochet.
- Click here to find crochet stitch tutorials and instructions.
- Click here to learn more crochet techniques.
- Click HERE to Find Fabulous Yarn for Crochet and Knitting
- Click here to learn about crochet hooks.
- Click here to find my favorite crochet project bag.
Learn About Other Crafts: Knitting, Sewing, Quilting, Paper Crafts and More
- Click here to get updated on the latest craft supplies.
- Click here to learn about knitting.
- Click here to find our beginner’s guide to knitting needles.
- Click here to find outstanding craft project ideas.
Posted By: Amy Solovay
Page last updated on 7-22-2023. Thanks for visiting!