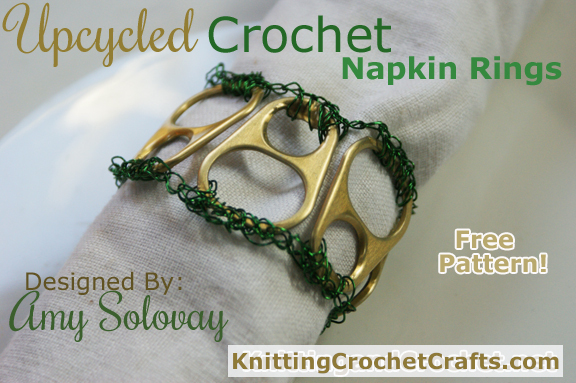
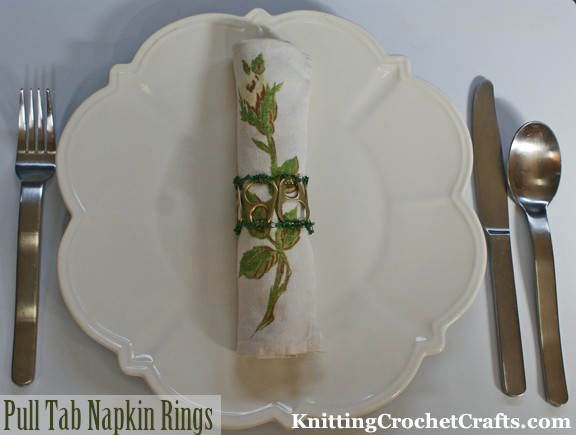
Use Pull Tabs to Crochet a Set of Fabulous Upcycled Napkin Rings


I’m the proud slave, er, owner, of four adorable but spoiled kittycats. I say “spoiled” because there are times when it feels as if I spend more money on cat food than I do on my own groceries.
The bright side of that: each little, expensive can of cat food comes with a removable pull tab — and those pull tabs are fabulous craft supplies. Here I’ve used them, along with wire, to make some upcycled crochet napkin rings. Want to make a set of these for yourself? If so, here’s the link to the pattern and instructions with all the details you need:
Get Free Instructions for How to Make the Napkin Rings:
Skill Level: Advanced / Experienced / Expert — This project is suitable for someone who has already completed many crochet projects and is comfortable working with alternative materials.

Supplies You’ll Need for Making Upcycled Crochet Napkin Rings:
Pull Tabs: For each napkin ring, you’ll need 6 – 8 pull tabs from cans. I used the pull tabs from canned cat food to make my project samples. I’m assuming this project would work just as well with other types of pull tabs, although I haven’t tested the pattern with any others.
Your pull tabs may have sharp edges in the spots where the can and the tabs were connected. It’s a good idea to look for and file down any sharp edges before you begin.
Craft Wire: You’ll need craft wire in a gauge that’s thin and pliable enough to use for crochet. I used 26 gauge permanently colored copper wire for crocheting the sample napkin ring. This wire is manufactured by Darice. I used color #3958-70; the color name is “Dark Green.” It comes in a 30 yard / 27.432 meter package.
Crochet Hook: I used a steel crochet hook in the 1.80 mm size. You might find that a different size is more comfortable for you when working with wire, so don’t feel obligated to use this size. Feel free to adjust.
Please note that working with wire is really hard on crochet hooks, so select a hook that does not have significant sentimental or monetary value for completing this project.
Other: Small tapestry needle for weaving in ends
Gauge: Irrelevant for this project.
Finished Size: One finished napkin ring measures about 6 inches in circumference, and about 2 inches in diameter.
Crochet Abbreviations Used in This Pattern:
- beg = beginning
- ch = chain
- ea = each
- rep = repeat
- sc = single crochet
- sl st = slip stitch
- st = stitch
Project Instructions:
Grab a pull tab, your crochet hook and your wire.
Most pull tabs are wider on the part that you pull, and narrower at the part that connects to the can. Place the pull tab in your hands with the wider side facing up. Reach into the pull tab with your crochet hook and pull up a loop. Ch 1.
At this point, you’ll want to work a series of sc sts into the top of the pull tab. I worked 6 sc into my tab, but it’s possible that you may need to crochet a different number of sts to make the pattern work. Your pull tab dimensions might differ slightly from mine, and for sure your individual way of crocheting will probably be different than mine. Just work whatever amount of sts seem like a comfortable amount in that spot.
Then ch 2.
Next, grab another pull tab and hold it beside your first pull tab with the opposite side, the narrow part, facing up.
Work a series of sc sts into the narrow part of this pull tab. I worked 4 sts into mine, but again, you may need to work a different amount to achieve a comfortable fit.
Ch 2.
Grab another pull tab, and hold it with the wider end up. Work another series of sc sts into the tab. You’ll want this to be the same number of stitches you worked in the wider part of the first tab.
Ch 2.
Continue adding more tabs in this manner until you have the amount of tabs needed to make a nice napkin ring. I used six tabs all together; it’s possible that you might prefer to have a larger napkin ring with 8 pull tabs total.
When you’ve finished adding pull tabs, join the work to the beg of the round with a sl st. End off.
Turn the work over and work the same exact pattern into the other end of the napkin ring.
Dealing With Your Loose Ends: You can weave your loose ends into your work using a tapestry needle, just as you would with a crochet project made of yarn. When the ends are sufficiently woven in, cut off any extra and manipulate the end to be buried down in the piece.
Now repeat these instructions from start to finish several more times to make additional matching napkin rings to complete your set.
Set your table in style — and enjoy!
Thanks for Dropping by Our Knitting and Crochet Website!
We hope this free napkin ring pattern was exactly what you were looking for…but if it wasn’t, we invite you to keep browsing, because we’ve posted many other patterns that you might also enjoy. Here are a few suggestions.
More Upcycled Craft Projects:
- Upcycled Crochet Scrubbies Made From Plastic Bags or Produce Bags
- Free Pouch Pattern: An Easy Project for Starting to Crochet Plastic Bags
- Upcycled Crochet Rag Rug
More Lovely Napkin Rings to Crochet
- Get More Napkin Ring Patterns — Here at Knittingcrochetcrafts.com
- Crochet Wire Napkin Rings
- Beaded Christmas Napkin Rings (Free Crochet Pattern)
Related Resources
Topics Covered on This Page
- pull tab crafts,
- upcycled crochet napkin rings,
- recycled crafts,
Find More Ideas for Lovely Table Settings
More Craft Pages You Might Enjoy:
- Craft Supplies
- Knitting
- Knitting Supplies
- Lace Knitting
- Cable Knitting
- Knitting Techniques
- Knitting Yarn
- Quilting
- Jewelry Making
- Best Tools for Jewelry Making
- Beadwork
- Sewing
- Sewing Appliques
- Kitchen Crafts
- Holiday Crafts
- Christmas Crafts
- Paper Crafts
- Fine Art
Find More Craft Project Ideas HERE!
Posted By: Amy Solovay
This page was last updated on 1-19-2022.