Need ideas for making a vacation scrapbook with a tropical theme? If so, check out this 6″x8″ scrapbooking album featuring photos from the Hawaiian island of Oahu:
This album is a Sn@p! Binder I’m making to document a trip my husband and I took to Hawaii.
We took the trip because we were invited to our friend John’s wedding. At the time, John was serving in the US military and was stationed on the island of Oahu. He and his wife-to-be rented a beach house right on the water to serve as the wedding location. It turned out to be the most fun wedding I have ever attended!
This album incorporates papers and embellishments from the Coastal Collection of supplies designed by Katie Pertiet for Simple Stories. Motifs in this collection include palm trees, tropical hibiscus flowers, shells, pineapples, seagulls, sailboats and more.
6″x8″ Scrapbooking Layouts Included in This Album:
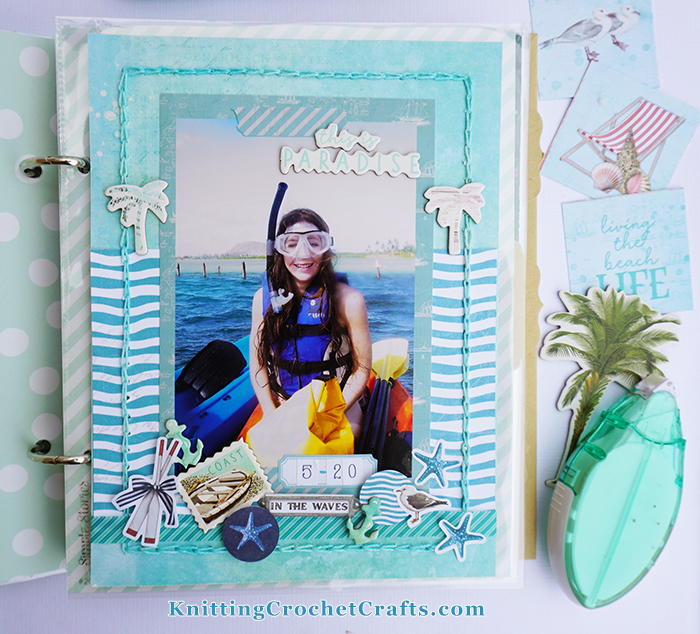
This Is Paradise 6″x8″ Scrapbooking Layout

I worked surface crochet slip stitch around the edges of this layout using size 10 crochet thread that I hand dyed.
There’s a free tutorial available here on this website teaching you how to do surface crochet slip stitch on a knitted or crocheted fabric. I learned the technique from Del Pitt Feldman’s book, Crochet: Discovery and Design.
To do the stitch on paper, you have to take an extra step: punching evenly-spaced holes in the paper so you have a spot to work your stitches.
There are different ways you could approach this. I did it by using the We R Memory Keepers Book Binding Tool Set to punch my holes. It would also be possible to accomplish the same task by attaching graph paper to the back of your page and then using the smallest circle-shaped Fiskars hand punch to punch your holes. You then use the grids on the graph paper as guides to help you figure out where to punch the holes.
In my experience, this technique can be challenging when you’re first learning it — so I suggest practicing first on scrap paper rather than risking the paper you’ll be using for your actual project. It took me awhile to master this, so please do not get frustrated if it takes you some time to figure it out, too.
I made this page using supplies by Simple Stories from several of their collections: the Coastal Collection, the Simple Vintage Seas Collection, and the “Color Vibe” Collection.
Most of the items that were originally available in the Coastal collection are now sold out. Since I missed out on getting them, I decided to use stickers from the Simple Vintage Seas sticker book on this page where I needed more embellishments. The number stickers are from the “Color Vibe: Winter” Alphabet sticker book.
I did a small portion of this layout digitally; I downloaded the photo mat and “washi tape” from Katie Pertiet’s website. There’s a physical equivalent of the paper I used for the photo mat, but I’m not sure you can buy it any more; it’s sold out everywhere I looked for it. That’s why I grabbed the digital version to use.
I actually did have the physical paper, too; I had previously purchased a Coastal collection bundle that included the chipboard stickers, the pineapple stencil, and 12 of the physical papers from this collection. The physical version of this design was included the bundle, but it has pocket cards on the other side, and I really wanted to use the pocket cards on these pages.
The background paper for this layout is the 12″x12″ “Sea You Soon” patterned paper from the Coastal Collection by Simple Stories. I also used 1 12″x12″ Sheet of Surf, Sea and Sand Patterned Paper from the Simple Vintage Seas Collection by Simple Stories to make this page.
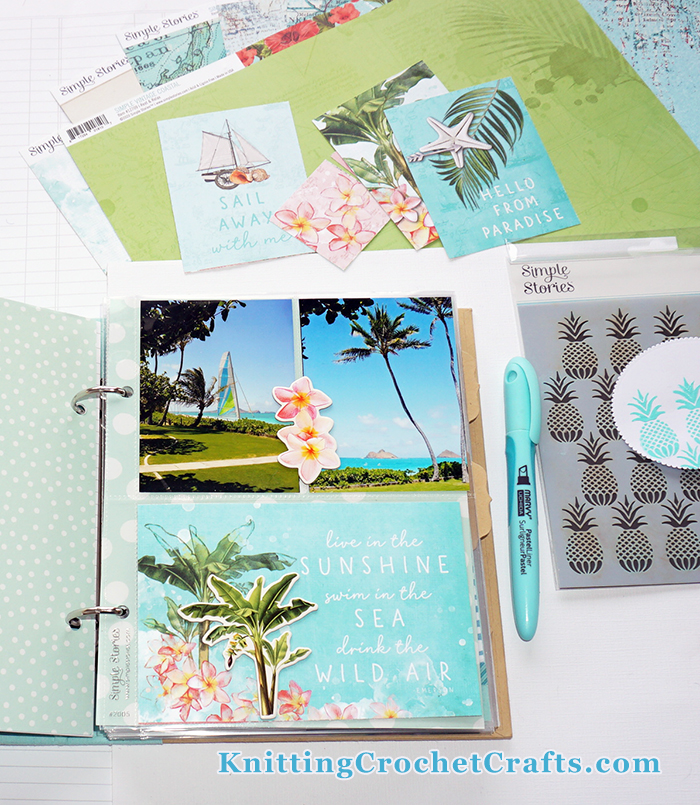
The View from the Beach House 6×8 Pocket Page Scrapbooking Layout

I mentioned above that our friend John rented a beach house right on the water to be the location for his wedding. The upper two photos on this page show the views you can see from the beach house lawn. It was incredible!
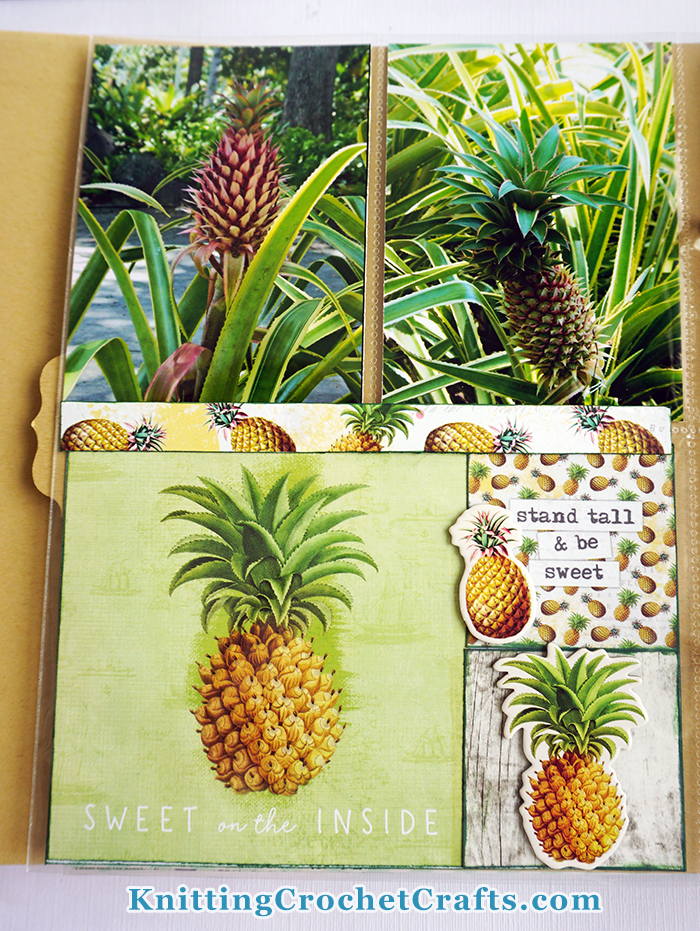
Tropical Pineapples 6×8 Pocket Page Scrapbooking Layout

In the days following the wedding, our group took bunches of different day trips to interesting places around Oahu.
One day we visited Foster Botanical Gardens. I took these pineapple pictures that day.
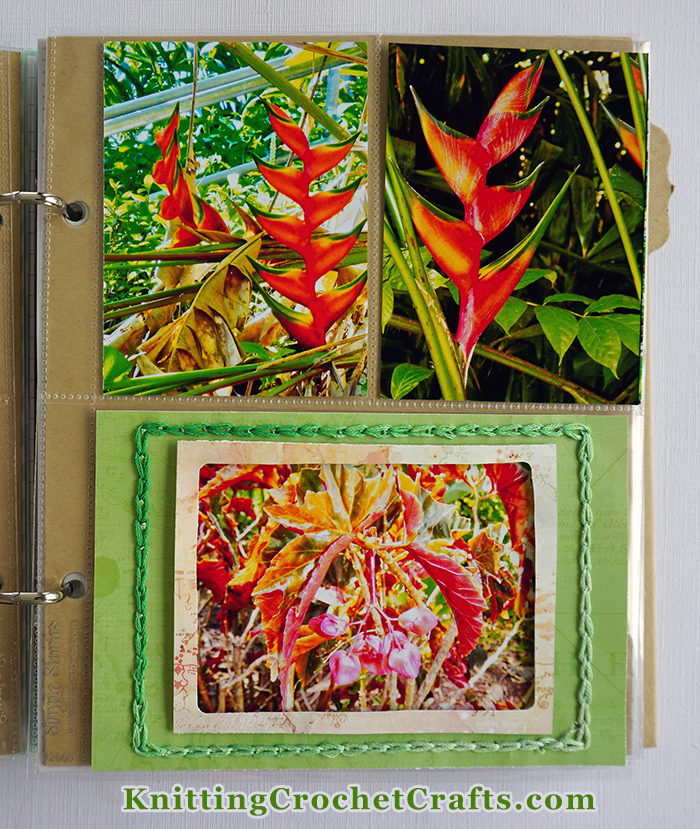
Heliconia and Other Tropical Plants — 6×8 Scrapbooking Pocket Page Layout

These are more pictures we took at the botanical gardens. At the time, I was working in the textile industry, and I used to design lot of tropical prints and jacquards. I couldn’t believe my good fortune to be able to photograph so many amazing tropical flowers and plants to use as design reference material.
I keep my textile design inspiration images organized in gigantic binders, and they are separate from my scrapbooks. I’ve already printed out the best tropical flower photos from this trip and organized them in my textile design inspiration binders. However, now that I am getting around to putting the photos from this trip in scrapbooks, I decided to put a few of my favorite botanical images in my travel scrapbook, too.
I wanted the tropical plants to be the focus of this page, so I didn’t do a lot of embellishing. However, I thought the page needed a little something besides just the paper and photos, so I added a frame around the lower photo and some surface crochet slip stitch around the edges of the lower pocket card.
I chose a vintage variegated embroidery floss for doing the stitching. This floss dates back to the early 1900s; I used to collect vintage magazines and needlework patterns from this time period, and I had to get rid of most of these items when I moved aboard a sailboat and went cruising. I was able to keep a few things, and this embroidery floss was one of the few things from that collection that has stayed with me. I’ve had it in my stash for years, waiting for the perfect project to use it in — and this was it.
I love how the shades of green in the floss complement the vibrant greens on the tropical foliage.
I made a frame for the photo using the We R Memory Keepers Frame Punch Board plus a contrasting paper from the Simple Stories collection. To give the frame extra dimension, I adhered it to the page using three-dimensional Foam Adhesive Strips by Scrapbook.com.
The green patterned paper is the “Rest and Relax” design, which is the only paper from this collection that I could still find available for sale. It is green on one side, as pictured, and features red hibiscus flowers on the opposite side.
Other Craft Supplies You’ll Need to Create a Similar Tropical Hawaiian Vacation Themed Scrapbooking Album:
I already mentioned the supplies I used to create the pages above. It’s also helpful to have the following additional supplies when you create your album:
- A 6×8″ binder and page protectors to fill it with; I used a Sn@p! Binder in the Robin’s Egg color, but you can use whichever binder you think would work for your project.
- Patterned Papers: You can use any patterned papers you like. Tropical themed patterned papers are obviously the ideal choice for this project, but there are many other possible paper types you might want to try.
- Stitching on your pages is optional. If you want to stitch on some of your layouts like I did on the example pages, you’ll need either a tapestry needle or a crochet hook, plus some crochet thread, fine yarn or embroidery floss. If you’d rather embroider than crochet, you can work the embroidered chain stitch to get this effect.
- You can use Scrapbook.com’s Foam Adhesive Strips for giving some of your embellishments extra dimension. I used this adhesive in various places throughout my album — under the photo frames, under selected stickers and under selected other embellishment to make them pop out from the page and appear more three-dimensional.
I hope you enjoyed these ideas, and that you’ll be able to use some of them in your own travel scrapbook pages and albums. If you want to find more travel scrapbooking ideas, you’re invited to check out some of the other projects we’ve posted:
- Take the Scenic Route: 12″x12″ Travel Scrapbooking Layout
- Travel Scrapbooking Ideas: Farmer’s Market Visit in Ashkelon, Israel
- Travel-Themed 6×8 Scrapbooking Album Featuring Nautical Layouts and Road Trip Pages
- Travel Scrapbooking Ideas: How to Make a Travel Journal With Pictures
- Travel Bucket List Planner Layout Idea
Thanks for visiting! We sincerely appreciate your interest in our craft projects.
Posted by: Amy Solovay
This page was last updated on 4-23-2023