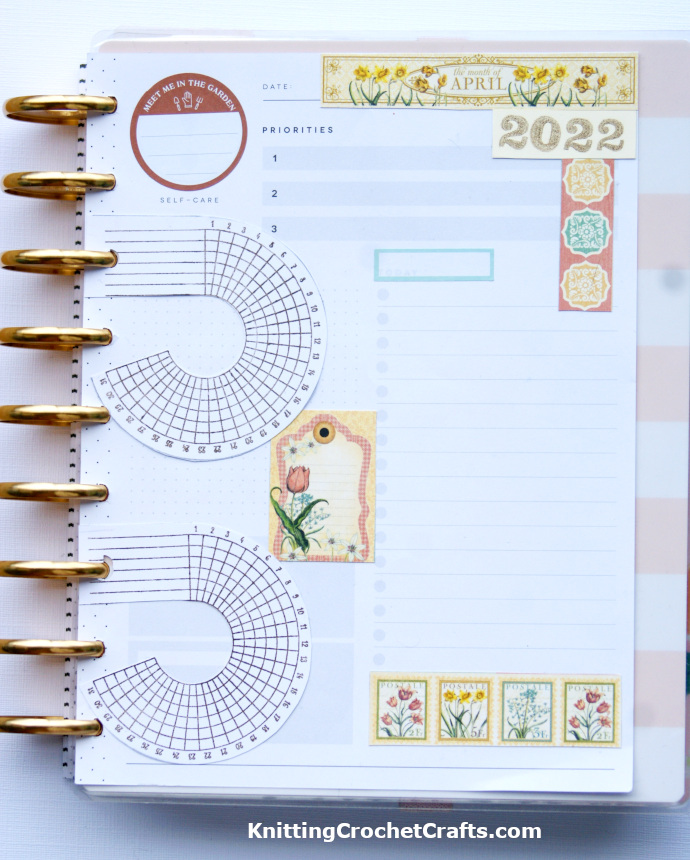
April Monthly Happy Planner Layout Featuring Graphic 45 Papers from the “Time to Flourish” Collection
Here’s a Low-Tech Idea for Creating Your Own Planner Layout for Discbound Planners Such as the Happy Planner, Maggie Holmes Freestyle Planner, Martha Stewart Planner, Arc Planner, Tul Planner, ETC. No Die Cutter Is Needed for Creating This Page Layout.

Hello crafty friends!
I originally made this April planner layout in 2022, but I still think it’s pretty and relevant in April of 2025. You can also feel free to use this idea for any month; it’s a totally versatile design.
I took what was supposed to be a daily planner page layout and hacked it to use for monthly tracking.
If you use a Happy Planner, and you want to make a page similar to this one for your own planning and tracking purposes, the logical spot to place it would be right before the tab for April, beside the April monthly overview page that comes stock with most dated Happy Planners.
I made pages like these for multiple months in 2022 and loved them, but found that they didn’t really work as intended for me. This is actually more a problem with Happy Planner’s overall setup than it is with the page itself. This is because I suffer from “Out of sight, out of mind” syndrome, and having this page before the month’s tab meant I forgot to use it. I would also forget to use them monthly overview page, too.
When I was actively using these pages, I found that they worked better if tracked the things I wanted to using weekly pages and then used this page at the end of the month to summarize. This was time consuming to do but gave me a really clear picture of how I did and what I needed to work on.
Although I love Happy Planner, I haven’t found a way to fix the things about it that aren’t working for me. So I’m trying out some different planners right now to see if I can find an option that will work even better for me than Happy Planner did. But if the Happy Planner layout generally works for you, please feel free to adapt this habit tracker layout for your own planner.
Craft Supplies You’ll Need for Making This Planner Layout
- Graphic 45 Time to Flourish 8×8 Pad — For this particular planner layout, I used the papers for the month of April. The papers in this pad follow the same basic format, so you can make a similar planner layout for any month of the year using the current month’s patterned papers from the Time to Flourish pad.
- The tracker stamps are from the P13 Tracker Stamp Set.
- I stamped “2022” using number stamps by Hampton Arts, but you can use any number stamps you happen to have stashed.
- Page from the classic sized Papillon undated planner or from the Papillon undated extension pack
- The round sticker is from a Happy Planner sticker book.
- I have my planner pages on gold metal expander discs, because I really hate the smaller plastic discs that most Happy Planners come with. I think the gold metal discs are a lot prettier, and they are also much sturdier.
- You can use the paper-friendly adhesive of your choice to put this planner layout together. I used Cherry Tape adhesive, but there are zillions of possible choices that would work well for this project.
- You’ll also need scissors and a paper cutter, but not a die cutter; you can easily cut everything you’ll need for this layout using either your scissors or a paper cutter.
Thanks for looking!