Learn the Shallow Single Crochet Stitch While Making a Cute Change Purse or Catnip Pouch
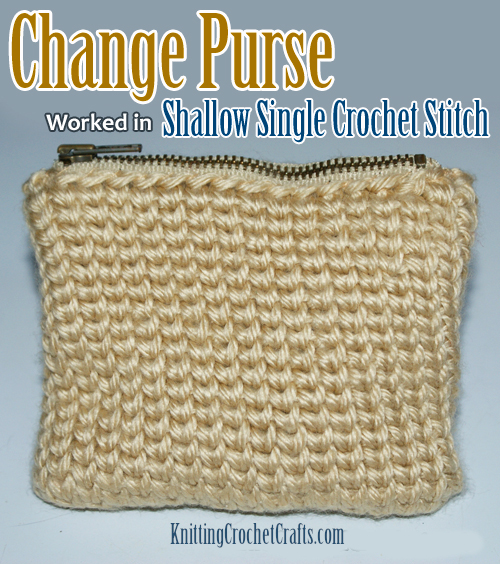
Maybe this crochet project is a change purse…


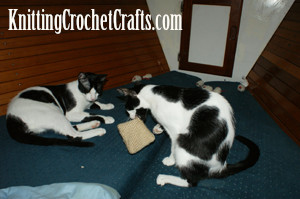
Come to think of it, wouldn’t this make a cute catnip pouch for your favorite feline friend?


See More About: Crochet Pouch Patterns | Crochet Stitches
How to Do Shallow Single Crochet Stitch: Free Instructions Plus a Free Pattern for a Change Purse or Catnip Pouch
This little change purse is worked in an intriguing crochet stitch known as “shallow single crochet.” Like the name suggests, this stitch is a variation of single crochet stitch; you’ll work it exactly as you would the single crochet, with a several important differences.
The main difference: instead of inserting your hook into the loops (the front and back loops of the stitch in the previous row or round) as you ordinarily would, you insert your hook into the base of the stitch itself. That is to say, the base of the stitch in the round before. So essentially, you are working into the middle of the stitch in the previous round, rather than working through the top loops of the stitch. On its way in, your crochet hook will be placed in the middle of the “v” formed by the previously-worked single crochet stitch. On its way out, your crochet hook will emerge through the “v” on the back side of the work as well; it is likely to meet with some resistance, and that’s one thing that makes this stitch a little more challenging than ordinary single crochet stitch is.
You can work this stitch in either rounds or rows, but I like the results best when it is worked with only one side facing. I think it gives more consistent results.
Other differences: Shallow single crochet stitches are much shorter than ordinary single crochet stitches are; the resulting fabric is also denser, and less stretchy.
This change purse came about because I was going to work a swatch of shallow single crochet stitch, but then I decided that I would rather work a small tube. So I decided to do a tube-shaped swatch, which is, of course, well suited to becoming a change purse.
If you would like to make a larger project using this stitch, I think it would be ideal for making belts, tote bags, market bags, purses, and pillows. I’d also love to explore the possibilities for using this stitch in other ways — perhaps for ultra-structured thick warm jackets, blazers and outerwear. But of course, first things first; for now let’s just get started with the change purse.
Supplies You’ll Need to Crochet This Change Purse:
- Worsted Weight Yarn: the sample change purse was crocheted using Caron’s Simply Soft yarn in the color called “Bone.” After having made my first sample, my opinion is that this project would be better if crocheted in wool or a yarn that easily responds to blocking. The stitches slant significantly, but you can take care of this issue using a combination of blocking and careful finishing. Feel free to substitute yarns.
- Crochet Hook:
Size I /9-5.50 mm, or size needed to achieve the correct gauge - Sewing thread in a color that matches your yarn.
- Zipper
- Tapestry Needle for weaving in ends
- Optional: scraps of fabric for lining the change purse. I did not bother giving mine a lining, and since the crocheted fabric alone is really hefty, I didn’t consider a lining to be essential. However, everyone’s crocheting is a little different; if you’d be happier having a lining in your change purse, by all means make one. If you’re going to make this as a catnip pouch, lining it is a good idea.
- Optional: stitch markers for marking the beginning / ending of each round; I didn’t use markers, and don’t consider them essential, but you may find them helpful.
Gauge:
Row gauge is not essential for this pattern.
Finished Size:
Before finishing, my sample piece measured approximately 4 inches wide by 3 3/4 inches high.
Crochet Abbreviations List:
- ch = chain
- PM = place a marker
- Rnd = Round
- sc = single crochet
- ssc = shallow single crochet
- sl st = slip stitch
- st = stitch
Pattern Notes: Work rounds in a continuous spiral. PM (optional) to mark the beginning / ending of your round, and move the marker up each time you complete the next round.
Change Purse Crochet Instructions:
Ch 34. Join with a sl st to form a ring, taking care not to twist your chain.
Rnd 1: Work in sc st all the way around.
Rnd 2: Work this rnd and each rnd thereafter in ssc.
Work even until your change purse is as tall as you want it to be. End off; weave in ends.
How to Finish the Change Purse:
Block the piece. I can’t emphasize this enough. I skipped this step when I made my sample, and I regret it! If you look carefully at my sample piece, you’ll see how much the stitches slant. Blocking is the key to straightening this out. If you skip the blocking, your pouch will probably turn out just as slanted as mine did. It is usable that way, but it sure could be improved on by blocking.
Pin zipper to the top of the change purse and then stitch it in place.
Close up the opening in the bottom using the technique of your choice; you could use whip stitch if you like, or slip stitch. Another idea: You could pick an edging from our list of edging patterns and work the edging across the bottom of the piece.
Fill the pouch with change, catnip or any other little objects and enjoy using it!
References and External Links:
I originally learned about this stitch in one of my crochet stitch dictionaries:
- The Harmony Guide to Crochet Stitches
Compiled by James Walters and Sylvia Cosh
1986 Lyric Books Limited
ISBN# 0 7111 0028 4 - As far as I can remember, I wasn’t inspired to try crocheting a project with this stitch until I saw Carol Ventura’s blog post about shallow single tapestry crochet, which I found inspiring.
Update 1-3-2020: Solve the Bias Problem + Learn How to Crochet Fair-Isle Inspired Mittens:

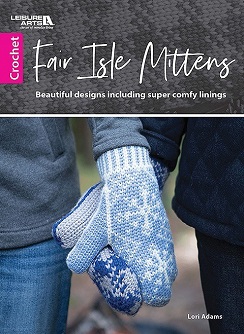
If the shallow single crochet stitch is of interest to you, Lori Adams has written a brand new book that you’ll definitely want to consider owning. In this book, called Fair Isle Mittens, Lori presents an innovative solution (besides blocking) for the bias problem that is inherent in this stitch.
Aside from that, the book gives you a tutorial for doing the shallow single crochet tapestry crochet technique — which allows you to incorporate intricate color patterns into your work.
And, on top of that, you get patterns and instructions for creating a whole bunch of different multicolored mittens that resemble Fair Isle knitted mittens (except that they’re entirely crocheted).
There are instructions for crocheting mittens for men, women, teens and children. Some of the pattern designs include snowflakes, houndstooth, hearts, stars and stripes and others.
This is an a groundbreaking and innovative book you won’t want to miss out on! I highly recommend it.
Free Crochet Pouch Patterns
Posted By: Amy Solovay
This page was last updated on 8-6-2023.