Free Crochet Pattern
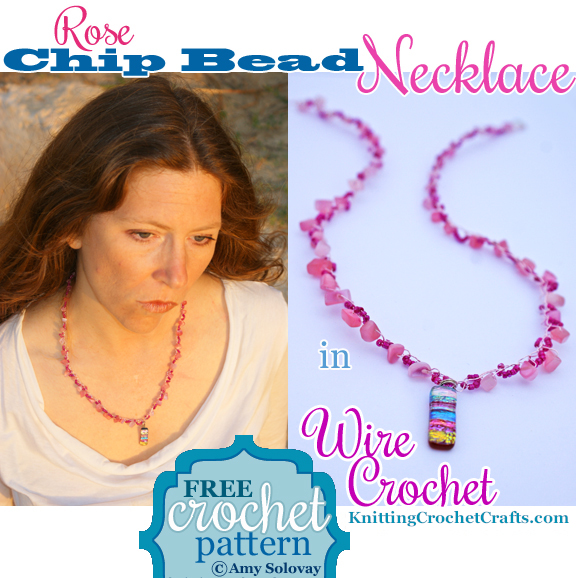
This is one of the prettiest necklaces I own. It’s a little fancier than many of my other wire crochet necklaces, in part because of the intricate beaded chain, and in part because I added a lovely dichroic glass pendant to the piece. The pendant is sparkly and eye-catching, and it’s often a conversation-starter when I wear it to parties or get-togethers.
Craft Supplies You’ll Need to Crochet This Necklace:
This necklace features an interesting mix of materials and textures. At the center of it all, a multicolored dichroic glass pendant sparkles and catches the eye. The pendant is accented by rose-colored stone bead chips, raspberry-colored metallic seed beads, and pale pink colored wire.
- Beads: The larger beads in this piece are rose-colored stone bead chips by Beader’s Paradise. The label on the packaging says “cat’s eye fancy chips” in a color they call “Romantic Rose.” The accent beads are 11/0 metallic pink seed beads by Darice, which I do not recommend for all the reasons I explain in my product review of these beads. Please feel free to substitute other similar beads instead of these.
- Wire: I used 26 gauge permanently colored copper wire by Darice in the silver-plated pink color.
- Crochet Hook: I used a size B / 2.25 mm crochet hook to make my sample necklace. You can use this size hook if you like, but do not feel obligated if there’s a hook you find more comfortable for crocheting with wire. Be sure to use a sturdy hook, as this technique is hard on hooks and a flimsy one is almost guaranteed to break on you. Also, please avoid using a hook that has significant sentimental (or monetary) value. In case you have a problem, it’s better to have it with a hook you don’t mind losing.
- Jewelry Findings: I used a lobster claw-style clasp closure. You can use one of those or a different type of closure if you prefer.
- Important Update, 8-5-2021When I originally designed this project, I was not aware of crimp beads, crimp tubes and crimping tools. Had I known about them, I would have designed this project to utilize them — because as this pattern was originally written, with the ends simply being woven into the project, it is possible that your ends of wire could end up poking you in the neck when you wear the necklace. So instead of doing it the way I recommended, I would suggest getting some crimp beads and a crimping tool, and using the crimp beads to hide your ends of wire instead of weaving them in. See this article on jewelry tools for more information about tools and supplies that come in handy for jewelry making.
Length of the Finished Necklace:
My sample necklace measures about 20.5 inches all together from tip to tip, including the closure. You can make yours a different length if you like.
How to Crochet This Necklace:
Pull out a length of wire, making sure that the wire flows freely so that you will be able to pull out even more if needed. String all your beads onto your wire in the order you want them to appear in the necklace.
Bead Stringing Pattern: To make the sample necklace, I started by stringing a chip bead, then six seed beads, then another chip bead, then another six seed beads, alternating between chip beads and seed beads until I reached the halfway point. Right before the midpoint, I strung six seed beads. Then at the midpoint, I strung the pendant onto the wire, and then from there mirror-imaged the first half, stringing another six seed beads followed by a chip bead, followed by another six seed beads, and so on.
Chip beads are all different sizes, but do your best to mirror the first half of the necklace when you choose beads for the second half.
Because of the differences in chip beads, it can be difficult to predict exactly where your midpoint will be, even if you use precisely the same number of beads on each side of the necklace. Because of that, I recommend leaving long lengths unworked at either end of the necklace; that way, if you have to add a little bit onto one end or the other, you’ll have enough wire to work with that you can do it.
Be sure to double check your work before proceeding. If you made a mistake in your stringing, the best time to find it is before you start crocheting; after you begin, it’s difficult to correct mistakes.
Leaving at least 6 inches free at the beginning of the piece, make a slip knot in the wire. [Slide a chip bead up close to your crochet hook. Reach around the bead with your hook and grab the wire; pull it through to create a chain stitch with a bead sandwiched inside of it. Slide six seed beads up close to your crochet hook; reach around them and grab the wire with your hook. Pull it through to create the next chain stitch.] Repeat the instructions specified inside the brackets until your beads have all been worked.
Finishing Instructions:
Compare the sides of the necklace to each other to be sure they are even. If they aren’t, even them up if you are able to by adding beads and completing more stitches as necessary.
When you are finished crocheting, cut the wire, leaving enough to work with in finishing. Gently pull the end of the wire through your active loop and give it a slight, careful tug to end the work off.
If you’re still working with uneven sides, you can string additional beads onto the ends of the piece to even them up. Then add one side of your lobster claw clasp. I did mine by stringing the clasp onto the wire, then folding the wire down onto itself and wrapping it around itself many, many times. Then I inserted the end of the wire back down into the nearest bead and cut it so that the end would be buried inside the bead.
Repeat on the other side to attach the other part of the clasp.
The necklace is now ready to wear, or to give as a gift. Enjoy!
Thanks for checking out this wire crochet necklace pattern. I appreciate your interest!
I invite you to return to this site often for more craft tutorials, project ideas and inspiration! You can make sure you keep this site on your radar by signing up for my newsletter and community at Substack. .
Basic subscriptions are free; I send out regular newsletters to let my subscribers know about new craft articles and tutorials as they are posted. I also share details about the craft projects I’m working on, and invite my readers to share their projects, too. So there is no need to feel like it’s just you, crafting all alone at home. I’d love to have you join us! You’re invited!!
By Amy Solovay
Please Visit My Ko-Fi Shop HERE to Find My Sample Sale, Destash Sale and Digital PDF Pattern Downloads for Sale.
Please Visit My Ravelry Store HERE to Find Digital PDF Pattern Downloads for Sale.
About the Author:

Amy Solovay is a real, live, human content creator and educator who holds an Associate of Arts degree in Textile Design from FIDM LA (The Fashion Institute of Design and Merchandising, Los Angeles) and a Bachelor of Arts degree in mathematics from Sweet Briar College. She is NOT a robot and does not use artificial intelligence (AI) to write book reviews or articles for this website.
Amy learned to crochet as a small child, and she still enjoys crocheting all these years later.

As an educator, Amy Solovay used to teach in-person college courses in trend forecasting, marketing and surface design at California Design College in Los Angeles. Nowadays she uses online platforms for sharing her knowledge about textiles, crafts, current color trends and current design trends.
Related Resources
- Best Crochet Accessory Pattern Books
- Best Crochet Womenswear Pattern Books
- Wire Crochet
- Jewelry Making
- Beadwork
More Craft Pages You Might Enjoy:
- Knitting
- Knitting Supplies
- Knitting Techniques
- Knitting Yarn
- Quilting
- Sewing
- Sewing Appliques
- Kitchen Crafts
- Holiday Crafts
- Paper Crafts
- Fine Art
Find More Craft Project Ideas HERE!
This page was last updated on 11-9-2025.