6×8 Fishing Themed Scrapbooking Layout: Life Is Good — Find Joy in Your Journey
Out of all the 8 billion + people on earth, who do you admire most?
There are bunches of people I think highly of.
Many of the people I admire are capable sailors who’ve made impressive ocean crossings and visited the world’s most fascinating destinations.
This scrapbooking layout documents one of my happiest memories of a sailor who’s journeyed across oceans and has remarkable stories to tell about it.
When I grow up someday, I want to be fearless like Captain Rick.
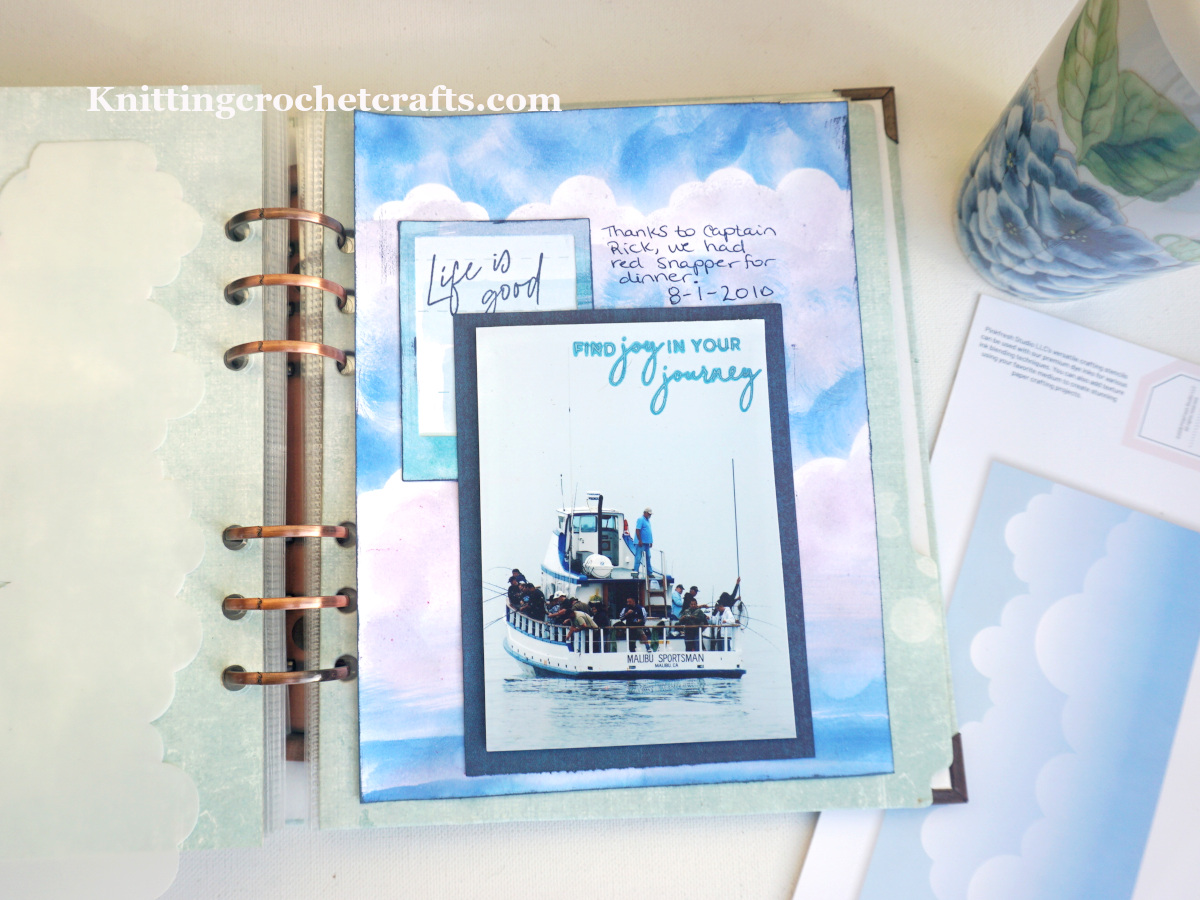
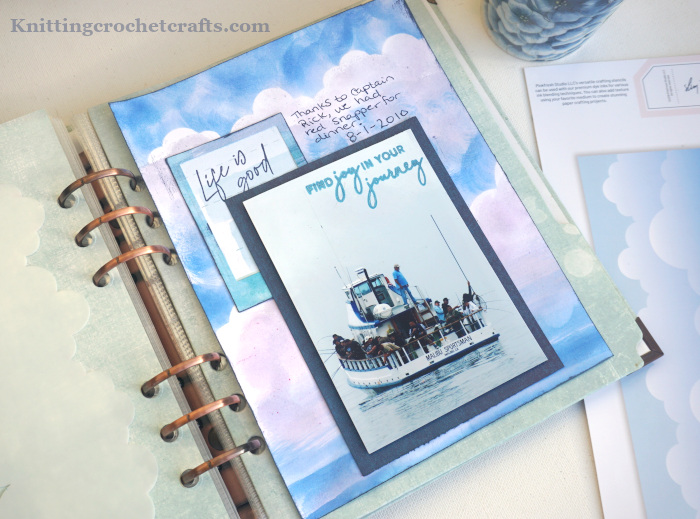
On 8-1-2010, my husband, Mike, and I were out sailing in Oxnard, California. I took this picture of Captain Rick from the cockpit of our sailboat, Typhoon. That’s him, standing alone on the upper deck of the fishing boat you see in the picture.
For a couple of years, Captain Rick was a recurring character in the story of our lives. We met him at a local marina in Oxnard, California. I learned a massive amount from him, and he was incredibly helpful to Mike and me as we were learning to pilot our sailboat.
The photo is special to me because it’s one of the few pictures I have of him — and it really shows him in his element.
Apparently, the fish were biting the day I took this picture; that day, Captain Rick shared a giant red snapper with us. We feasted that evening.
Fifteen years have passed since Captain Rick was a part of my everyday life, but I often still think of him and the wisdom he generously shared with us.
And I’m also hoping that someday we’ll catch up with him in the “adventures” department; he still has us beat by zillions of nautical miles.
Fast forward to now: The lovely people over at Pinkfresh Studio are having an “anything goes” challenge — and this scrapbooking layout is my latest entry in the challenge.
(I already entered one other project a few days ago.)
If you have a photo of a bunch of dudes saltwater fishing aboard a charter boat, you probably wouldn’t think, “Hey, I better grab my Pinkfresh Studio supplies to use for scrapping this layout.”
That’s because Pinkfresh Studio is best known for their beautiful floral clear stamp designs and detailed, feminine scrapbooking papers.
But in this case, I think Pinkfresh’s supplies were absolutely the perfect choice.
I’m a stencil fanatic, and I have bunches of them in my stash — but Pinkfresh Studio’s “Layered Clouds” Slim Stencil is one of my all-time favorite designs. I’ve used it somewhere around one zillion times to create interesting cloudy backgrounds like the one I’ve used here. It never disappoints! I think it’s really a bummer that it was discontinued, and I sure hope nothing bad ever happens to mine, because I wouldn’t want to be without it.
Here You Can See the Pinkfresh Studio Craft Supplies I Used for Making This Project:

Other Supplies Used for Making This Scrapbooking Layout:
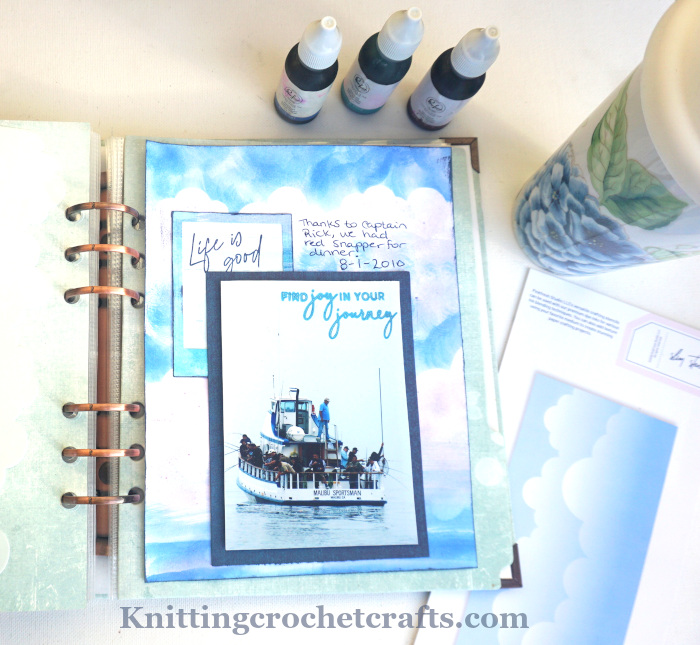
- Adhesive: I used Cherry Tape, Nuvo Deluxe Adhesive and Adhesive Foam Strips
- Photo Frame Die: I used a die by Obed Marshall / American Crafts from one of his older collections
- White cardstock
- Ink blending tool
- Tim Holtz Distress Oxide Ink Pad in the Chipped Sapphire and Uncharted Mariner Colors
- 12×12 navy blue Patterned Paper from Graphic 45’s “Make a Splash” collection
How to Create a Scrapbooking Layout Like This One
To create this layout, I first created the cloudy sky background by ink blending Blue Jay and Regal Kiss inks onto white cardstock with the Layered Clouds Slim Stencil as my template. I diluted the inks by wetting my ink blending tool before applying them.
Then I cut the cloudy background paper down to 6″x8″ and inked the edges with Chipped Sapphire ink.
I ink blended with Mermaid Cove, Blue Jay and Regal Kiss onto a die-cut photo frame and attached the inky frame to a scrap of “Celebrate You” patterned paper.
Then I stamped the “Life Is Good” sentiment from the “Life Is Good” stamp set onto the framed “Celebrate You” paper and attached it to the cloudy background paper.
I stamped the sentiment that says “Find Joy in Your Journey” from the Joyful Bouquet stamp set using Uncharted Mariner ink directly onto the upper right-hand corner of my photo.
Then I matted the photo onto the darker navy blue patterned paper using adhesive foam strips and attached the matted photo to the cloudy background paper.
I really enjoyed this challenge and am delighted with the resulting project.
Thanks so much for checking out my project! I appreciate your interest.