8 Easy Steps to Follow to Preserve Your Memories in a Scrapbook Album You’ll Cherish for Years to Come!
There are zillions of possible ways to make a scrapbook. There isn’t any single correct way of scrapbooking — and there isn’t a wrong way, either. On this page, I’ll share with you the steps I follow when I create a new scrapbook album — but you need to know that you do not have to do it this way. There are bunches of different approaches you could take besides just this approach.
Step 1: Choose a Scrapbook Album (Or Make Your Own Using Bookbinding Techniques)
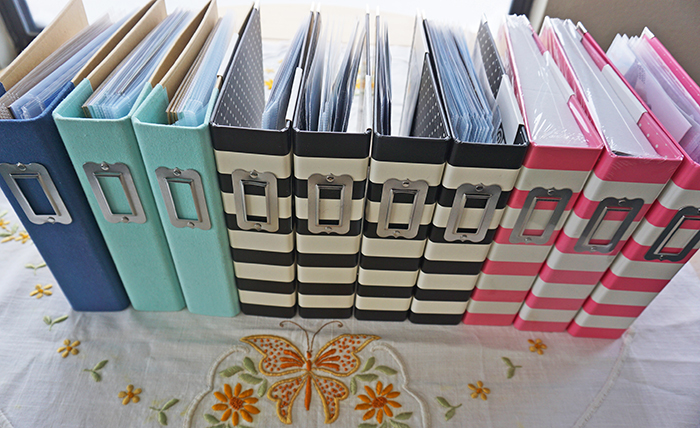
When you decide to make a scrapbook album, the first step is to choose a scrapbook album that will hold all your page layouts.
Technically, you could skip this step and start scrapbooking immediately. However, I recommend that you make the album choice your first step because your choice of albums can make a huge difference in the way you will create your pages.
If you choose a six inch chipboard mini album in a unique shape, your entire process would be different than if you choose a twelve inch postbound album; if you choose an acrylic album, you’d take another approach all together.
It’s easiest if you choose a ready-made scrapbook album that either comes with page protectors, or has coordinating page protectors available that you can buy separately.
But you are not limited to only using ready-made, store-bought albums. It’s also possible to make your own albums and mini books, too.
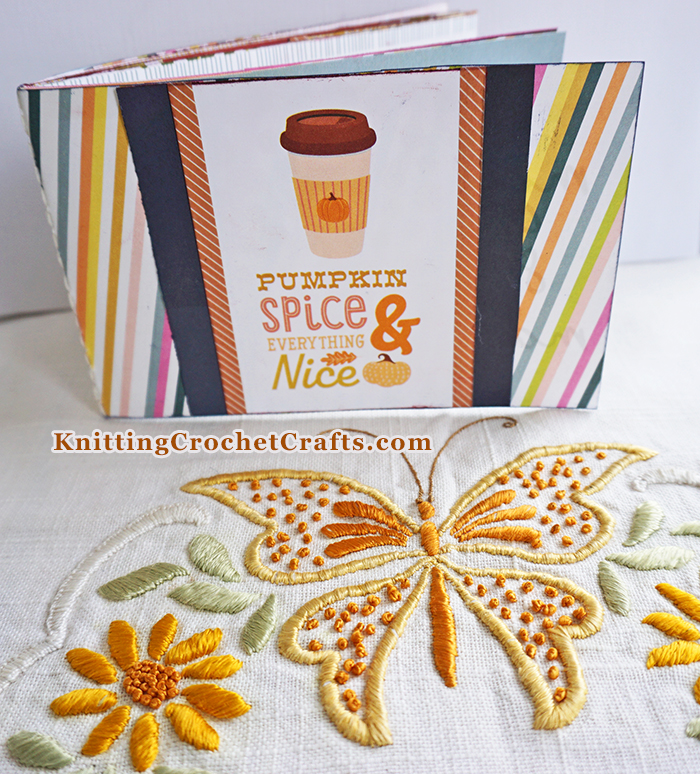
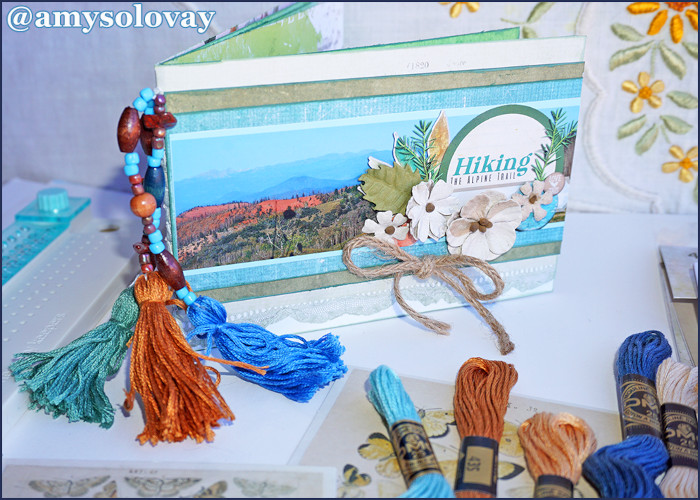
Lately, I have been making bunches of my own mini books because this is far less expensive than buying ready-made albums. It is also far more work to do it this way. If you want to make your own albums, there are a couple of pages I recommend taking a look at:
- Using the We R Memory Keepers Book Binding Tool to Make a Fall-Themed Mini Album
- How to Make a Hiking and Nature Themed Scrapbooking Mini Album
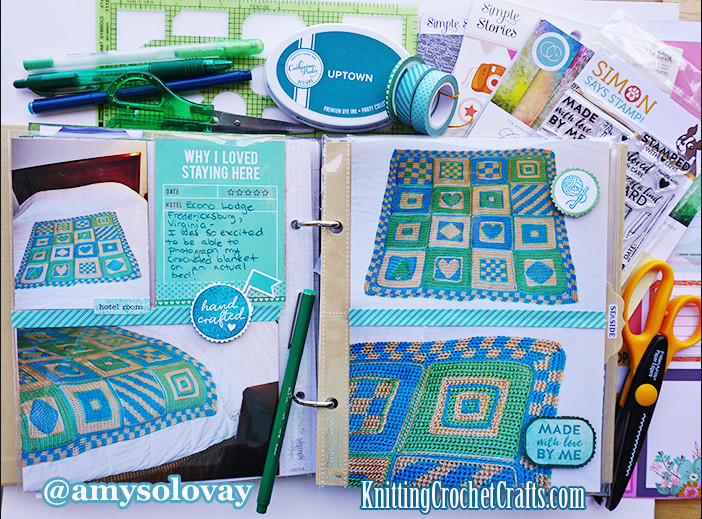
Step 2: Choose Your Photos and Print Them Out

Once you’ve chosen your album, the next step is to choose and print your photos. In this step, it’s important to do some basic planning.
I recommend looking at your photos with a critical eye. You may have several photos that are similar to each other; perhaps you can evaluate which of the group is the best photo, and print only that one.
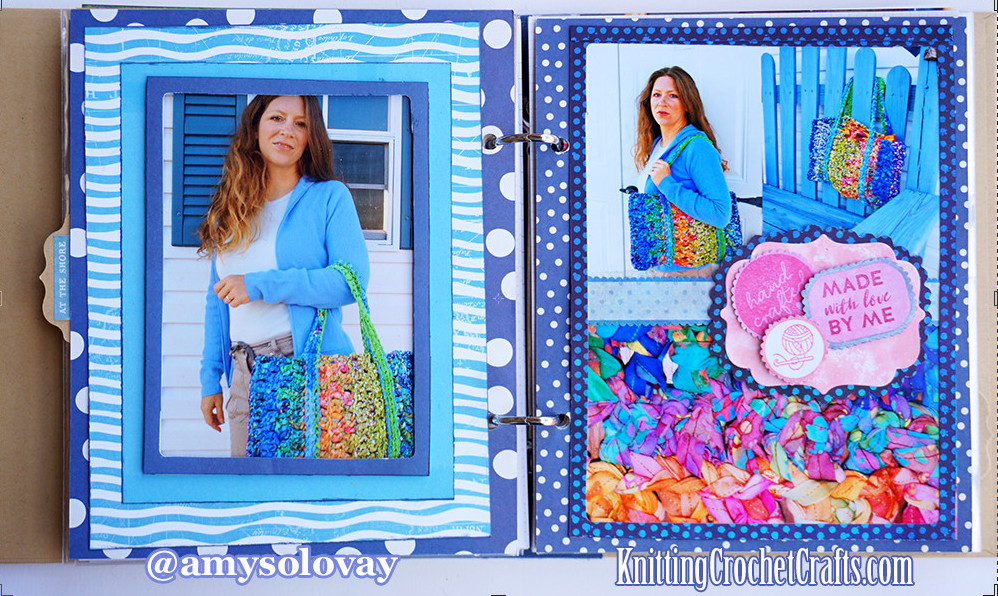
In other cases, the grouping of similar photos might tell a story, and you might want to print them all. In that case, you might want to choose one of the photos to be a “focal point” for the scrapbook page; you could print that photo large and print the supporting photos in a smaller size, as accents.
The size of your scrapbook album is going to dictate the size limitations on your photos. If you’ve chosen a twelve inch album, you’re going to have a great deal more freedom to play around with large photos.
Step 3: Think About Your Journaling and Plan Your Layouts
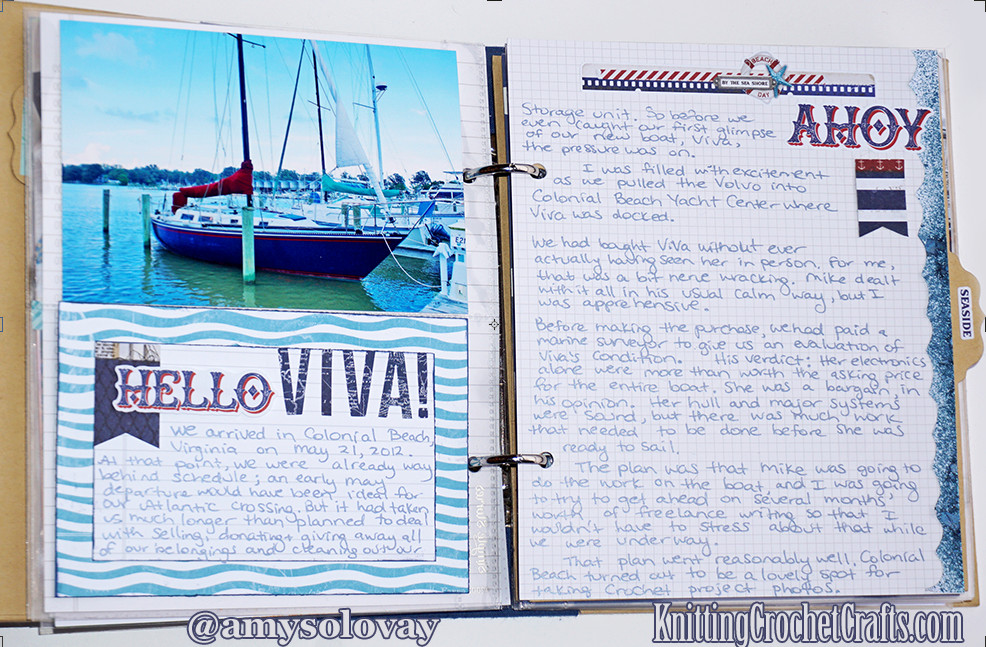
Once you have your photos in hand, the next step is to group them logically and sort out which ones are going to be used in pages together. The goal here is to envision how the album is going to flow from page to page. For example, if you have photos of your arrival at your vacation destination, you might want to group them on the first page, or the first several pages, of your album.
I often use page protectors to help with this step. That isn’t necessary; you can put your photos in piles, or sort them in plastic baggies, or organize them inside the packaging that comes with your scrapbook paper. It does help to find some way of keeping track of which photos are going to be on which page with each other. I find page protectors to be the easiest method for organizing all these things; I simply place all the photos, papers and embellishments for each page in one page protector. But it doesn’t really matter which method you use as long as you are happy with it.
Once you have an idea of which photos belong together on your pages, it’s time to jot down some ideas about the journaling you will put on each page (or not put on each page. See also: Should every scrapbook page have journaling?)
I find it helpful to use note pads. I recommend making a separate page of journaling notes and ideas for each page. When I’m finished with this, I store the page of notes along with the organized photos in my page protectors.
At this point, it’s also a good idea to think about how you want to create your journaling. If you decide to print it out on the computer, you’ll be choosing different supplies than if you decide to hand write it or rubber stamp it all or create it all using letter stickers.
If you aren’t sure what to write in your scrapbook, I invite you to check out these ideas for journaling prompts. You might also be inspired to try journaling with stickers.
Step 4: Choose Scrapbooking Paper
Now that you have an idea of which photos and what journaling might appear on each page, it’s time to choose scrapbooking papers that will enhance each layout. The goal here is to choose papers that will look good with your photos, and complementary papers that will enhance your journaling.
After you’ve selected each paper, store it in the appropriate spot along with your organized photos.
If you’re totally mystified by scrapbooking papers and not sure which papers to use, please see this article about how to choose scrapbook paper.
Step 5: Choose Scrapbooking Embellishments

By this point, you’ve hopefully got a pretty good idea of how each page is going to look. Choose embellishments that will enhance your photos, papers and journaling. For small bits of handwritten journaling, you might want to use die-cuts or hand-stamped journaling blocks. For titles, you might want to use letter sticker embellishments. You can have fun choosing washi tapes, ribbons, crystals and rhinestones, and other embellishments. You might even want to make some of your own embellishments. Try these hand-stamped paper flowers, if you like.
Step 6: Create Your Journaling
Now’s the time to create your journaling; type it up, print it out, stamp it, hand write it onto your journaling blocks, or do whatever else you plan to do with it. The exception to this: If you plan to hand write your journaling directly onto the scrapbook page, without using journaling blocks, wait until after your photos are in place. Only do this step at this point if you are making journaling spots that can be moved around easily.
Step 7: Finalize the Scrapbook Page Layouts
Combine your papers, your photos, your journaling, and all your embellishments. Move them around until you are happy with the placement of each element.
Look at each page with a critical eye. Crop photos that need it; eliminate visual clutter if you’ve got too much stuff for the amount of real estate on any one page. Double-check your journaling for typos and spelling errors.
Step 8: Attach All the Components for Each Scrapbook Page Layout
Using the adhesive(s) of your choice, adhere all your elements to your pages. Let the adhesive dry if necessary. Once dry, place the pages of your layout into the scrapbook album.
Add any finishing touches if your pages need them; you could add handwritten notes, an additional flower or two to cover a bare spot, or maybe a little doodle.
Enjoy Your Finished Scrapbook Album!
So there you have it: That’s how to make a scrapbook. I hope you found this information helpful and inspiring.
This tutorial gives you an outline for my usual approach to creating scrapbook albums. This is a tried-and-true approach that works for me, but these steps aren’t set in stone; you can feel free to move them around and do things in a different order if you like. It isn’t my intention to dictate to you how you should make your scrapbook; I’m only trying to give you ideas and suggestions. I hope these ideas save you time when you create your own scrapbook albums. As you gain experience with scrapbooking, you’ll probably develop your own approach that may differ significantly from the approach that I take, and that is a wonderful thing.
Happy Scrapbooking!
I invite you to return to this site often for more craft tutorials, project ideas and inspiration! You can make sure you keep this site on your radar by signing up for my newsletter and community at Substack. .
Basic subscriptions are free; I send out regular newsletters to let my subscribers know about new craft articles and tutorials as they are posted. I also share details about the craft projects I’m working on, and invite my readers to share their projects, too. So there is no need to feel like it’s just you, crafting all alone at home. I’d love to have you join us! You’re invited!!
By Amy Solovay
Please Visit My Ko-Fi Shop HERE to Find My Sample Sale, Destash Sale and Digital PDF Pattern Downloads for Sale.
Please Visit My Ravelry Store HERE to Find Digital PDF Pattern Downloads for Sale.
About the Author:

Amy Solovay is a real, live, human content creator and educator who holds a Bachelor of Arts degree in mathematics from Sweet Briar College; she has also earned a separate Associate of Arts degree in textile design from FIDM LA (The Fashion Institute of Design and Merchandising, Los Angeles). She is NOT a robot and does not use artificial intelligence (AI) to write book reviews or articles for this website.
Amy learned to stamp and color as a small child, and she still enjoys stamping techniques all these years later.

As an educator, Amy Solovay used to teach in-person college courses in trend forecasting, marketing and surface design at California Design College in Los Angeles. Nowadays she uses online platforms for sharing her knowledge about textiles, crafts, current color trends and current design trends.
Thanks for dropping by. You’re invited to check out our related pages on scrapbooking, paper crafts and other crafts:
- Find More Scrapbooking Layout Ideas HERE.
- Take a Look at Scrapbook Mini Albums HERE
- Discover Vacation Scrapbooking Ideas HERE
- Check out Our Picks for the Best Paper Craft Adhesives
- Learn How to Stamp Sentiments for Scrapbooking Layouts, Greeting Cards and Other Paper Craft Projects
- Best Ink Pads for Stamping on Paper: Card Making and Other Paper Crafts
- Card Making
- Adult Coloring
Posted By: Amy Solovay
This page was last updated on 7-19-2025.