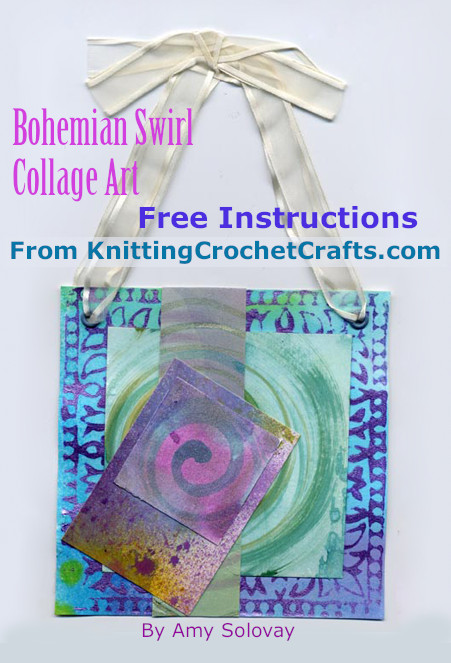
This collage features an interesting juxtaposition of spirals, swirls, color washes and decorative design elements borrowed from fabric. The collage doesn’t need to be framed, because it comes with its own built-in ribbon hanger.
If you like this idea, we invite you to make a similar collage using our free step-by-step instructions. You can use your finished collage to decorate your own home, or to give as a gift. You can hang the collage from a bulletin board, on the refrigerator, or really just about anywhere.

Supplies You’ll Need
- Bristol Board
- Fabric dyes and squirt bottles, or watercolor paints and paintbrushes
- Batik block, wood block or rubber stamp. In the project sample, I used a square medallion batik block, but you could use just about any large background stamp to get interesting results.
- Stamping ink
- Metallic paints such as Lumiere by Jacquard Products
- Small squirt bottles,
- Adhesive such as Mod Podge
- Hand punch for punching holes
- 2 scrapbooking eyelets and an eyelet setter
- Ribbon
- Fray check
- Sponge brushes
Collage Instructions:
- Paint washes of color onto a 5 3/8 inch square of Bristol board using dyes or watercolors.
- Using the batik block or stamp, stamp an image onto the colored Bristol board. Set it aside.
- Paint washes of color onto a 5-inch square of Bristol board using dyes or watercolors. Then paint a spiral or swirl motif overtop of the background. To get the best possible results when painting the spiral, follow the instructions given in our spin art how-to.
- Paint washes of color onto a 1.5 inch by 5 3/8 inch strip of Bristol board. Then paint a spiral or swirl motif overtop of the background. Again, you can use our spin art instructions for best results with the spiral motif.
- Using small squirt bottles, squirt colorful dyes onto a 2.5 inch by 3.5 inch rectangle of Bristol board.
- Using dyes or watercolors and metallic paints, paint a small swirl motif onto a 2 inch square of Bristol board.
- Collage the 5 painted pieces together using Mod Podge or the adhesive of your choice.
- Punch holes in the 2 upper corners of the piece.
- Using a sponge brush, coat the entire piece with Mod Podge or similar decoupage medium.
- Wait for the piece to dry, at least overnight.
- Attach 2 metal eyelets through the holes in the corners using an eyelet setting tool.
- Cut a length of ribbon and treat the ends with Fray Check.
- Thread each of the ends of ribbon through one of the eyelets, from back to front.
- Tie the ends of the ribbon in a bow.
- Position the ribbon so that the piece can be hung from it with the bow at the top; the length of the ribbon will be doubled up.
- Hang up your new collage and enjoy!
More Collage Art Ideas
- Free Instructions for How to Make Collage Art
- Collage Art for Kids
- Ideas for 50+ Creative Collage Art Materials to Try
Learn More About Fine Art Techniques HERE.
Find Our Main Directory of Craft Project Ideas HERE.
By Amy Solovay
This page was last updated on 12-13-2023.