Free Crochet Edging Pattern With Corner; Makes a Fantastic Blanket Edging
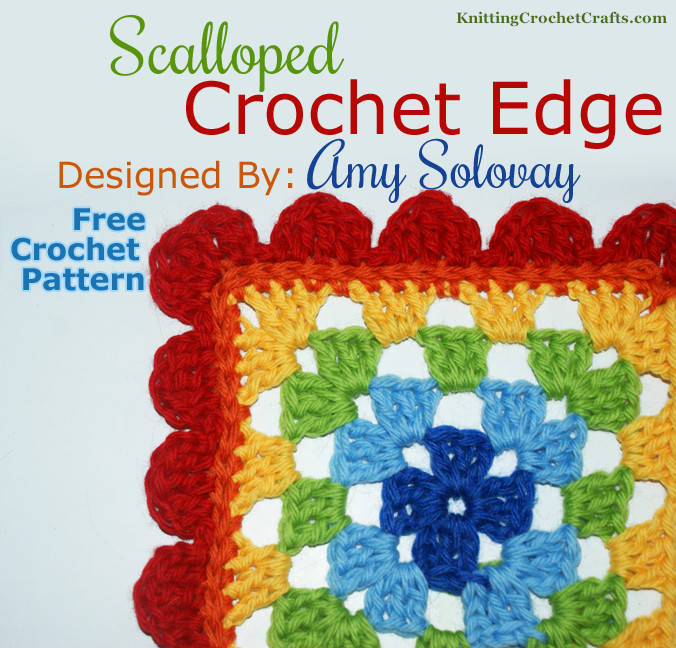
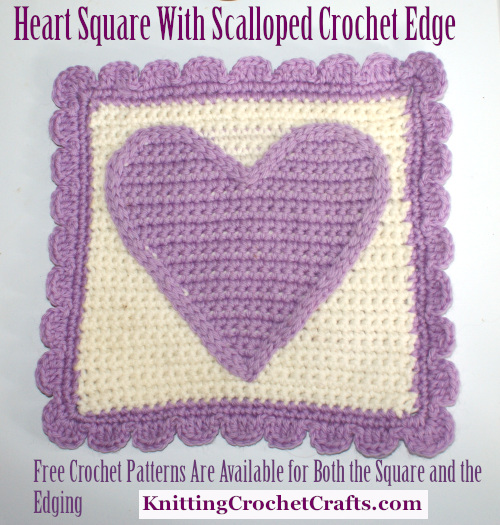
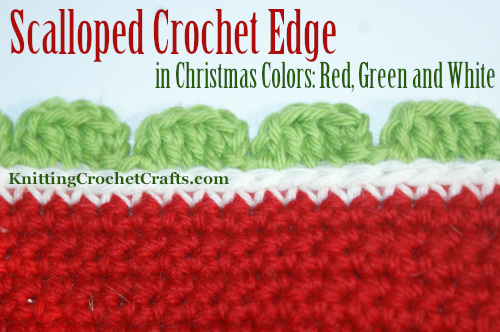
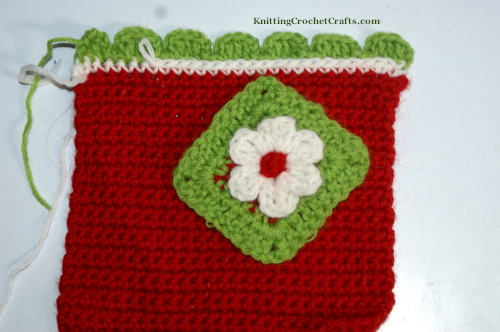
If you’re ready to finish off a blanket, placemat, tablecloth, sheet or other square /rectangular craft project, this scalloped crochet edge is a fantastic pattern to consider.
This edging would also work for embellishing various garment edges or accessories; you could use it at sleeve edges, along the lower edges of a skirt, around the openings of a simple cardigans, or along the lower edge of a pullover sweater.
There are several versions of this pattern you could use:
- For finishing blankets and other square or rectangular projects, there’s a version with a corner.
- For projects such as sheets, there’s another version that’s suitable for finishing straight edges without corners.
- There’s yet another version to use for projects such as cowls, infinity scarves, skirts and pillowcases where you crochet in the round and need the edges to join to each other.
- I’ve also added a two-color version, in case you’d like to create a project with a colorful edging.
Scalloped Edge With Corners
Stitch Multiple: For this pattern to work out correctly, when you get to round 2, each edge needs to have a multiple of 5 sts across plus one extra st, not counting the ch-2 spaces in the corners. This translates to being a multiple of 5 + 1 sts across each edge. If you need to work any increases or decreases to get the right number of stitches, round 1 is the ideal time to do that.
Round 1: sc all the way around the piece. When you get to a corner, ch 2 to turn the corner, then resume working in sc st. At the end of the round, sl st to join the end of the round to the beg.
Round 2: [ch 2. dc in same st. Work 1 dc in ea of the next 2 sts. ch 2, sl st in same st. sl st in next st. sl st in next st.] Repeat. When you get to a corner, work 2 ch sts and then dc in the st right before the ch-2 space. Work 3 dc sts in the ch-2 space. In the next st after the ch-2 space, work 1 dc, then ch 2, then sl st in the same st as the last dc. sl st in next st, sl st in next st, then resume working the sequence in between brackets until you get to the next corner.
Optional Round 3: Work a round of surface crochet slip stitches in the spot where round 1 of the edging and the last row of the project touch each other, all the way around.
Another alternative: you could work a round of surface crochet slip stitches in the spot where rounds 1 and 2 touch each other.
Two-Color Scalloped Edge With Corners
Stitch Multiple: For this pattern to work out correctly, when you get to round 2, each edge needs to have a multiple of 5 sts across plus one extra st, not counting the ch-2 spaces in the corners. This translates to being a multiple of 5 + 1 sts. If you need to work any increases or decreases to get the right number of stitches, round 1 is the ideal time to do that.
You’ll need 2 different yarn colors for this version of the edging — color A and color B. To see an example of this version, check out the colorful rainbow granny square.
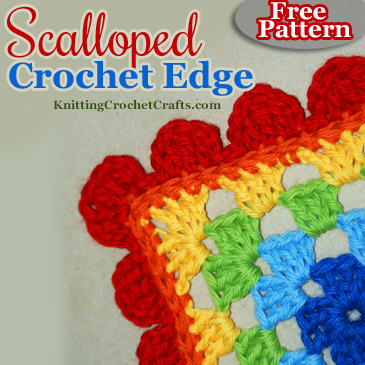
In my granny square example,
- Color A = orange
- Color B = red
Round 1: Using color A, sc all the way around the piece. When you get to a corner, ch 2 to turn the corner, then resume working in sc st. At the end of the round, before you work the last step of the last st in the round, change colors to color B. Do not cut color A. Just drop it and let it hang while you work round 2, taking care not to tangle it up.
Round 2: using color B, [ch 2. dc in same st. Work 1 dc in ea of the next 2 sts. ch 2, sl st in same st. sl st in next st.] Repeat. When you get to a corner, work 2 sl sts and then dc in the same st right before the ch-2 space. Work 3 dc sts in the ch-2 space. In the next st after the ch-2 space, work 1 dc, then ch 2, then sl st in the same st as the last dc. sl st in next st, sl st in next st, then resume working the sequence in between brackets until you get to the next corner. When you’ve worked all the way around the piece, end off color B and weave in your loose end.
Round 3: Insert your hook into the work in a spot close to where you dropped color A, and also in a spot where colors A and B touch each other. Work a round of surface crochet slip stitches, using the spot where rounds 1 and 2 touch each other as your guide for placing the stitches. Work all the way around.
End off.
Weave in all ends.
Straight Scalloped Edge Worked in Rows
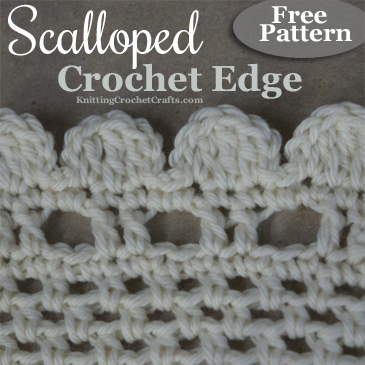
See the second photo posted above for an example of how this version of the edging looks.
The basic stitch multiple for this version is 5 sts, plus you need 3 extra at the end of the row. Depending on how you start your project, you may need to add some stitches to your initial starting chain to get the right number of stitches.
Row 1: Single crochet across entire row.
Note: the work needs to be turned at this point. You can either turn without working a turning chain, then complete the sequence in brackets given in row 2. Or work the first ch 2 and turn the work, then complete the sequence in brackets below as usual without working any additional chains.
Row 2: [ch 2. dc in same st. Work 1 dc in ea of the next 2 sts. ch 2, sl st in same st. sl st in next st.] Repeat. At the end of the row, you can omit the last set of 2 sl sts to end with a scallop.
If you want to work an additional row of surface crochet sl st where rows 1 and 2 touch each other, it will add a bit of additional texture and visual interest to the work. This isn’t a necessity. The picture above shows the edging WITHOUT this optional third row.
Straight Scalloped Edge Worked in Rounds
If you want to use this edging to finish off the edges of a cowl or infinity scarf, this is the version to use.
The basic stitch multiple for this version is 5 sts. If you’re starting the project from the beginning, you may need to add some stitches to your initial starting chain to get the right number of stitches. The number you’d need to add depends on the stitch or stitch pattern you are working.
Round 1: Single crochet across entire row. At the end of the round, work a sl st to join the end of the round to the beg.
Round 2: [ch 2. dc in same st. Work 1 dc in ea of the next 3 dc sts. ch 2, sl st in same st. sl st in next st.] Repeat all the way around.
If you want to work an additional row of surface crochet sl st where rows 1 and 2 touch each other, it will add a bit of additional texture and visual interest to the work. This isn’t a necessity. The picture above shows the edging WITHOUT this optional third row.
End off and weave in any loose ends.
So there you have it: That’s how to crochet a scalloped edge for a blanket or other project. I hope this pattern will be useful to you for finishing off a variety of your crochet projects.
Please Visit My Ko-Fi Shop HERE to Find My Sample Sale, Destash Sale and Digital PDF Pattern Downloads for Sale.
At Ko-Fi, you can use the coupon code HALFOFF through October 31, 2024 to get a 50% discount on my newly-released digital PDF pattern downloads.
At Ravelry, you can use the coupon code HALFOFF! through October 31, 2024 to get a 50% discount on my newly-released digital PDF pattern downloads.
Thank you for your support! I am grateful for any purchases or donations you choose to make.
Related Resources:
Crochet Books You Might Enjoy:
- Delicate Crochet
- Crocheted Beanies and Slouchy Hats
- Unexpected Afghans
- Best Crochet Edging Pattern Books
- Best Crochet Stitch Dictionaries
- Best Crochet Baby Pattern Books
- Best Crochet Blanket Pattern Books
Knitting, Crochet and Craft Supplies
- Find Yarn for Crochet and Knitting
- All About Knitting Needles
- Get Ideas for How to Organize Yarn
- All About Crochet Hooks
More Crochet
Other Crafts You Might Enjoy
By Amy Solovay
About the Author: Amy Solovay is a real person; she is NOT a robot and does not use artificial intelligence (AI) to write articles for this website. She is a real, live, human content creator and educator who holds a bachelor’s degree with a studio art minor; she has also earned a separate degree in textile design. Amy learned to crochet as a small child, and she still enjoys crocheting all these years later. Beyond that, she enjoys introducing other crafters to the best new craft supplies, and she also loves helping crafters learn new techniques for making the most of the craft supplies they buy.
As an educator, Amy Solovay used to teach in-person college courses in trend forecasting, marketing and surface design at California Design College in Los Angeles.
Nowadays, Amy uses online platforms to teach digital courses to craft pattern designers, content creators and influencers all over the world.
Thanks for visiting!
This page was last updated on 10-7-2024.