A Scrapghan Is an Easy Way to Clean Out Your Stash of Scrap Yarn!
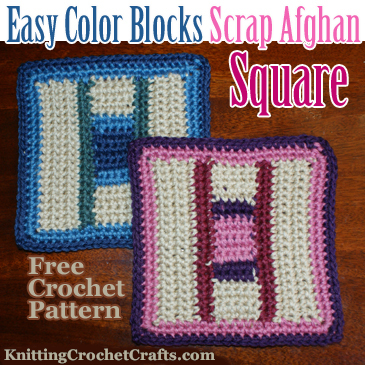
Easy Color Blocks Scrap Afghan Square — Free Crochet Pattern
Related Resources: Knitting and Crochet Scrap Yarn Patterns | Crochet Squares | Crochet Blanket Patterns
If you have bunches of scrap yarn left over from other projects, you could use it to make an afghan or a smaller project. This afghan square pattern is easy, and it allows you to use up as many scraps as you happen to have on hand. If you have bunches, it could become an afghan; it you only have a little bit, it could become a pillow or other project. Or you could save up your squares for awhile until you have enough to make a larger throw or blanket.
Skill Level: Easy

This Is an Easy Crochet Pattern.
This project looks really complicated and colorful at first glance, but it isn’t as hard as you might think. You’re only ever working with one color per row or round, and the color changes are really easy to do.
The project consists entirely of single crochet stitch, making it an ideal choice for new crocheters. I don’t recommend this as your very first project (see this page for first-time crochet project suggestions), but this is a good project to try once you are comfortable with maintaining an even tension as you crochet. The most challenging thing about this pattern is keeping an even tension throughout the various different rows and rounds.
Supplies You’ll Need to Crochet the Easy Color Blocks Scrap Afghan Square:
Yarn:
I originally crocheted my sample squares using a brand of worsted weight yarn that has now been discontinued. There’s no need for you to worry about using the same yarns I used; if you have scrap yarn on hand, you’ll want to raid your own scrap yarn stash to choose yarns for using in your squares.
To crochet this square as shown, you’ll need four different colors of worsted weight yarn:
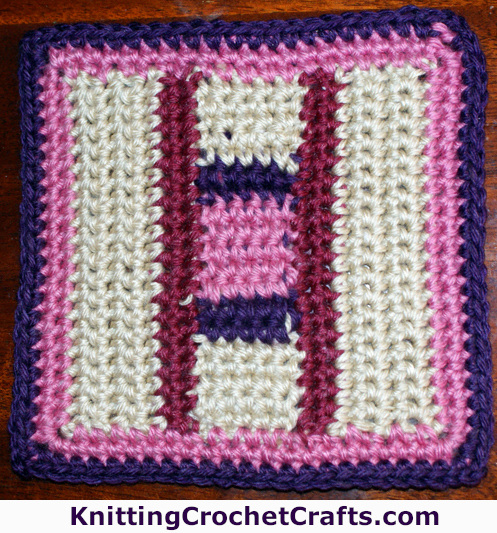
Color Block Afghan Square: Free Crochet Pattern
- Color A: Corresponds to the tan yarn in my sample square
- Color B: Corresponds to the dark purple yarn in my sample square
- Color C: Corresponds to the pink yarn in my sample square
- Color D: Corresponds to the burgundy yarn in my sample square
The design works best if color A contrasts with the other colors used in the same square. I think the design looks nicest if color C is the brightest or most interesting color in the square, but that’s up to you; feel free to experiment with your color choices.
You can crochet this square with any yarn or crochet thread you like. Keep in mind that your gauge and finished sizes will vary depending on the materials you use.
If you plan to make a scrapghan, colors A through D can be different in every square you crochet.
Another idea: if you don’t mind buying some of the yarn for the afghan, you could use the same color for color A throughout all the squares in the entire afghan, and then use scrap yarn for colors B, C and D. This helps to create more of a unified look. It’s also a good choice if you don’t have an entire afghan’s worth of scrap yarn accumulated.
Crochet Hooks:
To crochet my project sample, I used a size H / 8 – 5.0 mm crochet hook. It’s acceptable, although it’s a little tight for my taste; if I were going to crochet an entire afghan using this pattern I’d maybe try going up a hook size for “drapier” results.
You may also need a hook that’s a size up or down from the crochet hook you begin working with.
Other Craft Supplies You’ll Need:
- Scissors
- Tapestry needle for weaving in ends
Gauge and Size of the Finished Square:
1 square = about 6 inches.
There is no need for you to match my gauge in this project. However, if you plan to use multiple squares in the same project, you do need to match your own gauge.
Abbreviations List:
- beg = beginning
- ch = chain
- ch-2 space = chain-2 space, the space created in the previous round when you worked the ch-2 in the corner.
- ea = each
- rep = repeat
- sc = single crochet
- sl st = slip stitch
st = stitch
Pattern Notes:
Work in standard single crochet stitch throughout. Ch 1 in between rows as a turning chain.
Dealing With Loose Ends: You’ll end up with many loose ends when you work this pattern. A real sanity-saver: Crochet overtop of your loose ends as you work. You’ll still have to weave in your remaining ends at the beginning and the end of the work, but otherwise, this technique will save you from doing bunches of extra end weaving.
In case you don’t now how to do this, here’s a photo from another project that will hopefully give you the idea:
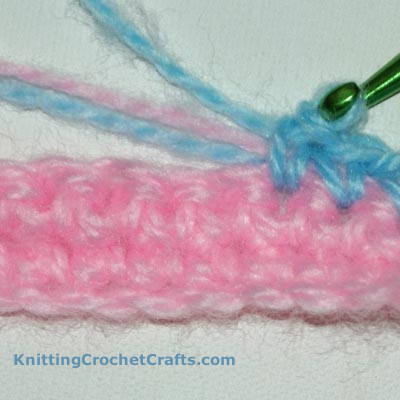
Here you can see me crocheting over my yarn ends. I crocheted the first few rows of my project using pink yarn. Then I changed to blue yarn, and I’m working overtop of the pink end and the blue end that resulted from the color change. My working yarn is the blue yarn on top. You can see that I’m simply holding the ends parallel to the piece I’m working on, and then sandwiching the ends into the stitches as I crochet.
Joining These Squares: I think it’s a good idea for yarn ends to do double duty for the joint tasks of sewing pieces together and weaving in ends at the same time. It helps to ensure that the join will be strong. If you are going to be joining your squares to create a larger project such as a blanket, when you end off after completing edging round 3, leave an extra long tail of yarn so you can use it for joining your squares together. You can thread this yarn with a tapestry needle and use it to do your sewing.
In my project photos on this page, I did not take this advice, only because I want to use contrasting yarn for my demonstration. The contrast in colors enables you to see what I’m doing.
How to Crochet the Easy Color Blocks Scrap Afghan Square:
Using color A, ch 6.
Rows 1-5: sc in 2nd ch from hook and all the way across the row. Work 4 more rows in sc for a total of 5 rows. At the end of the fifth row, before completing the last step of the last st, change colors to color B.
For rows 1-19, you’ll end up with 5 sc sts in ea row; be sure to count stitches periodically to make sure you are not gaining or losing any.
Rows 6-7: Work 2 rows of sc st in color B. Before completing the last step of the last st in row 7, change colors to color C.
Rows 8 – 12: Work 5 rows of sc st in color C. Before completing the last step of the last st in row 12, change colors to color B.
Rows 13 – 14: Work 2 rows of sc st in color B. Before completing the last step of the last st in row 14, change colors to color A.
Rows 15 – 19: Work 5 rows of sc st in color A. Before completing the last step of the last st in row 19, change colors to color D.
Using color D, ch 1.
Begin Sideways Rows:
Up until this point in the pattern, you’ve been working your rows as you normally do when working in single crochet stitch. At this point, you’re going to stop building your rows on top of each other. Instead, you’ll crochet your next row down the left-hand side of the work (if you’re right-handed) and then you’ll begin building the next several rows on top of it.
If you’re left-handed, you’ll most likely reverse what a right-handed person would do, so you’d probably find it easiest to work down the right-hand side of the work. Please note that it doesn’t matter too much which side you choose to work down, as you’ll be mirror-imaging the work on the other side anyway.
Some crocheters will find it helpful to change hooks at this point, in order to maintain a consistent tension. In my experience, you may want to try going down a hook size before you start crocheting these rows. Pay attention to your work over the next several rows; if it turns out significantly wider than your original 19 rows, you’ll want to rip back and try a smaller hook. If the work turns out narrower than the original 19 rows, it means your hook is too small and you want to go with a larger one.
Minor differences in tension aren’t that big a deal, as those will even out when the final rounds are added at the end (and when you block the square, if you’re using a block-able yarn).
Sideways Rows 20 – 21: Work 19 evenly spaced sc sts down the side of the work. Work a total of 2 rows of sc sts using color D. Before completing the last step of the last st, change colors to color A.
Sideways Rows 22 – 26: Work 5 rows of sc st using color A. At the end of row 26, end off.
Rotate the work so that you can work across the other side. If you’re right-handed, pull up a loop of color D in the right hand corner; if you’re left-handed, pull up your loop in the left-hand corner. ch 1.
Rep all your sideways rows on this side to create a mirror image, except at the end of the last row, do not end off; instead, change colors to color C.
ch 1.
Begin Edging Rounds:
Next you’re going to stop working in rows and work in rounds, all the way around the outer edge of the square.
Edging Round 1: Using color C, work a round of sc st all the way around the square. You’ll want to have 19 sc sts on ea side of the square. When you get to a corner, ch 2, turn the corner and continue working in sc. At the end of the round, sl st to join the end of the round to the beg.
ch 1.
Edging Round 2: Continue working in color C. Work another round of sc st all the way around. When you get to a corner, sc in ch-2 space, ch 2, sc in same ch-2 space, then continue working sc all the way around. You’ll want to have 21 sc sts total on ea side of the square. At the end of the round, sl st to join the end of the round to the beg. Insert hook into next st and pull up a loop of color B.
ch 1.
Edging Round 3: Using color B, rep the same instructions given above in edging round 2; you’ll want to have 23 sts on ea side of the square.
End off, leaving a very long length of yarn that you can use for sewing your squares together. If you used a block-able yarn such as wool or cotton to crochet your squares, you’ll want to block each square before joining. When your squares have thoroughly dried, thread one of the long yarn ends onto your tapestry needle to prepare for joining the squares.
How to Join These Crocheted Squares to Make a Blanket or Other Project:
There are bunches of different ways you could join these squares. I’m going to demonstrate how to join the squares using whip stitch; but feel free to use a different joining method if there’s another method you’d rather use.
How to Whip Stitch Your Crocheted Squares to Join Them:
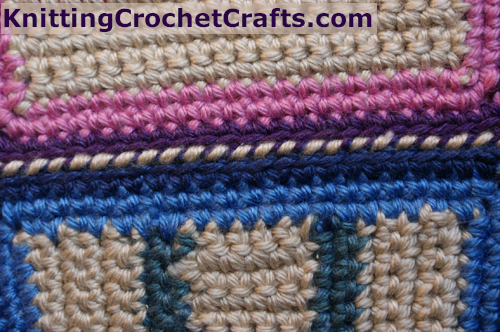
Color Blocked Afghan Squares Joined With Whip Stitch
Whip stitch is my favorite join for afghan squares like this one, because I like the simplicity of the stitch and also the decorative look of it. Here’s how to whip stitch your color block afghan squares:
The first step: set your squares flat on a table, lining them up with the sides you want to join touching each other. If you’re right handed, you’ll probably find it easiest to start stitching on the right and go from right to left. If you’re left handed, start on the left and stitch from left to right.
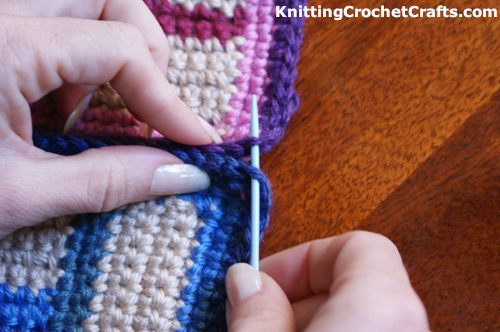
To begin whipstitching, choose which loops you will work through. If you aren’t sure, a good choice is to work in the back loop of the stitch in the square that’s closest to you and the front loop of the square that’s furthest from you. It’s also possible to work through all 4 loops. Insert your needle under these loops to begin stitching.
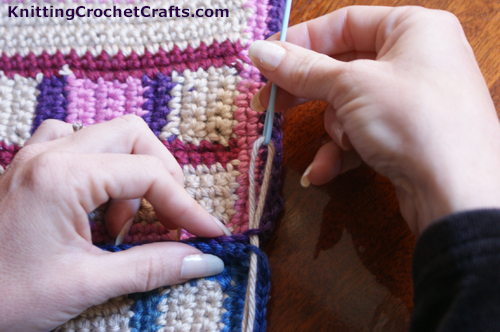
Pull the Threaded Needle Through the Loops of Your Stitches. Leave a tail of yarn about six inches long hanging from the end. Later, when you’re finished sewing the squares together, you’ll want to weave this end into the back of your piece. This is a necessary step because you don’t want your seam to unravel, and you also don’t want want pieces of yarn hanging off of the afghan.Notice that I’m stitching with a doubled piece of contrasting-colored yarn. You can do it this way if you like, but a better approach is to simply thread one of the loose ends you end up with from crocheting, and use that to stitch your squares together. If you do that, your yarn won’t contrast, and you’ll be stitching with a single length of yarn rather than a doubled length.
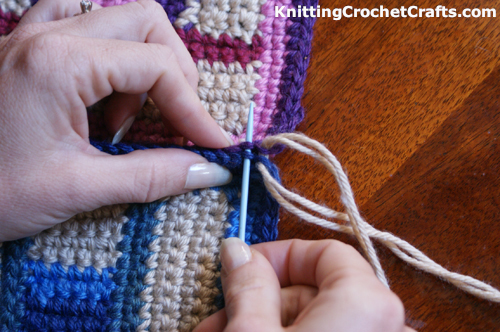
Insert the Tapestry Needle Into the Next Unstitched Set of Loops.
Pull the yarn all the way through so that it is taut, but also making sure that some flexibility remains; you don’t want it to be either too tight or too loose.
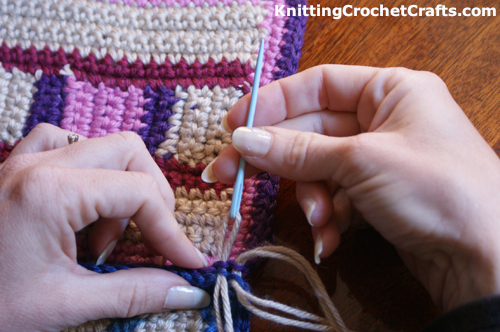
Continue stitching like this until you’ve completed the entire seam.
So there you have it: that’s how you crochet the easy color blocks scrap afghan squares and join them together to make blankets and other projects. I hope you’ll enjoy the pattern! Thanks so much for your visit to Knittingcrochetcrafts.com today. We really appreciate your interest in our patterns.
Related Resources
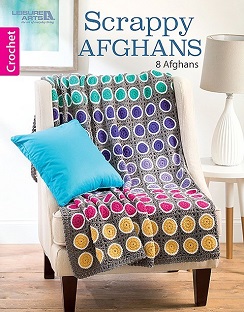
Scrappy Afghans Crochet Pattern Book Published by Leisure Arts
- Patterns for Knitting and Crocheting Squares
- Best Crochet Granny Square Pattern Books
- How to Crochet a Granny Square: Free Step-By-Step Tutorial
- Scrappy Afghans — This crochet pattern book is exclusively dedicated to giving you excellent patterns for crocheting scrap afghans. It’s a must have resource for any serious crochet enthusiast.
- Knitting and Crochet Blanket Patterns
- Knit and Crochet Baby Blanket Patterns
- Scrap Yarn Patterns