Become an Artist Instantly With This Easy Painting Technique
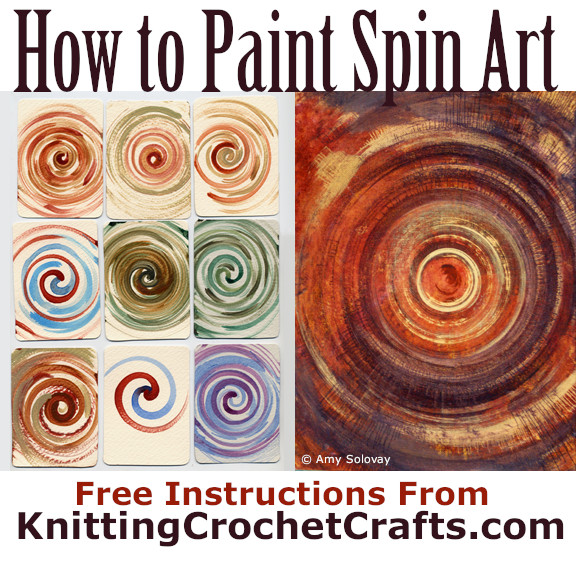
How to Do Spin Art: Paint Circles, Spirals and Splatters EASILY! This Is Such an Easy Art Technique!
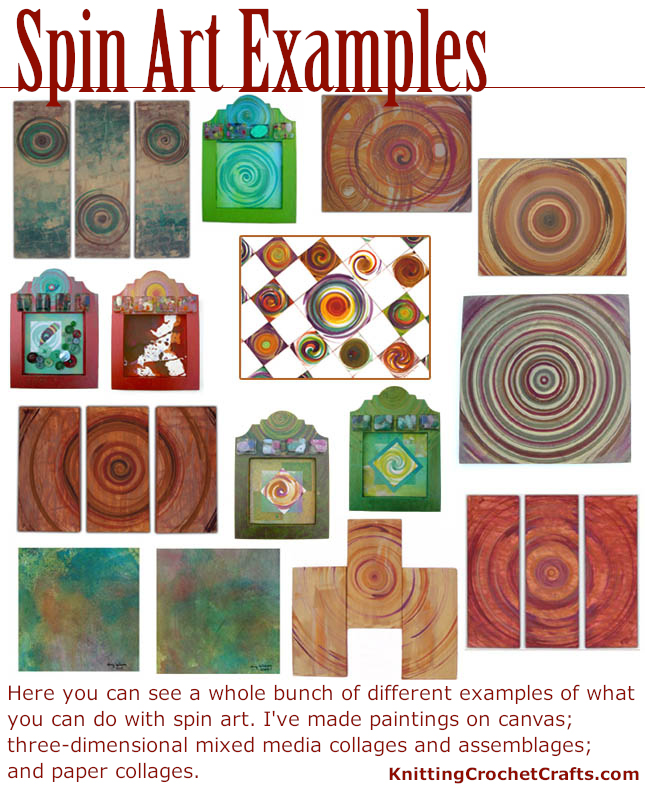
Spin Art Examples
Even if you’ve never taken a single art class, you could paint spectacular abstract paintings with the spin art technique. Kids and adults can both have success with this method. It’s easy enough for anyone to master.
Art Supplies and Other Tools Needed:
- Spin art machine; turntable; lazy Susan; or drill and drill bit
- Paints
- Squirt bottles and / or paintbrushes
- A surface to paint on (canvas and heavy paper both work well; I’ve also used alternative surfaces like bubble mailers and even an art journal.)
- Drop cloths, old newspapers and / or plastic for protecting your work surface; old clothes that you don’t care if they get paint on them
Spin Paint Machines and Turntables:
In the past, I’ve seen bunches of different spin paint machines, turntables, and spin art toys come and go in the marketplace. It’s usually pretty easy to find cheap spin art games or toys for kids that you can buy.
If you just need the machine for a one-time event like a birthday party, you might be able to rent a spin art machine. If you’re interested in having it around to use for a longer period of time, you may wish to buy one of the larger and nicer machines available.
It’s also possible to make your own spin art machine if you prefer to do that. That’s what we did. Here are a few pics of me with the turntable my husband made for me:
We have also tried doing spin art with a drill.
Spin Art With a Drill
One day my husband and I tried experimenting with doing spin art on a drill. I used canvas board to the paintings and acrylic paint to paint with. The drill can spin really fast — faster than my turntable did — and as a result, we were able to achieve some seriously cool splatter-y effects.
At this point I’m a little fuzzy on the details of exactly how he affixed thel canvas board to the drill — but, in any case, I can’t really recommend doing it this way because after a few paintings like this, we realized that this would be a really good way to ruin our drill — so we stopped. If you try spin art with a drill, we don’t recommend using a drill that you really need. But if you really want to do this project with a drill, you could maybe get a cheap drill to work with.
What to Paint on
The surface you choose to paint on will greatly affect the look, and also the value, of your finished painting.
If you want to paint on paper, I suggest buying a heavy paper that’s appropriate for the type of paint you plan to work with. Bristol board is a good choice; it is suitable for use with many types of paint. That’s the surface I used for painting the small art trading card sized spin art examples you see posted on this page.
If you would rather paint on canvas, you can use either canvas boards or stretched canvas with gallery-wrapped sides. I have successfully used both types of surfaces for painting spin art.
In my experience, those are the easiest surfaces to paint, but there are plenty of other possibilities as well. Anything that can be both painted on and attached to your turntable could be painted using this technique.
Some other things I’ve spin-painted include bubble mailers, mailing boxes, envelopes, and an art journal. The art journal was difficult to attach and hard to paint, but the other things were reasonably easy to work with.
Squirt Bottles vs Paintbrushes:
Unless you plan to use finger paints, you need some sort of tool or device for transferring the paint onto your canvas. The most popular tools for this purpose are paintbrushes and squirt bottles.
I prefer to use paintbrushes and also sponge brushes for making spin art. Sponge brushes are great, because they are cheap, widely available, and not easily destroyed by the painting process.
Paintbrushes are tricky to use in spin art, because they get destroyed so quickly. I don’t let that stop me, because I love the fine, detailed effects I can achieve with a paintbrush.
Squirt bottles are easy to use for spin art, and they are a great choice if you want to make designs that have lots of splatter and splash effects. My experience has been that squirt bottles are slightly quicker to use, but that you have a little less control over the paint placement when you use them.
The splatter and splash effects are actually created by the paint itself running, and you can achieve that effect using either paintbrushes or squirt bottles. In my opinion, the squirt bottles are slightly more splash-friendly, but you can get great results with either type of paint applicator.
Paints For Spin Art:
If you want your finished paintings to have abundant splashes and splatters, use a water-soluble paint and experiment with watering it down to the consistency that gives you the effect you want.
Acrylic paint is an acceptable choice for spin art. Acrylic works well on both paper and canvas, and it can be watered down, or not, whichever you prefer. If you will be applying the paint with squirt bottles, you should mix up some paint and test to make sure the paint flows out of the bottle freely.
There are plenty of other interesting paints you can use: metallic paints, gouache, watercolors, oils, etc. If you’re going to use oil paints, you’ll also need solvents for cleaning up afterwards.
If children will be taking part in the spin art activities, it’s advisable to use child-friendly paints of the non-toxic variety. It also helps if the paints are easy to clean up; in that case, you’ll definitely want to use a water soluble paint.
Adhesive:
It’s possible that maybe your turntable features some sort of mechanism for attaching your paper or canvas to itself. If if it does, there’s no need to worry about adhesive, just use the built-in feature.
If not, you’ll have to figure out how to attach your painting surface to your turntable.
In the past, I’ve used bunches of different adhesives for this purpose.
If you’re using paper to paint on, try using a repositionable adhesive to see if it works well with your setup. Some repositionable adhesives work well and some may not be strong enough for this purpose.
If you’re painting on canvas, you need a much heavier-duty adhesive, something like duct tape, Velcro or double-sided foam tape. Those are the three adhesives I’ve had the best success with for attaching canvas to my turntable.
Preparing to Paint
- Gather your supplies
- Put on your painting clothes, because whatever you wear might get spattered with paint. This technique can get messy.
- Go outdoors with your painting setup if possible. If not, protect all nearby work surfaces with drop cloths, newspapers and / or plastic.
- Right before you are ready to get started, mix up your paint to create the colors and color combinations you want to use for your paintings.
Get Started Painting
Before you begin the spinning process, you may wish to paint a background onto your surface.
If you’re painting on canvas, I highly recommend covering the canvas completely with a painted background before you begin spinning.
With a canvas painting, ideally, you don’t want to have any of the canvas visible when you are finished; the entire canvas should be covered in paint. However, the spin painting process alone isn’t always enough to give you full background coverage.
I’ve found that it’s much easier to achieve this goal if you purposely start the work by painting a background first. Then you can do the spin painting on top of the background, without having to worry about whether you covered every last inch of the canvas with paint.
It’s up to you whether you want to let the background dry before you start painting your spin art overtop of it. In some cases you might want to, and in other cases you might not, depending on the effect you are trying to achieve.
If you’re painting on paper, it’s your choice whether you want to paint a background first, or not. With paintings on paper, I don’t know of any compelling reason that you’d have to paint a background first.
Next Comes the Fun Part: Spin Painting!
From here, the rest of the process is pretty easy. You turn on your spinning machine, and when it’s spinning you put paint on your paper or canvas. You can splash the paint on with your squirt bottles, or you can apply it with your paintbrushes or sponge brushes.
Whichever way you choose, it won’t be long before you’ll see circles, spirals and arcs forming as you apply the paint. You may also achieve interesting splatter and splash effects, depending on the supplies you’re using, how fast your turntable is spinning, and other factors.
For less splashing and splattering, use thicker paint and a lower spinning speed (if possible.) For more splashing and splattering, use waterier paint and faster spinning speeds (again, if possible. Your turntable might or might not allow you to pick the speed at which it spins.)
If you want your painting to be colorful, remember to change colors from time to time.
If you’re using a fast-drying paint, you may wish to let the paint dry before you remove the painting from the turntable. Otherwise, be careful when you remove it, and put it in a safe place where it can remain undisturbed while drying.

Spin Art Embellishments for Scrapbook Projects
Spin art can be the focal point of your art piece, but it doesn’t always have to be. Sometimes spin art is handy to use for making embellishments that enhance an unrelated theme or idea. For example, spin art gives you lots of interesting opportunities to embellish scrapbook pages. We invite you to check out the following examples:
Spin Art on a Vacation Layout [/ezcol_1half] [ezcol_1half_end]Spin Art on a Wedding Scrapbook Page
 [/ezcol_1half_end]
Things to Do With Spin Art:
- Decoupage with it.
- Decorate your fridge, bulletin board, locker, etc.
- Frame it and use it to decorate the walls of your home, office or business.
- Sell it. Spin art has a history of selling pretty well; I sold most of the examples you see on this page.
- Use small pieces of spin art in other paper crafts; you can incorporate them into greeting cards, scrapbook albums and other paper craft projects.
- Incorporate it into collages, art journals, handmade books, or other mixed media projects. Little spirals make beautiful focal points for these sorts of projects.
- Give it to the kids (or grandkids) to use in their craft projects.
- Make it into gift tags.
Related Resources:
Get More Free Painting Instructions: How to paint a still life
Get complete instructions for how to spin paint, plus see pictures of bunches of examples — paintings, collages, cards, and other projects you can make.
spin art, spin painting, paints, art, artwork, art supplies, spin paint machine, spin paint turntable, painting technique, painting surfaces, original art, squirt bottles, paintbrushes