Napkin rings are lovely accents to add to any table setting. It’s little details like these that make a house (or apartment) seem more like a home.
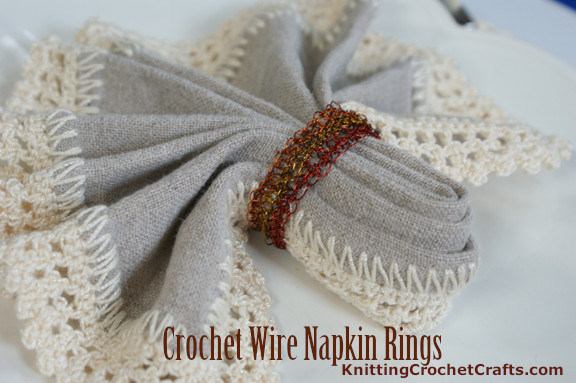
Linen and Lace Napkin Folded Neatly in a Wire Crochet Napkin Ring
Napkin rings also tend to impress the dinner guests with your fabulous hospitality, not to mention your outstanding creative skills.
I envision using these napkin rings during the entire fall season, and especially for Thanksgiving. However, all it would take is a quick change of colors to make them appropriate for any other holiday or season.

Learn How to Crochet Wire Napkin Rings With This Free Crochet Pattern
Crochet Skill Level: For a wire crochet project, this one’s reasonably easy, but it’s truthfully more of an advanced technique for experienced crocheters. However, with this type of project, I think patience counts for more than experience or crochet talent.
Materials:
You’ll need the following materials to make napkin rings like these.
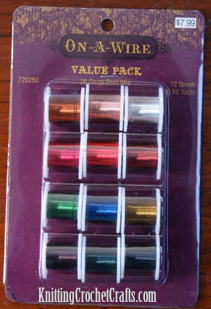
Copper Colored Wire Value Pack
Supplies Needed:
Wire: I crocheted this napkin ring using 3 different fall-friendly colors of 26-gauge beading wire / craft wire:
- A deep russet red (Color A) — I used about 2 yards in the sample project, although you may need to use a slightly different amount due to individual variations in crochet.
- A bronze-y gold, (Color B) — A bit less than 2 yards
- And a lovely dark orange. (Color C) — A bit less than 2 yards
The stated amounts are a best-case scenario that assumes no mistakes and no do-overs.
I got my wire as part of a value pack at Hobby Lobby. The only trouble with that idea: the spools of wire in the value pack only have short lengths of wire — 3 yards each. If you want to use the same 3 colors in each napkin ring in your set, then this is not enough wire to crochet an entire set of napkin rings. So if you want to crochet a bunch of rings, you would have to buy more than one value pack. You’d need one value pack for each napkin ring, and at $7.99 per pack, this is probably not the way you want to go. You’d end up having a lot of money invested in a bunch of unused leftover wire spools. This might not be a problem for you if you do a lot of wire crochet or jewelry-making, but if you don’t, I wouldn’t recommend buying multiple value packs.
Instead, I suggest buying 3 different colors of wire in larger packages or spools that each have more yardage.
For a set of up to 12 napkin rings, one possibility would be to buy 3 different 24 yard packs of 26-gauge Darice colored copper craft wire (or any similar wire that happens to strike your fancy.)
Crochet Hook: I used a 1.80 MM steel crochet hook for making the sample napkin ring. I think steel crochet hooks are fantastic to use for wire crochet, because they are really sturdy, and you need to use a sturdy hook with this technique. I should also mention that wire crochet is hard on your hooks. Be prepared for the possibility that your hook could break, and choose your hook accordingly. This is not a good project for using with family heirloom hooks or any hooks of particular value or significance.
Other: Tapestry needle for weaving in ends
Finished Size:
The finished napkin ring meaasures about 1 3/4 inches in diameter and a bit less than 6 inches in circumference.
Abbreviations Used in This Pattern:
- Beg = beginning
- ch = chain
- ea = each
- sc = single crochet
- sl st = slip stitch
- st = stitch
Instructions for Crocheting the Napkin Rings:
Ch 27. I suggest doing a quick check to make sure this looks like it’s about the right size for working with the napkins that you plan to use with this set. You can add additional chains to make your ring larger, but if you do this, keep in mind that you will use more wire than is specified above.
When you’re satisfied that the chain is the correct length, sl st in the first ch to form a ring. Ch 1.
Round 1: sc in ea ch st around the ring. When you get to the last st, stop short of finishing it and change colors to color B, then complete the st using color B. Sl st to join the work to the beg of the round.
Round 2: Work sc through the back loops all the way around the ring. Before completing the last step of the last stitch in the round, change colors to color C. Sl st to join the work to the beg of the round. Ch 1.
Round 3: Repeat round 2 using color C, except that you won’t change colors at the end of the round; instead, sl st to join the work to the beg of the round, then cut the wire and end off.
Finishing Your Napkin Ring:
Weave in your ends using a tapestry needle or the end-weaving method of your choice.
Try folding one of your napkins inside the ring to see how it looks, and also be sure to try removing the napkin from the ring to make sure all goes well.
Complete the Set of Napkin Rings
If you’re pleased with the napkin ring — you’ve checked to make sure that it’s the correct size and it looks nice with your napkins and china, it’s time to complete the set.
If something is amiss, like maybe the colors aren’t quite right or you want bigger napkin rings, feel free to make any needed adjustments to the pattern before proceeding with making any more napkin rings.
Enjoy! Here’s hoping you’ll get lots of compliments on your gorgeous table settings.
More Crochet Napkin Rings:
-
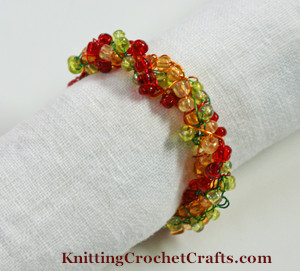
- The Finished Napkin Ring. Isn’t It Gorgeous?
-
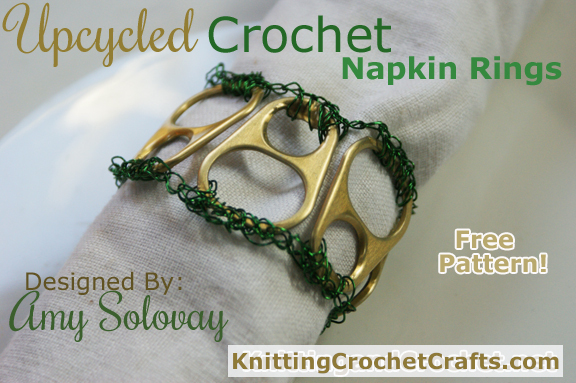
- Upcycled Crochet Napkin Rings: Free Crochet Pattern
- Beaded Christmas Napkin Rings (Free Crochet Pattern)
- Upcycled Crochet Napkin Rings
- 6 Ways to Make Napkin Rings — Free Instructions and Patterns
More Wire Crochet Projects:
-

- DIY Beaded Napkin Ring — Learn How to Make This Craft Project Using Our Free Pattern, Instructions and Tutorial
-
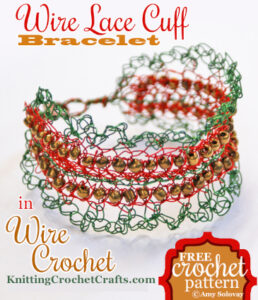
- Jewelry Making Idea: Wire Crochet Lace Cuff Bracelet — Free Instructions
-
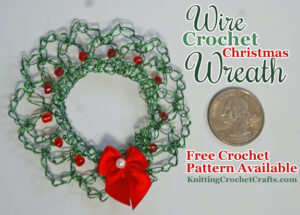
- Wire Crochet Christmas Wreath: Free Crochet Pattern
- How to Wire Crochet With Beads + Free Beaded Napkin Ring Pattern
- Wire Crochet Lace Cuff Bracelet: Free Pattern
- Wire Crochet Christmas Wreath: Free Crochet Pattern
Related Resources:
- Check Out Our Picks for the Best Crochet Patterns for the Home
- All About Crochet
- Free Beadwork Patterns, Project Ideas and Tutorials
Find More Ideas for Lovely Table Settings
- Crochet Coasters
- Crochet Placemats
More Craft Pages You Might Enjoy:
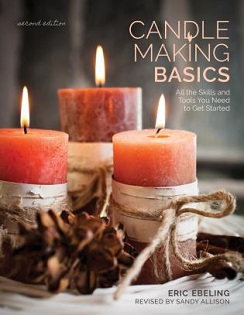
Candle Making Basics by Eric Ebeling, Published by Stackpole Books
- Knitting
- Quilting
- Jewelry Making
- Best Tools for Jewelry Making
- Sewing
- Kitchen Crafts
- Holiday Crafts
- Christmas Crafts
- Bottle Cap Crafts
- Paper Crafts
- Fine Art
Find More Craft Project Ideas HERE!
Posted By: Amy Solovay
This page was last updated on 8-7-2021.