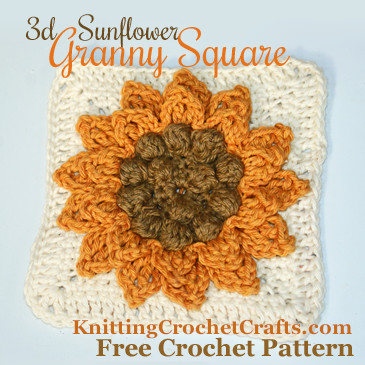
Texture is one of the most noteworthy things about crochet — and when it comes to texture, this three-dimensional sunflower does not disappoint. The sunflower center features gorgeous textured crochet popcorn stitches. The petals offer additional layers and dimension, delightful to both the senses of sight and touch.
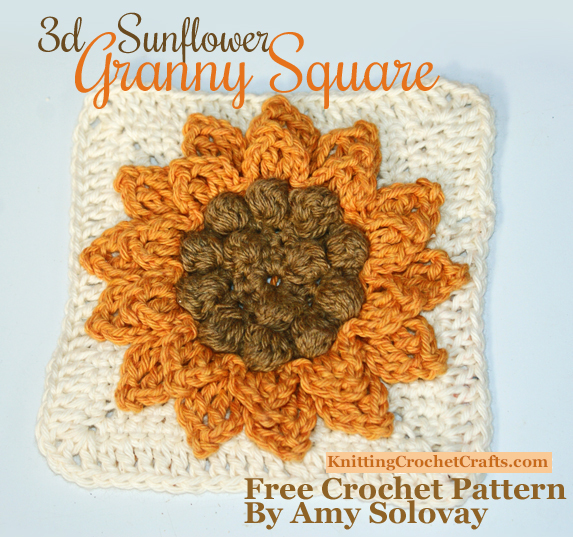
3d Sunflower Crochet Granny Square Pattern
See More About: Sunflower Patterns | Crochet Flowers | Crochet Granny Square Patterns | Crochet Squares
Project Description:
This textured granny square features a sunflower design as the focal point. The sunflower’s center and petals are delightfully three-dimensional. We’re making this design available as a free pattern for you to crochet.
I ask that you use your imagination when viewing the sample sunflower square. First of all, please imagine a darker brown in the center of the square. I didn’t have quite the right color in my yarn stash when the idea for this pattern struck…so I went with what I had, knowing that the color should be changed.
Second, my sample turned out too heavy, so I ask you to please imagine how it would look if made in different yarn. I used worsted weight cotton yarn to crochet my sample. To start with, cotton is a heavy fiber. Compounding the issue, this square has lots of texture, and several layers. The stitching is pretty solid, with few open areas. If I were to crochet this design in cotton again, I would use a sport weight yarn or lighter. I’d also love to see it crocheted in wool, for use in afghans or pillows.
Skill Level: Intermediate
Materials:
Yarn or Crochet Thread:
You’ll need three colors of yarn or thread as follows:
- Brown for the sunflower center (Color A)
- Yellow or Gold for the sunflower petals (Color B)
- Any color you like for the background. I used off-white. (Color C.)
I used Simply Cotton Worsted yarn to crochet my sample. Please note that two of the three colors I used have been discontinued (the off-white, “Marshmallow,” color was still available when I last checked.) As noted above, these colors are not the best choice anyway — particularly not the brown. I think this design will be far nicer if made using a rich chocolate brown color in the center, and yellow-gold yarn for the sunflower petals. Cascade 220 would be a fantastic choice of yarns for this project, because they offer a great yarn with a color palette that includes multiple choices for lovely browns and yellows.
Crochet Hook: I used a size H / 5.0 mm crochet hook to make the sample square.
Other: Tapestry needle for weaving in ends
Gauge:
You don’t need to worry about matching my gauge exactly when you crochet this square. However, if you plan to use more than one of these squares in the same project, it’s crucial for you to match your own gauge — because it’s easier to join squares when they are the same size. So, be sure to measure your work as you make each square. For example, you could measure round 3 of each square, checking to be sure the pieces each measure the same at that point, to be sure you are working at a consistent gauge throughout. Also, avoid changing crochet hooks between squares, as this can sometimes throw your gauge off.
Finished Size:
My sample square measures 6.5 inches before blocking or laundering. I expect some shrinkage will occur on my sample, since I used a cotton yarn that is prone to shrinking. Your results will vary, depending on the materials you use and other factors.
Special Stitch: In this pattern, a bobble stitch is defined as being 5 partially complete double crochet stitches worked into the same stitch. You’ll want to work each of the 5 stitches without completing the last step; then at the end, yarn over and pull it through all the loops on your hook to close it. This will form a textured bump on the side of the work that’s facing away from you.
Crochet Abbreviations Used in This Pattern:
- BLO = Back loop only
- ch = chain
- ch-2 sp, or ch-2 space = for the purposes of this pattern, this means the space created when you worked 2 chain stitches in the corner in the previous round.
- dc = double crochet
- ea = each
- hdc = half double crochet
- rep = repeat
- sc = single crochet
- sl st = slip stitch
- tr = treble crochet
- st = stitch
How to Crochet the Sunflower
Using color A (brown) ch 4. sl st to form a ring.
Round 1: ch 1. 9 sc sts in ring. Sl st in first ch in the round to join the end of the work to the beg.
Round 2: ch 1. [Work 1 sc in ea of the next 2 sc, bobble in next sc.] Rep sequence in brackets all the way around. You’ll end up with a total of 3 bobbles.
Round 3: Work 3 sc sts in ea st around, including the first ch st in the round, for a total of 30 sc. Sl st to join the end of the round to the beg.
Round 4: ch 1. [Work 1 sc in ea of the next 2 sc, bobble in next sc.] Rep sequence in brackets all the way around. You’ll end up with a total of 10 bobbles. Sl st to join the end of the round to the beg. End off color A.
Round 5: Using color B (yellow / gold,) make a slip knot on your hook for joining. [Work 1 sc in ea of the next 2 sts. Work 2 sc sts in the next st.] Rep the sequence in brackets for a total of 40 sc sts in the round. At the same time you work your sl st to join the end of the work to the beg, change colors to color C (white) without ending off. Just drop color B and leave it dangling. Make sure it falls to the back of the work (the side facing away from you) when you continue crocheting round 6.
Round 6: Using color C, ch 2. In this round, work all your sts in front loop only of the sts in the previous round. [hdc in next st, sc in ea of the next 2 sts, 1 sl st in ea of the next 3 sts, sc in ea of the next 2 sts, Hdc in next st. Form a corner in the next st as follows: hdc, ch 1, dc, ch 1, hdc.] Rep the sequence in brackets all the way around. In the last corner, you’ll want to count your first 2 ch sts in the round as being the last hdc. So, instead of working the usual (hdc, ch 1, dc, ch 1, hdc,) instead do this: hdc, ch 1, dc, ch 1, sl st to join to the second ch st in the round.
Round 7: ch 1. In this round, work through both loops. Work 1 sc in ea st around. When you get to a corner, ch 2, turn the corner, and resume working sc sts all the way around. At the end of the round, work a sl st to join the end of the round to the beginning. You’ll have 14 sc sts on ea side and a total of 56 sc sts, plus a total of 8 chs in the corners all together.
Round 8: ch 1. Continue working through both loops. Work 1 sc in ea st around. When you get to a corner, work 1 sc st in ch-2 sp in corner of previous round, then ch 2 and turn the corner, then work another sc in the same ch-2 sp. Then resume working sc sts all the way around. Sl st to join. You’ll have 16 sc sts on ea side and a total of 64 sc sts, plus a total of 8 chs in the corners all together.
Round 9: Rep round 8, finishing the round with 18 sc sts on ea side and a total of 72 sc sts, plus a total of 8 chs in the corners all together.
Round 10: ch 3. This counts as the first dc in the round.
Up until this point, you’ve had the wrong side of the work facing. Flip work over to the other side, so that you have the right side facing.
Work dc st all the way around. When you get to a corner, work the following sequence: dc in ch-2 corner space, ch 1, dc in same ch-2 sp, ch 1, dc in same ch-2 sp. Then continue working dc all the way around. Sl st to join the end of the round to the beginning. At the end of the round, you’ll have 18 dc across ea side plus 3 dc and 2 chs in ea corner for a total of 84 dc and 8 chs in the round all together.
End off color C.
Begin Crocheting the Sunflower Petals
Resume working with color B (gold) by picking up the yarn where you dropped it.
Round 11: Insert hook into next free loop and pull up a loop of color B. [ch 3. tr in next st, ch 3, sl st in third ch from hook, tr in same st as previous tr, ch 3, sl st in next st, sl st in next st.] Rep around for a total of 13 flower petals. End off.
Round 12: Working in color B, make 30 evenly spaced surface crochet slip stitches in a ring around the flower center, inserting your hook into the place where color A touches color B. End off.
Round 13: In this round, you’ll want to crochet into the BLO of the sts you worked in round 12. While you can pull up a loop of color B in any back loop, it’s best if you take a moment to figure out where each stitch should be placed in order to stagger them so they are offset from the flower petals you already worked. [ch 2. dc in next st, ch 3, sl st in third ch from hook, dc in same st as previous dc, ch 2, sl st in next st, sl st in next st.] Rep around for a total of 13 flower petals. End off.
Finishing:
Weave in all loose ends. Block if desired.
Join Your Granny Squares
I’m convinced that joining granny squares is almost as much of an artform as crocheting them is. You can be much more creative with this task than you might think. The joining method you use has the potential to make or break your finished project, and it will significantly affect both its look and its performance.
There are bunches of different joining methods you could use. For this square, I’d probably use one of the following:
- The whip stitch join
- The slip stitch join
- The single crochet join (Simply align your squares, insert your hook into both squares and work single crochet across the edge to join them. Repeat until all squares are joined.)
But it’s up to you! You do have plenty of other choices, so feel free to browse through the others and see which ones appeal to you most.
Find More Crochet Flower Patterns:
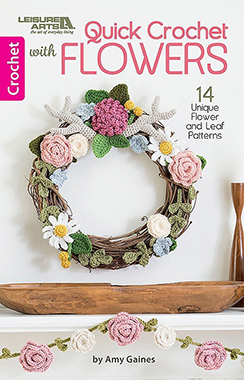
Quick Crochet With Flowers Book by Amy Gaines, Published by Leisure Arts.
- Check out our picks for the best crochet flower pattern books.
- 3D Aster flower granny square
- Quick Crochet With Flowers
- More flowers
- 9 Gorgeous Crochet Daisy Patterns
- Small Crochet Flower With Popcorn Stitch Petals
- Crochet Flower Applique (Free Pattern With Photo Tutorial)
- Crochet Sunflowers (Free Patterns)
Find More Crochet Patterns for Granny Squares and Other Squares
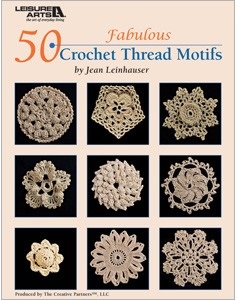
50 Fabulous Crochet Thread Motifs Book by Jean Leinhauser, Published by Leisure Arts
- Check out our picks for the best crochet granny square pattern books.
- (Mostly) Free Crochet Granny Square Patterns
- Free Patterns for Mix and Match Afghan Squares
- Easy Beginner’s Crochet Granny Square
- The Criss Cross Granny Square
Learn More About Crochet:
- Click here to find our picks for the best crochet books.
- Click here to find crochet stitch tutorials and instructions.
- Click here to learn more crochet techniques.
- Click HERE to Find Fabulous Yarn for Crochet and Knitting
- Click here to learn about crochet hooks.
- Click here to find my favorite crochet project bag.
Learn About Other Crafts: Knitting, Sewing, Quilting, Paper Crafts and More
- Click here to get updated on the latest craft supplies.
- Click here to learn about knitting.
- Click here to find our beginner’s guide to knitting needles.
- Click here to find outstanding craft project ideas.
Posted By: Amy Solovay
Page last updated on 7-1-2021. Thanks for visiting!
3d Sunflower Granny Square: Free Crochet Pattern