Get the Free Crochet Pattern and Tutorial Here
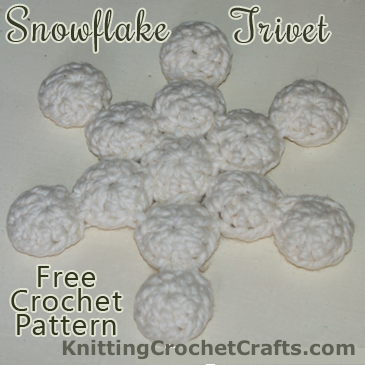
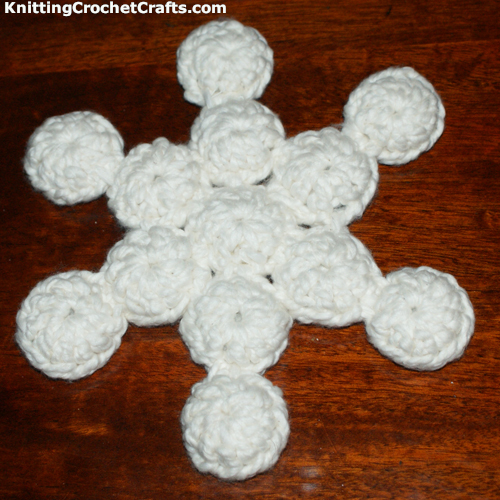
Crochet Snowflake Trivet: Free Pattern and Step-By-Step Tutorial
This crochet snowflake trivet is made up of 26 of these easy, beginner-friendly crochet circles. The project also incorporates metal bottle caps; if you have beer snobs or soda snobs in your household, or as frequent guests, this project is an environmentally responsible way to dispose of all those bottle caps they leave in their wake.
These snowflake trivets make great Christmas gifts, although they are not recommended for total slobs or people with small children — due to the fact that this project should be spot cleaned whenever possible, or hand washed as a last resort, for best results.
Similar Knitting and Crochet Patterns: Kitchen Crafts | Snowflake Patterns | Christmas Patterns
Crochet Skill Level: Beginner
Sewing Skill Level: Easy
Pattern Designer: Amy Solovay
Craft Supplies You’ll Need for Making This Snowflake Trivet:
Yarn: To crochet my sample snowflake trivet, I used Nature’s Choice Organic Cotton by Lion Brand Yarn. To the best of my knowledge, this yarn has now been discontinued. I recommend substituting any of the following yarns:
- Classic Elite’s Sprout yarn; this will give you an effect that is quite similar to the yarn I originally used to crochet my sample.
- Cascade 220 wool; this is a smooth wool yarn that will make the perfect substitute if you are a beginner to crochet. You might have to go up a hook size to get the right gauge if you use this yarn.
- Knitpicks Simply Cotton worsted yarn in the natural “marshmallow” color; this is a smooth organic cotton yarn that would be gorgeous in this pattern.
Do not use acrylic, polyester or synthetic fibers to crochet this project; synthetics could melt if anything hot comes into contact with them.
Crochet Hook:
Size J / 10 – 6.00 mm crochet hook, or size needed to make your crocheted circles turn out the correct size. If your circles end up too small, choose a larger crochet hook; if your circles end up too big, choose a smaller crochet hook.
Other:
- 13 metal bottle caps; Do Not use plastic bottle caps for this project!
- Tapestry Needle for weaving in ends
Finished Project Size:
My finished snowflake trivet measures about 8 inches in diameter. Each crocheted circle measures about 1 5/8 inches in diameter.
How to Make the Trivet:
This trivet is nothing more than a bunch of metal bottle caps sandwiched in between crocheted circle shapes; the covered bottle caps are then artistically arranged to form a snowflake shape, and stitched together. Easy!
Here’s how to crochet one of the circles to use for covering the bottle caps:
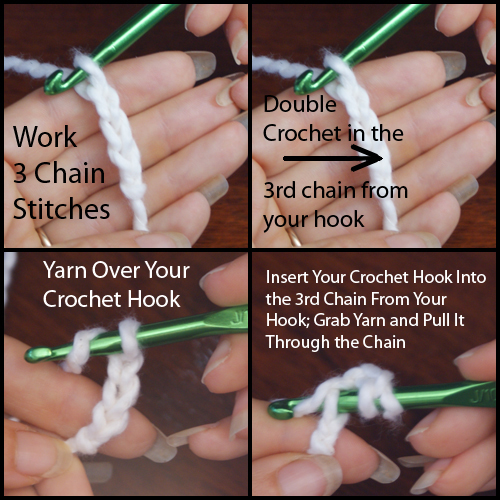
How to Begin Crocheting the Circle Shape for Making the Snowflake Trivet
Upper Left Photo: The first thing you want to do is crochet 3 chain stitches. If you do not already know how to do this, you can visit my chain stitch tutorial for complete instructions.
Upper Right Photo: The next thing you want to do is double crochet in the third chain from your crochet hook. If you’re not sure what that means, or which stitch to work into, I’ve marked it with an arrow in this photo.
Lower Photos: Both of these photos show you a double crochet stitch in progress. If you’re not already familiar with the double crochet stitch, these pictures will show you how to do it for this particular project, but you may also wish to view my double crochet tutorial.
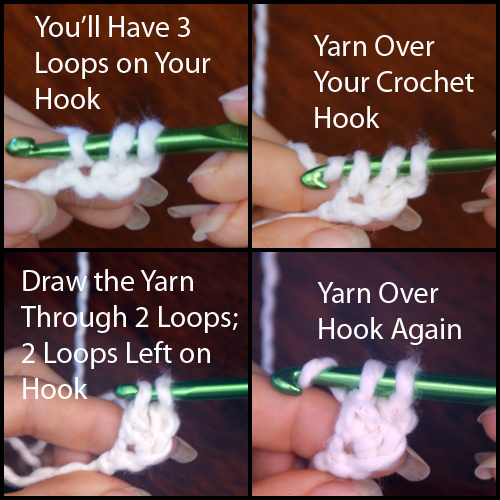
These photos all show a double crochet stitch in progress.
Not pictured: The photos omit the last step in the double crochet stitch; after you’ve grabbed the yarn as shown in the lower right photo, pull it through both loops on your hook to complete the stitch.
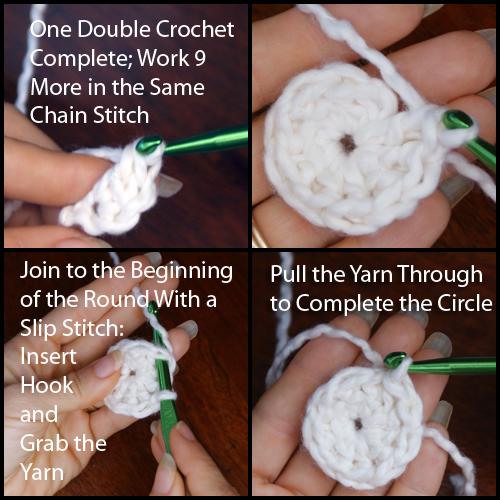
These photos show you how to finish a circle shape to use for making a snowflake potholder.
Upper Left Photo: This is how the first double crochet stitch looks when it is complete. Next, you’ll work 9 more double crochet stitches into the same chain stitch for a total of 10.
Upper Right Photo: Here’s how it looks when all 10 of the double crochet stitches are complete.
Lower Left Photo: The next step is to close the circle. You will do this by working a slip stitch into the beginning part of the round, as follows: Insert your hook, then grab the yarn with your hook;
Lower Right Photo: Here’s how it looks after the slip stitch has been worked.
Next, end off by cutting the yarn and pulling it all the way through your active loop. The following photos will show you how to do it:
How to End Off
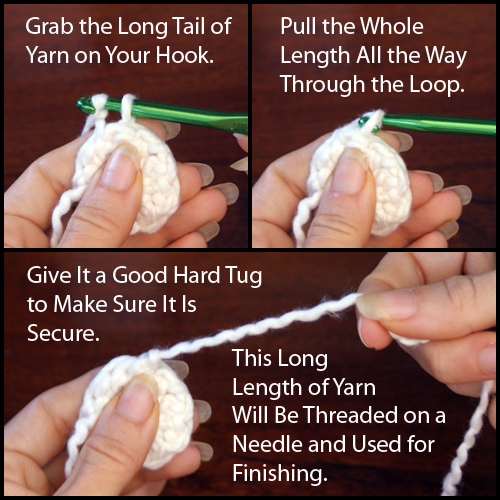
Crochet Snowflake Trivet: Free Pattern and Step-By-Step Tutorial
When ending off, for every two circles you crochet, leave an extra-long tail of yarn measuring at least 14-16 inches. This length is used for stitching the circles together, and after that it is also used for sewing the covered bottle caps together.
14 inches was enough yarn for these tasks, but barely. In hindsight, I wish I had left a little more — 16 inches would have been better, and if you want to leave even more than that you can do so. For the other circles, you can leave a shorter tail of yarn measuring around 6 inches. Weave in the shorter ends but not the long tails. You will be using the longer end for stitching.
If you have no idea how to weave in your ends, this tutorial will help.
Make More Circles Just Like This One
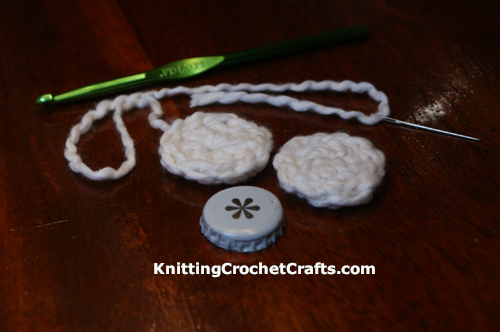
Finished Crochet Circles With a Bottle Cap
For every bottle cap, you’ll make two of these circle shapes. There will be one minor difference in the circles: you only need to leave an extra-long length of yarn on one of them. On the other one, the yarn tail at the end can be shorter, measuring around 6 inches so that you can weave it in comfortably.
This photo shows my bottle cap and my two circle shapes. As you can see from the photo, I have a tapestry needle threaded with the long length of yarn that’s attached to one of my circles.
For those who don’t know, a tapestry needle is a needle with a large eye; this particular tapestry needle has a large enough eye that I can thread yarn through it.
You’ll crochet a total of 26 circles all together.
Instructions for Assembling the Snowflake Trivet:
Thread your tapestry needle using one of the long tails of yarn attached to one of your crocheted circles. Sandwich a bottle cap in between that circle and one of your other circles. Sew the circles together; I used whip stitch to do this, although there are other stitches that could also work well. Do not cut off the remaining end.
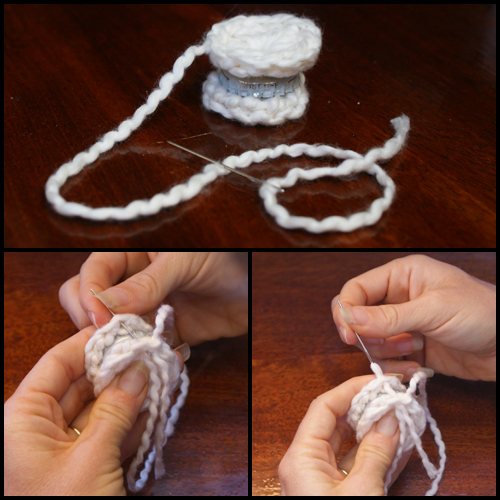
Covering the Bottle Cap
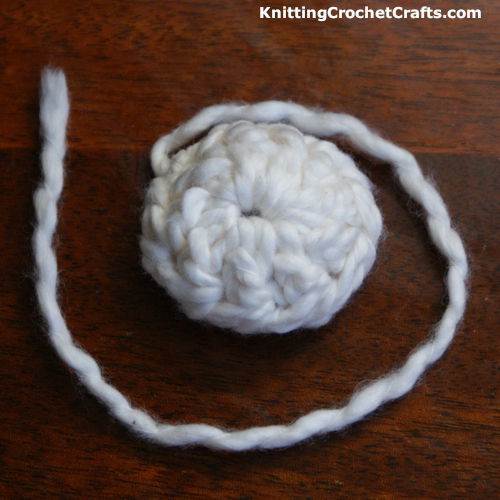
Covered Bottle Cap
Here’s how the bottle cap looks with its cover on. Notice that there’s still a length of yarn left over; this length will be used to stitch the piece to the others you’ll be using to create the snowflake-shaped trivet.
Cover all 13 of your bottle caps in the same way.
Arrange the bottle caps in a snowflake configuration as follows:
Crochet Snowflake Trivet: Free Pattern and Tutorial
Place one bottle cap in the center; then place six bottle caps in a circle surrounding the center bottle cap; then there will be one additional bottle cap extending out from each of those six, creating the “arms” of the snowflake.
Refer to the photo if you need a visual reference for how the bottle caps are arranged.
Use the remaining lengths of yarn to stitch each of the bottle caps to its nearest neighbor. To do this, I started in the center of the snowflake and worked my way outward.
Voila! The resulting finished project is a snowflake trivet.
Cleaning Instructions:
If this project has a downside, it’s gotta be the uncertainty of how to clean this thing. At the time I am writing these instructions, my project is brand new and I haven’t yet had to clean it. I’ll tell you how I plan to clean mine. I can’t promise that it will work, so use these instructions at your own risk.
I plan to spot-clean until it’s absolutely impossible to avoid cleaning the whole piece, at which point I plan to hand wash it and lay it out in the sun to dry.
I think it is possible that, given enough use and wear, the bottle caps may rust in time; it’s also possible that aggressive repeated washing could hasten that process. Therefore, I’d recommend this project be used and cleaned sparingly, perhaps on special occasions.
So there you have it: That’s how to crochet a snowflake trivet. I hope you found this project enjoyable. If you’d like to see similar patterns and other craft ideas, you’re invited to check out the patterns below. Thanks for your interest!
More Snowflake Patterns
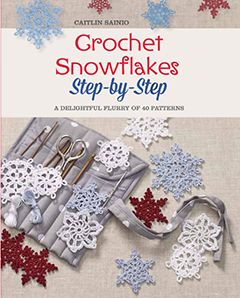
Crochet Snowflakes Step-By-Step Book
- Crochet Snowflake Potholders: Free Pattern
- Crochet Snowflake Christmas Ornament: Free Pattern
- More Delightful Snowflake Patterns
More Knitting and Crochet Patterns for Your Kitchen and Home
Holiday Knitting and Crochet Patterns
More Craft Techniques and Ideas to Discover:
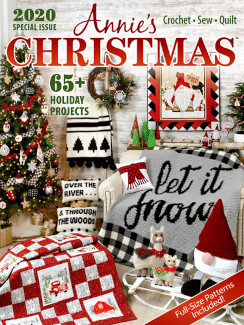
Annie’s Christmas Special Edition 2020: 65+ Christmas Patterns for Crochet, Quilting and Sewing
- Best Christmas Craft Books for the 2021 Holiday Season
- Learn How to Do Wire Crochet With Beads
- Craft Supplies
- Knitting
- Knitting Books
- Speed Knitting
- Knitting Supplies
- Lace Knitting
- Cable Knitting
- Knitting Techniques
- Knitting Yarn
- Quilting
- Jewelry Making
- Best Tools for Jewelry Making
- Beadwork
- Sewing
- Guide to Basic Hand Sewing Stitches
- Sewing Appliques
- Button Crafts
- Kitchen Crafts
- Home Decor Crafts and DIY Project Ideas
- Holiday Crafts
- Christmas Crafts
- Paper Crafts
- Illustration
- Fine Art
Check Out More Craft Techniques and Project Ideas HERE!
Posted By: Amy Solovay
This page was last updated on 9-5-2021.